Mounting the Meter Box
For All Catalog Nos. (Fig. 3 & 4).
Ameter box is standard equipment with the
1.Slip the collar on the meter box over the stud on the cradle.
2.Position the meter box as desired and tighten the
NOTE: For horizontal (wall) coring, the ammeter gauge must face upward in view of the operator. Otherwise, water flow from the water
Mounting the Dymodrill Motor to the Stand
For All Cat. Nos. (Fig. 5 & 6).
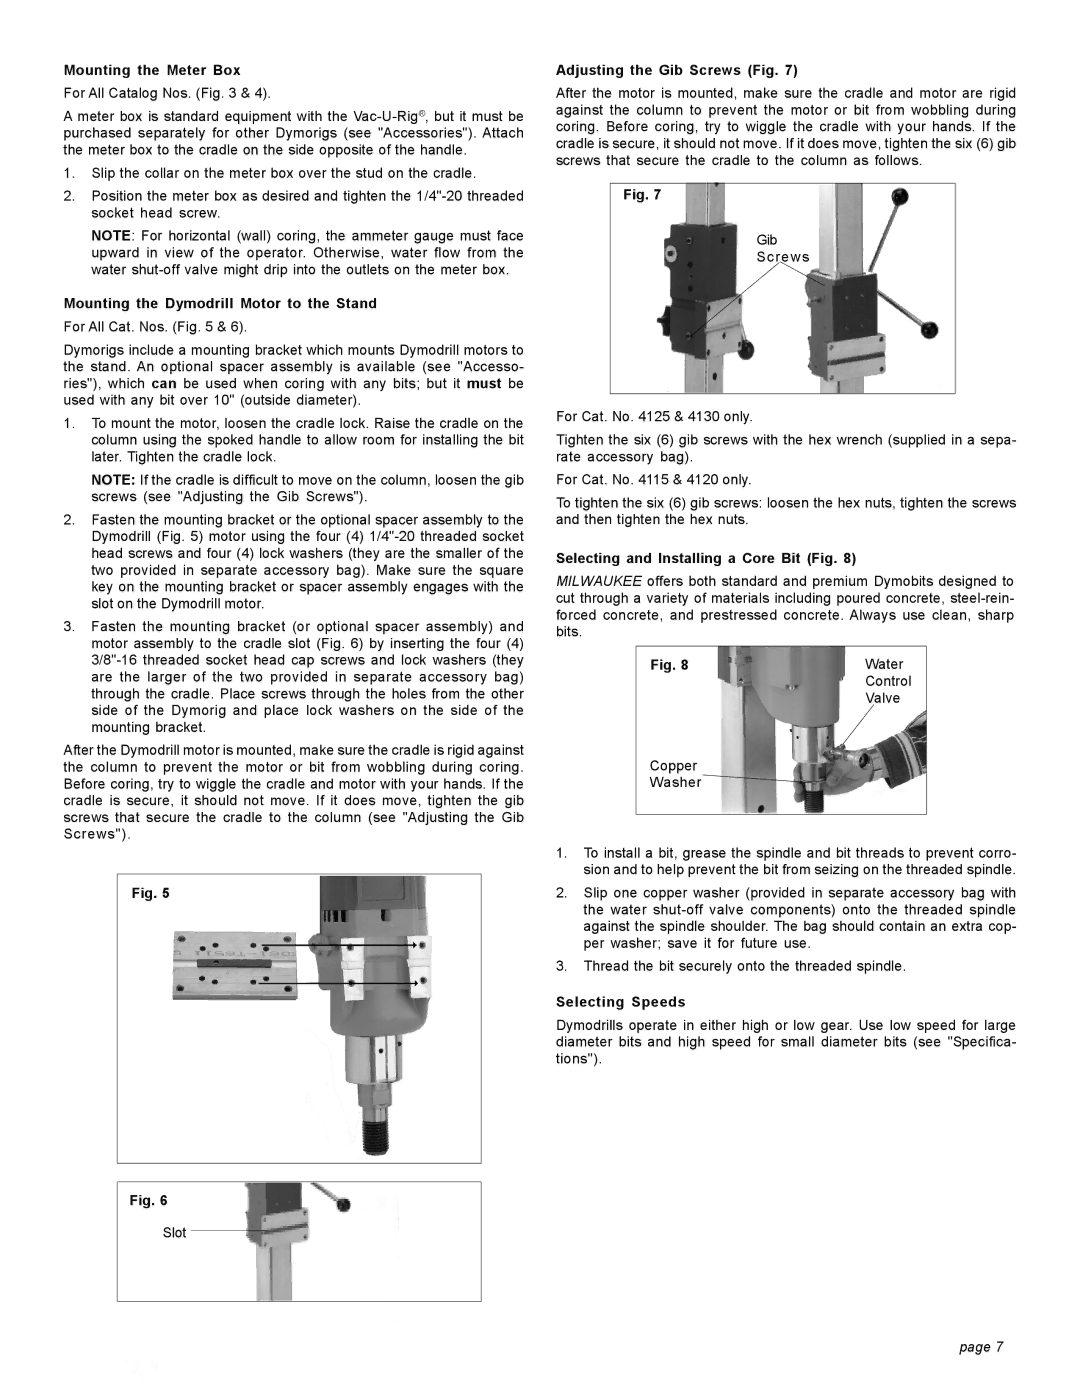
Dymorigs include a mounting bracket which mounts Dymodrill motors to the stand. An optional spacer assembly is available (see "Accesso- ries"), which can be used when coring with any bits; but it must be used with any bit over 10" (outside diameter).
1.To mount the motor, loosen the cradle lock. Raise the cradle on the column using the spoked handle to allow room for installing the bit later. Tighten the cradle lock.
NOTE: If the cradle is difficult to move on the column, loosen the gib screws (see "Adjusting the Gib Screws").
2.Fasten the mounting bracket or the optional spacer assembly to the Dymodrill (Fig. 5) motor using the four (4)
3.Fasten the mounting bracket (or optional spacer assembly) and motor assembly to the cradle slot (Fig. 6) by inserting the four (4)
After the Dymodrill motor is mounted, make sure the cradle is rigid against the column to prevent the motor or bit from wobbling during coring. Before coring, try to wiggle the cradle and motor with your hands. If the cradle is secure, it should not move. If it does move, tighten the gib screws that secure the cradle to the column (see "Adjusting the Gib Screws").
Fig. 5
Fig. 6
Slot
Adjusting the Gib Screws (Fig. 7)
After the motor is mounted, make sure the cradle and motor are rigid against the column to prevent the motor or bit from wobbling during coring. Before coring, try to wiggle the cradle with your hands. If the cradle is secure, it should not move. If it does move, tighten the six (6) gib screws that secure the cradle to the column as follows.
Fig. 7
Gib
Screws
For Cat. No. 4125 & 4130 only.
Tighten the six (6) gib screws with the hex wrench (supplied in a sepa- rate accessory bag).
For Cat. No. 4115 & 4120 only.
To tighten the six (6) gib screws: loosen the hex nuts, tighten the screws and then tighten the hex nuts.
Selecting and Installing a Core Bit (Fig. 8)
MILWAUKEE offers both standard and premium Dymobits designed to cut through a variety of materials including poured concrete,
Fig. 8 | Water |
| Control |
| Valve |
Copper
Washer![]()
1.To install a bit, grease the spindle and bit threads to prevent corro- sion and to help prevent the bit from seizing on the threaded spindle.
2.Slip one copper washer (provided in separate accessory bag with the water
3.Thread the bit securely onto the threaded spindle.
Selecting Speeds
Dymodrills operate in either high or low gear. Use low speed for large diameter bits and high speed for small diameter bits (see "Specifica- tions").
page 7
