INSTALLATION
VESA WALL MOUNT
This monitor can be attached to a wall mounting arm (not included). Disconnect power before performing this procedure. Follow these steps:
1.Remove the VESA cover from the monitor.
2.Remove the stand rear cover from the base.
3.Unplug the connector.
4.Pull out the cable from the hook of base.
5.Support the base and remove the four screws.
6.Remove the base.
7.Place the wall mounting arm (not included) onto the back of the
monitor. Line up the holes of the arm with the holes in the back of the monitor.
8.Insert the 4 screws into the holes and tighten.
9.Reconnect the cables. Refer to the manual of wall mounting arm for instructions on attaching it to the wall.
CONTROL BUTTONS
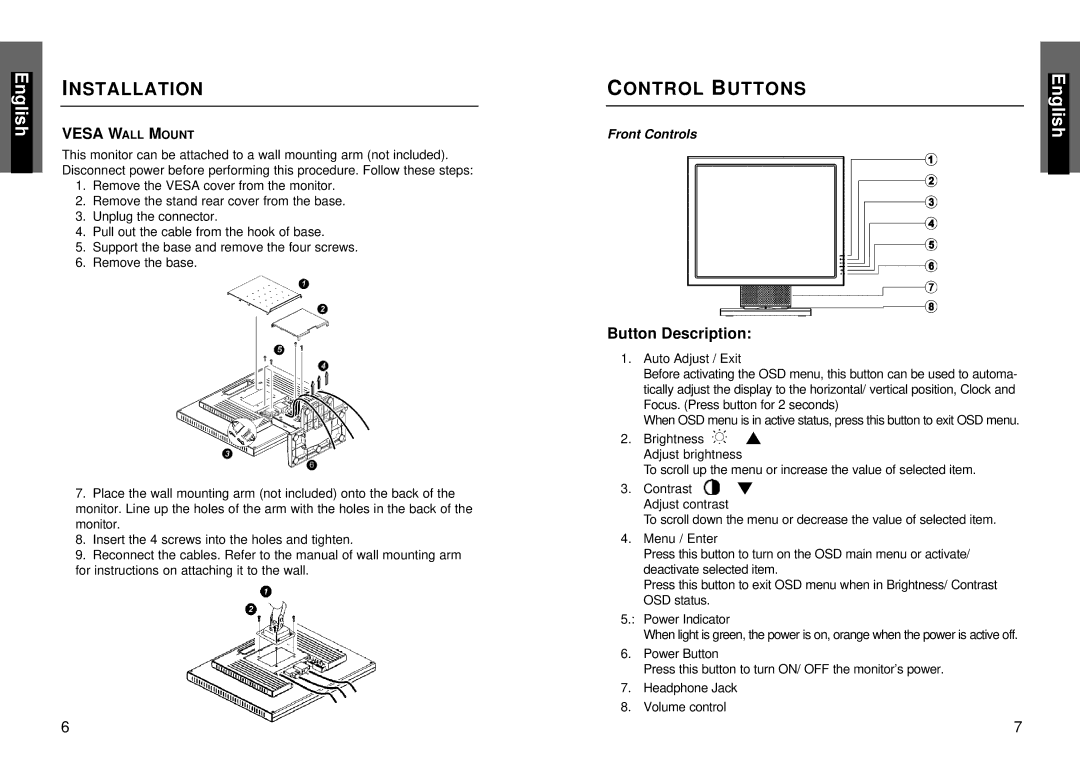
Front Controls
Button Description:
1.Auto Adjust / Exit
Before activating the OSD menu, this button can be used to automa- tically adjust the display to the horizontal/ vertical position, Clock and Focus. (Press button for 2 seconds)
When OSD menu is in active status, press this button to exit OSD menu.
2.Brightness ![]()
![]() Adjust brightness
Adjust brightness
To scroll up the menu or increase the value of selected item.
3.Contrast ![]()
![]() Adjust contrast
Adjust contrast
To scroll down the menu or decrease the value of selected item.
4.Menu / Enter
Press this button to turn on the OSD main menu or activate/ deactivate selected item.
Press this button to exit OSD menu when in Brightness/ Contrast OSD status.
5.: Power Indicator
When light is green, the power is on, orange when the power is active off.
6.Power Button
Press this button to turn ON/ OFF the monitor’s power.
7.Headphone Jack
8.Volume control
6 | 7 |