C. Projecting images
Preparation:
•Remove the lens cap.
•Turn on the power of the connected computer.
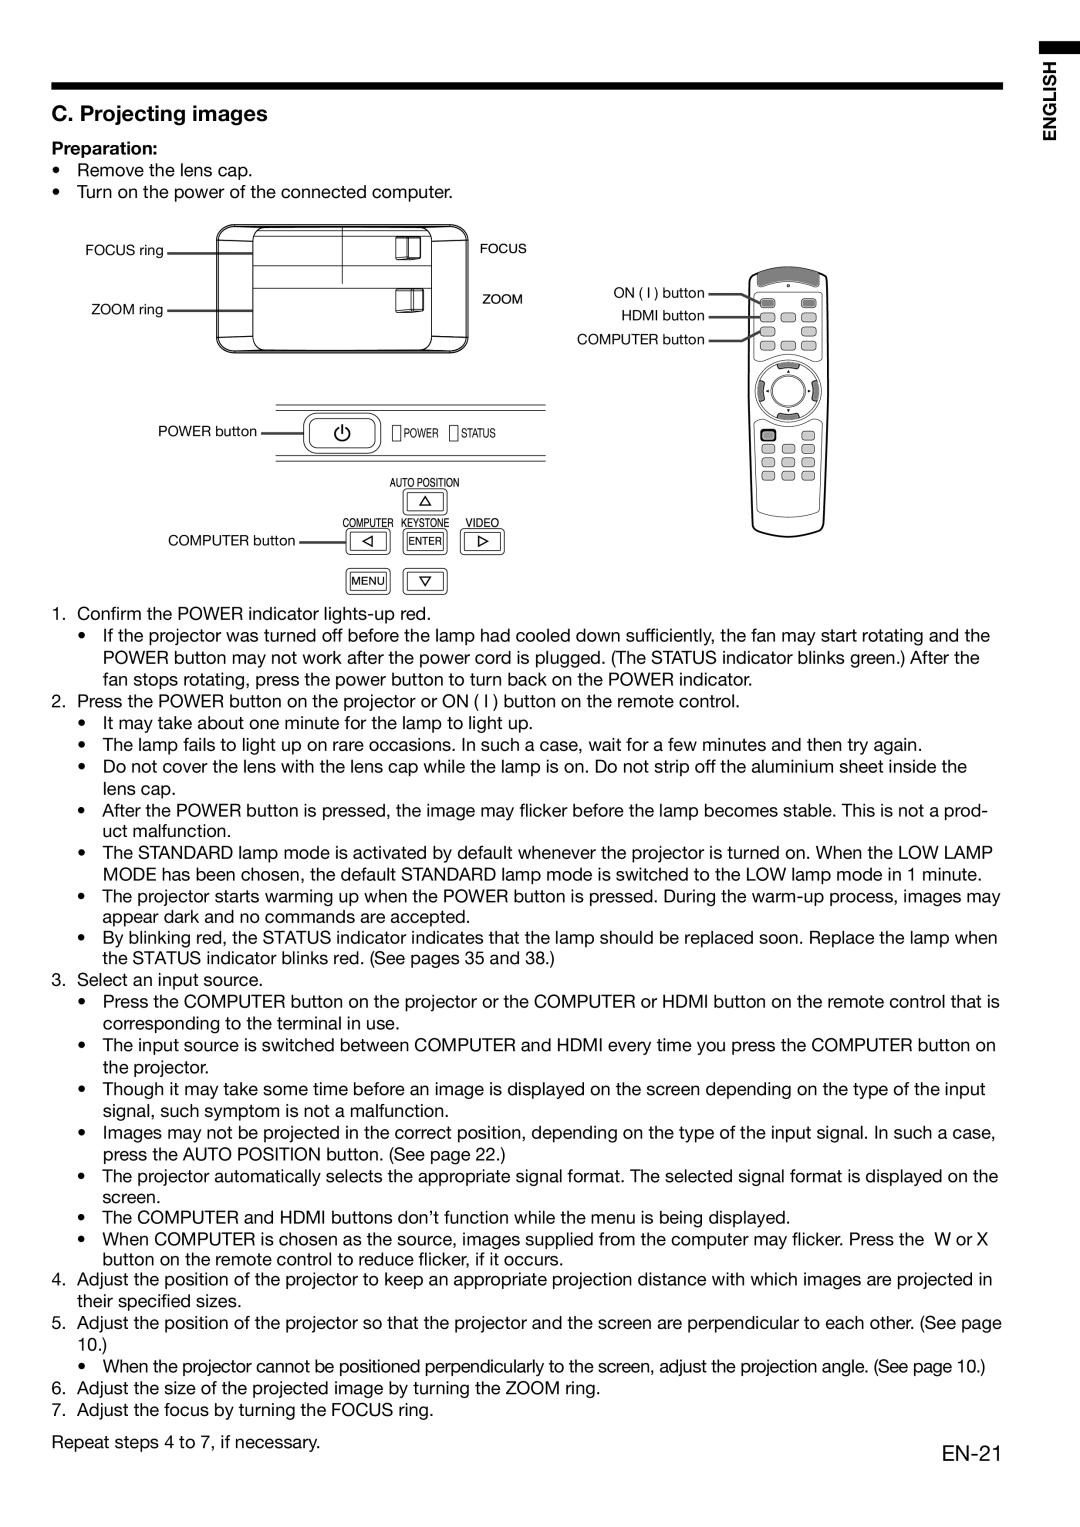
FOCUS ring
ZOOM ring
POWER button | POWER STATUS |
COMPUTER button
ON ( I ) button HDMI button COMPUTER button
ENGLISH
1.Confirm the POWER indicator
•If the projector was turned off before the lamp had cooled down sufficiently, the fan may start rotating and the POWER button may not work after the power cord is plugged. (The STATUS indicator blinks green.) After the fan stops rotating, press the power button to turn back on the POWER indicator.
2.Press the POWER button on the projector or ON ( I ) button on the remote control.
•It may take about one minute for the lamp to light up.
•The lamp fails to light up on rare occasions. In such a case, wait for a few minutes and then try again.
•Do not cover the lens with the lens cap while the lamp is on. Do not strip off the aluminium sheet inside the lens cap.
•After the POWER button is pressed, the image may flicker before the lamp becomes stable. This is not a prod- uct malfunction.
•The STANDARD lamp mode is activated by default whenever the projector is turned on. When the LOW LAMP MODE has been chosen, the default STANDARD lamp mode is switched to the LOW lamp mode in 1 minute.
•The projector starts warming up when the POWER button is pressed. During the
•By blinking red, the STATUS indicator indicates that the lamp should be replaced soon. Replace the lamp when the STATUS indicator blinks red. (See pages 35 and 38.)
3.Select an input source.
•Press the COMPUTER button on the projector or the COMPUTER or HDMI button on the remote control that is corresponding to the terminal in use.
•The input source is switched between COMPUTER and HDMI every time you press the COMPUTER button on the projector.
•Though it may take some time before an image is displayed on the screen depending on the type of the input signal, such symptom is not a malfunction.
•Images may not be projected in the correct position, depending on the type of the input signal. In such a case, press the AUTO POSITION button. (See page 22.)
•The projector automatically selects the appropriate signal format. The selected signal format is displayed on the screen.
•The COMPUTER and HDMI buttons don’t function while the menu is being displayed.
•When COMPUTER is chosen as the source, images supplied from the computer may flicker. Press the or button on the remote control to reduce flicker, if it occurs.
4.Adjust the position of the projector to keep an appropriate projection distance with which images are projected in their specified sizes.
5.Adjust the position of the projector so that the projector and the screen are perpendicular to each other. (See page 10.)
•When the projector cannot be positioned perpendicularly to the screen, adjust the projection angle. (See page 10.)
6.Adjust the size of the projected image by turning the ZOOM ring.
7.Adjust the focus by turning the FOCUS ring.
Repeat steps 4 to 7, if necessary. |
|
|