Appendices29
Appendix A: Lamp Cartridge Replacement, continued
Replacement Procedure
Removing the Old Lamp Cartridge
1, Turn off TV power and unplug the TV. Allow the lamp to cool for at least one hour before proceed-
ing.
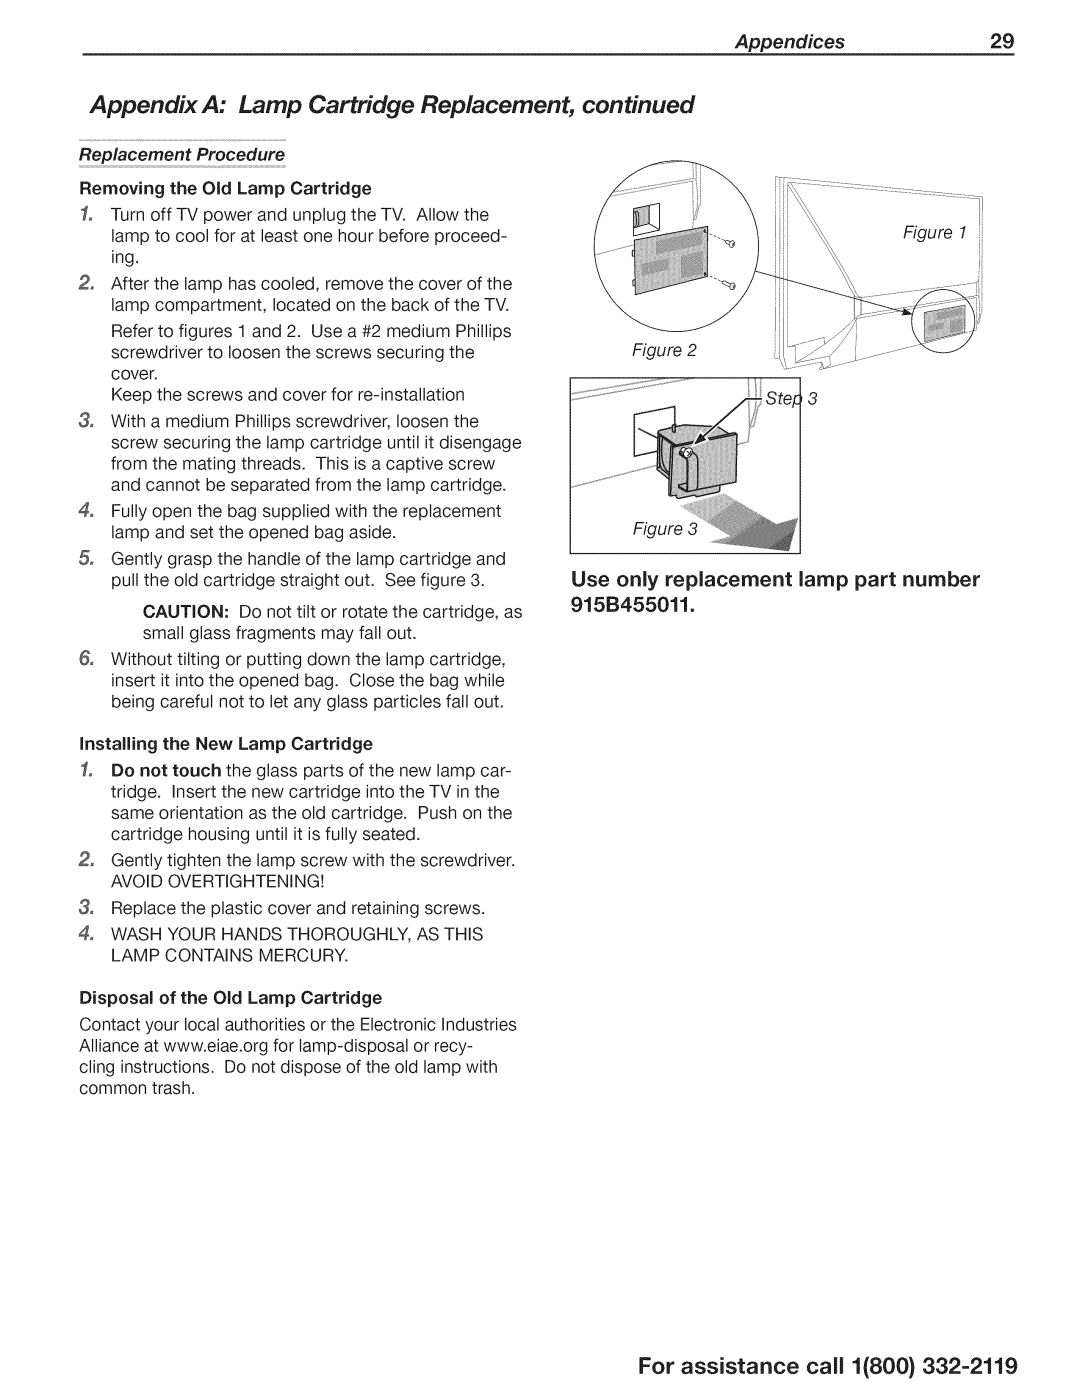
After the lamp has cooled, remove the cover of the lamp compartment, located on the back of the TV.
Refer to figures 1 and 2. Use a #2 medium Phillips
screwdriver to loosen the screws securing the cover.
Keep the screws and cover for
screw securing the lamp cartridge until it disengage from the mating threads. This is a captive screw and cannot be separated from the lamp cartridge.
4, Fully open the bag supplied with the replacement lamp and set the opened bag aside.
Gently grasp the handle of the lamp cartridge and pull the old cartridge straight out. See figure 3.
CAUTION: Do not tilt or rotate the cartridge, as small glass fragments may fall out.
&Without tilting or putting down the lamp cartridge, insert it into the opened bag. Close the bag while being careful not to let any glass particles fall out.
Installing the New Lamp Cartridge
1, Do not touch the glass parts of the new lamp car- tridge. Insert the new cartridge into the TV in the same orientation as the old cartridge. Push on the cartridge housing until it is fully seated.
Gently tighten the lamp screw with the screwdriver.
AVOID OVERTIGHTENING!
3, Replace the plastic cover and retaining screws.
4, WASH YOUR HANDS THOROUGHLY, AS THIS LAMP CONTAINS MERCURY.
Disposal of the Old Lamp Cartridge
Contact your local authorities or the Electronic Industries Alliance at www.eiae.org for
Figure 2
3
Figure 3
Use only replacement lamp part number 915B455011.
For assistance call 1(800}
