Instant WirelessTM Series
Chapter 6: Configuring the Wireless Network Access Point
Note: The Access Point is designed to function properly after using the Setup Wizard. This chapter is provided solely for those who wish to perform more advanced configuration or monitoring.
The Access Point has been designed to be functional right out of the box, with the default settings in the Setup Wizard. However, if you’d like to change these settings, the Access Point can be configured through your web browser with the
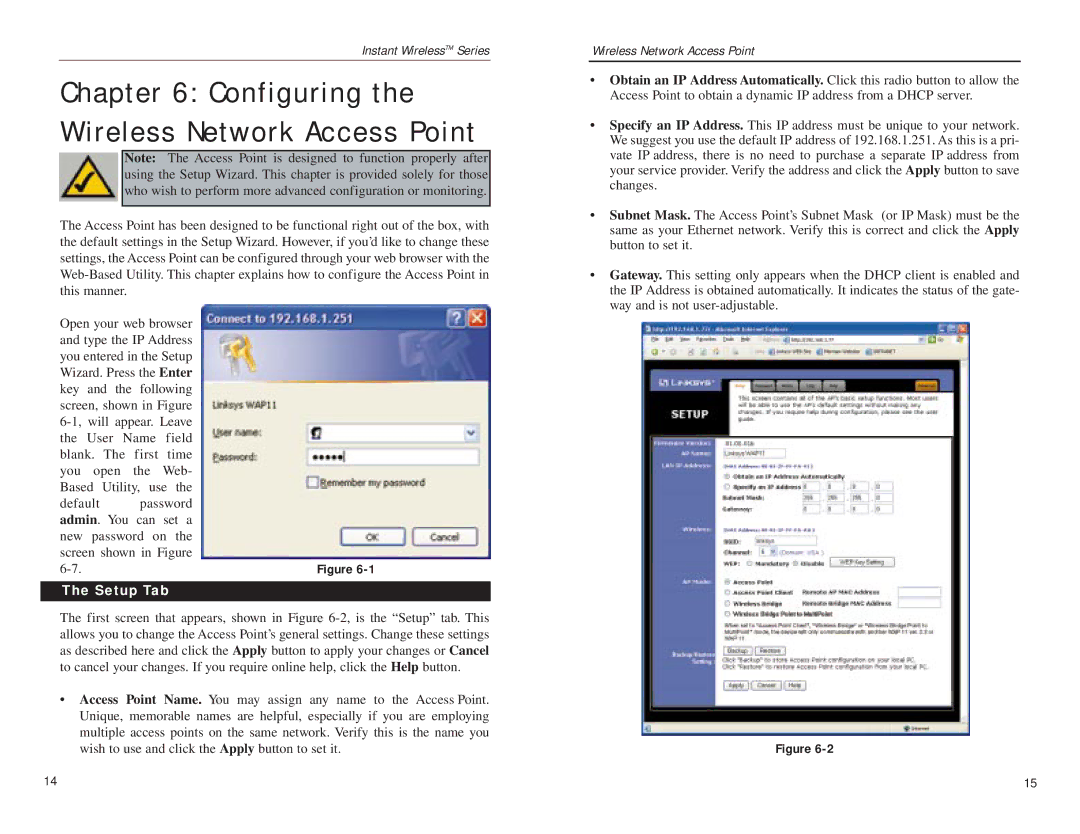
Open your web browser and type the IP Address you entered in the Setup Wizard. Press the Enter key and the following screen, shown in Figure
default password admin. You can set a
new | password on the |
screen shown in Figure | |
Figure | |
The Setup Tab
The first screen that appears, shown in Figure
•Access Point Name. You may assign any name to the Access Point. Unique, memorable names are helpful, especially if you are employing multiple access points on the same network. Verify this is the name you wish to use and click the Apply button to set it.
Wireless Network Access Point
•Obtain an IP Address Automatically. Click this radio button to allow the Access Point to obtain a dynamic IP address from a DHCP server.
•Specify an IP Address. This IP address must be unique to your network. We suggest you use the default IP address of 192.168.1.251. As this is a pri- vate IP address, there is no need to purchase a separate IP address from your service provider. Verify the address and click the Apply button to save changes.
•Subnet Mask. The Access Point’s Subnet Mask (or IP Mask) must be the same as your Ethernet network. Verify this is correct and click the Apply button to set it.
•Gateway. This setting only appears when the DHCP client is enabled and the IP Address is obtained automatically. It indicates the status of the gate- way and is not
Figure
14 | 15 |