
SBV400, BBV400, SBV500 specifications
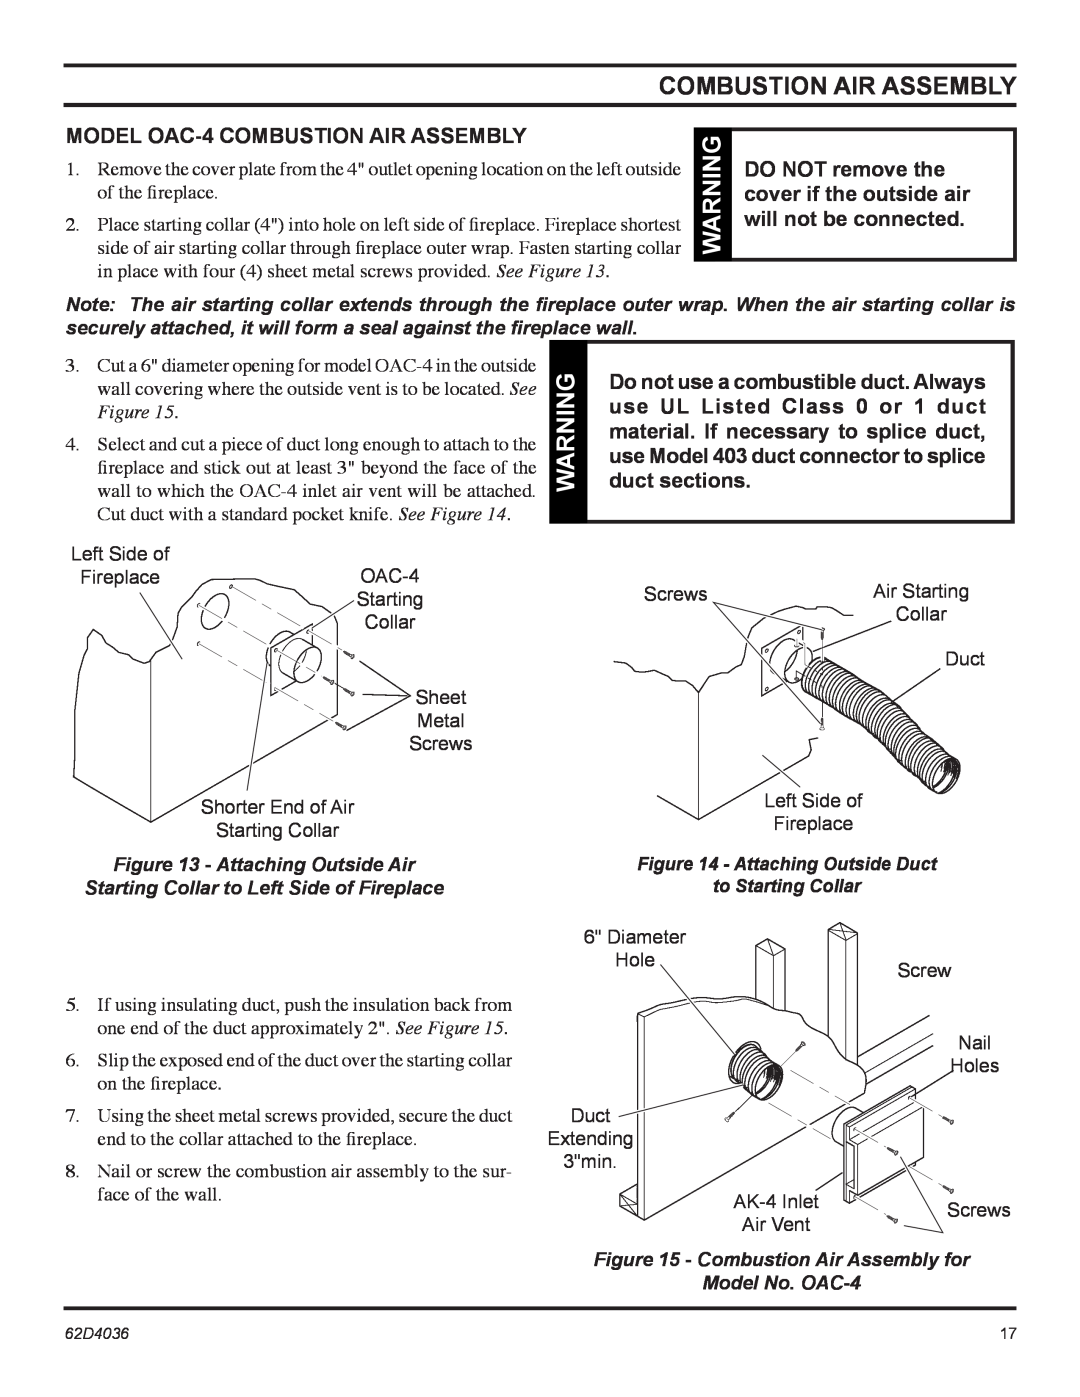
The Monessen Hearth SBV400, SBV500, and BBV400 are premium gas fireplaces that combine elegant design with state-of-the-art technology to enhance any living space. Each model offers a unique blend of features aimed at addressing diverse heating needs while boasting impressive aesthetic appeal.The SBV400 and SBV500 models are particularly noted for their distinctive contemporary styling. These vented gas fireplaces provide a clean and efficient heat source while serving as a stunning focal point in any room. The SBV400 delivers efficient warmth with an output of up to 32,000 BTUs, while the SBV500 impresses with a powerful maximum output of 40,000 BTUs, catering to larger spaces and providing superior heat distribution. Both models come equipped with a standard remote control, allowing you to adjust the flame height and temperature with ease, ensuring maximum comfort at your fingertips.
The technology behind these fireplaces includes a unique burner system that produces a stunning, realistic flame pattern. This advanced burner technology not only enhances the visual appeal but also promotes optimal fuel efficiency. The models are designed to utilize either natural gas or propane, offering versatility based on your needs. Additionally, an optional fan kit can be incorporated into these fireplaces to further enhance their heating capabilities, helping to circulate warm air throughout the room effectively.
In contrast, the BBV400 is designed with a more traditional aesthetic, featuring a classic fireplace look that suits a variety of décor styles. This model also boasts significant heating capabilities with a maximum output of 32,000 BTUs, ensuring warmth and comfort during colder months. Its minimalist design, combined with the variety of available face options and decorative media, allows homeowners to customize the look of their fireplace to meet their personal preferences.
All three models feature built-in safety measures, including an automatic shut-off system and an insulated firebox, ensuring peace of mind during operation. The easy-to-use control panel and optional wall switch further enhance user convenience.
Whether you choose the modern SBV series or the traditional BBV400, Monessen Hearth fireplaces are engineered to provide not only reliable performance but also an elegant addition to your home. With their exceptional features, cutting-edge technology, and stylish designs, these fireplaces are the perfect solution for anyone seeking both functionality and beauty in their heating options.