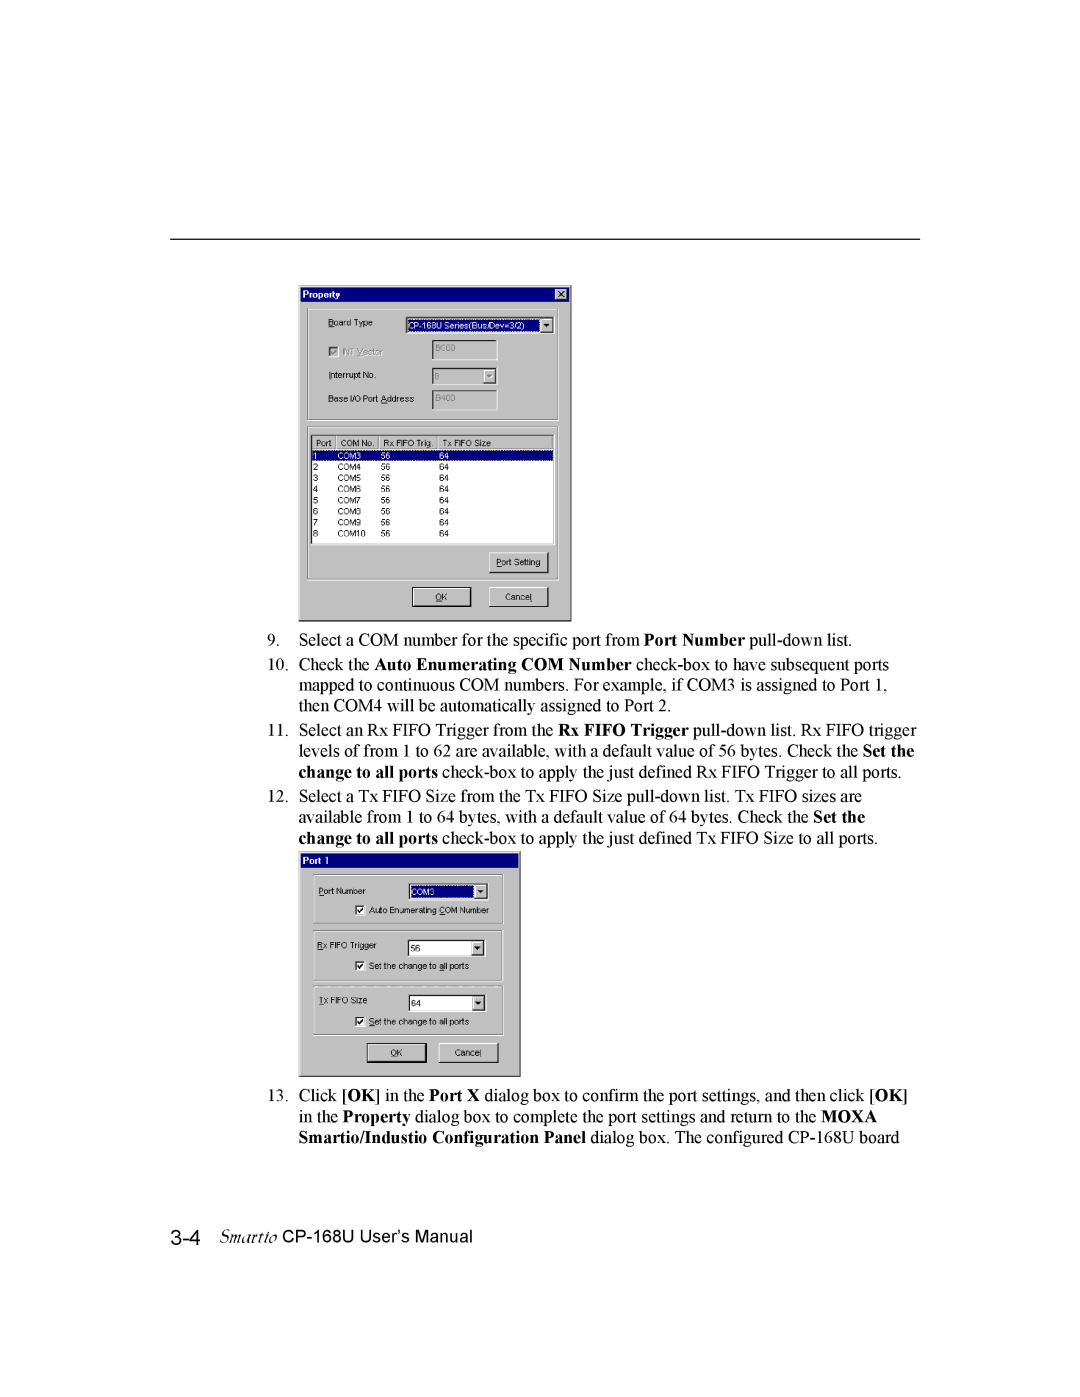
9.Select a COM number for the specific port from Port Number pull-down list.
10.Check the Auto Enumerating COM Number check-box to have subsequent ports mapped to continuous COM numbers. For example, if COM3 is assigned to Port 1, then COM4 will be automatically assigned to Port 2.
11.Select an Rx FIFO Trigger from the Rx FIFO Trigger pull-down list. Rx FIFO trigger levels of from 1 to 62 are available, with a default value of 56 bytes. Check the Set the change to all ports check-box to apply the just defined Rx FIFO Trigger to all ports.
12.Select a Tx FIFO Size from the Tx FIFO Size pull-down list. Tx FIFO sizes are available from 1 to 64 bytes, with a default value of 64 bytes. Check the Set the change to all ports check-box to apply the just defined Tx FIFO Size to all ports.
13.Click [OK] in the Port X dialog box to confirm the port settings, and then click [OK] in the Property dialog box to complete the port settings and return to the MOXA Smartio/Industio Configuration Panel dialog box. The configured CP-168U board
3-4Smartio CP-168U User’s Manual