Section 5: Maintenance
WARNING Before inspecting, cleaning or servicing the unit, shut off engine, wait for all parts to come to a complete stop, disconnect spark plug wire and move wire away from spark plug. Remove ignition key on elec- tric start models. Failure to follow these instructions can result in serious personal injury or property damage.
Cutting Edge
of Tine
Figure 5-6: Removing single tine.
Cutting Edge
of Tine
Figure 5-7: Removing a tine assembly.
WARNING
Follow the belt adjustment instructions carefully. An incorrect adjustment could result in the clutch control mechanism engaging too soon. This could cause loss of tiller control and result in per- sonal injury or property damage.
CHECKING AND ADJUSTING TENSION ON CLUTCH BELTS
Maintaining correct belt tension is impor- tant to good tilling performance and long belt life. A loose belt will slip on the engine and transmission pulleys and cause the tines and wheels to slow down
–or stop – even though the engine is running at full speed. A loose belt will also result in premature belt wear.
While checking belt tension, also check for cracks, cuts or frayed edges. A belt in poor condition should be replaced.
Tension on a new forward clutch belt (C, Figure
C
Figure 5-8: Forward clutch belt. (C, Left- side view, no belt cover.)
D
Figure 5-9: Reverse clutch belt (D). (Right-side view, no belt cover.)
first two (2) hours of operation and after every ten (10) hours of operation.
The reverse clutch belt (D, Figure
Checking and Adjusting
Forward Clutch Belt Tension
It is important to maintain correct tension on the forward clutch belt. A loose belt will cause the tines and wheels to slow down – or stop completely – even though the engine is running at full speed.
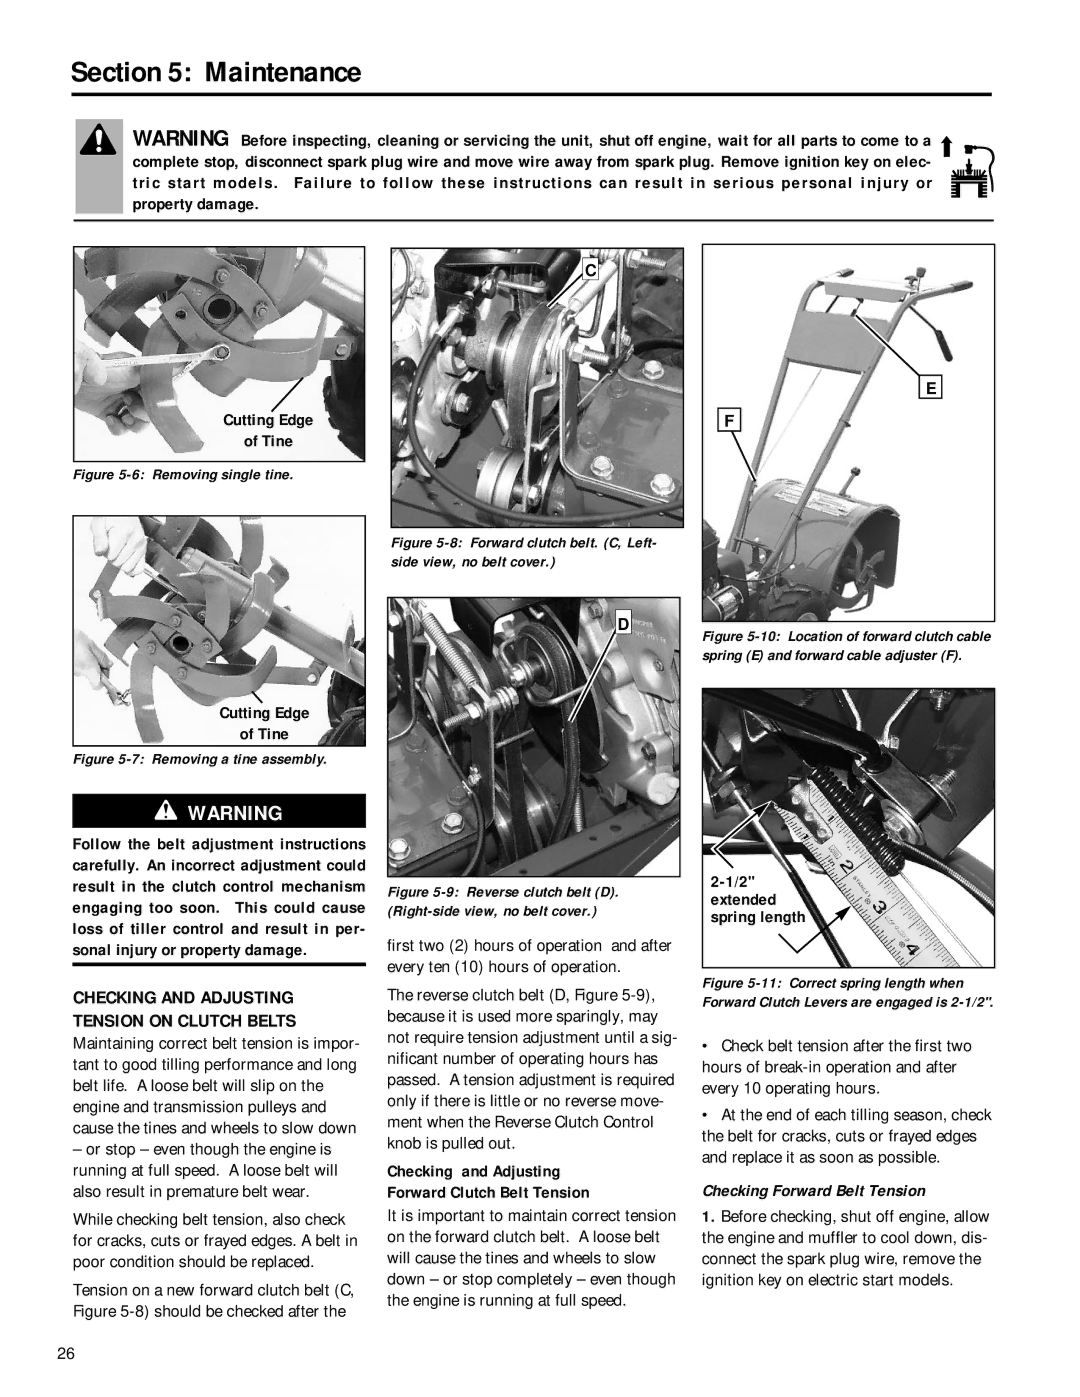
E
F
Figure 5-10: Location of forward clutch cable spring (E) and forward cable adjuster (F).
Figure 5-11: Correct spring length when Forward Clutch Levers are engaged is 2-1/2".
•Check belt tension after the first two hours of
•At the end of each tilling season, check the belt for cracks, cuts or frayed edges and replace it as soon as possible.
Checking Forward Belt Tension
1.Before checking, shut off engine, allow the engine and muffler to cool down, dis- connect the spark plug wire, remove the ignition key on electric start models.
26