GLOBUG SOLO LIGHTING SYSTEM — PRE-SETUP
CAUTION - READ MANUAL
Please read this entire manual carefully before attempting to operate the GloBug Solo. Failure to read this manual could cause damage to the GloBug Solo and serious injury to the operator.
GloBug Solo Setup
1.Place the GloBug Solo on a firm level surface so that it will not slide or turn over. Make sure there is enough space around the GloBug Solo for the outriggers to be deployed.
2.Lock the three caster wheels (two wheels have no locks) by stepping on the red end (S) of the caster lever (Figure 7).
Figure 7. Locking Caster Wheels
3.Pull outriggers downward at the ends until they lock in place in the ground (Figure 8).
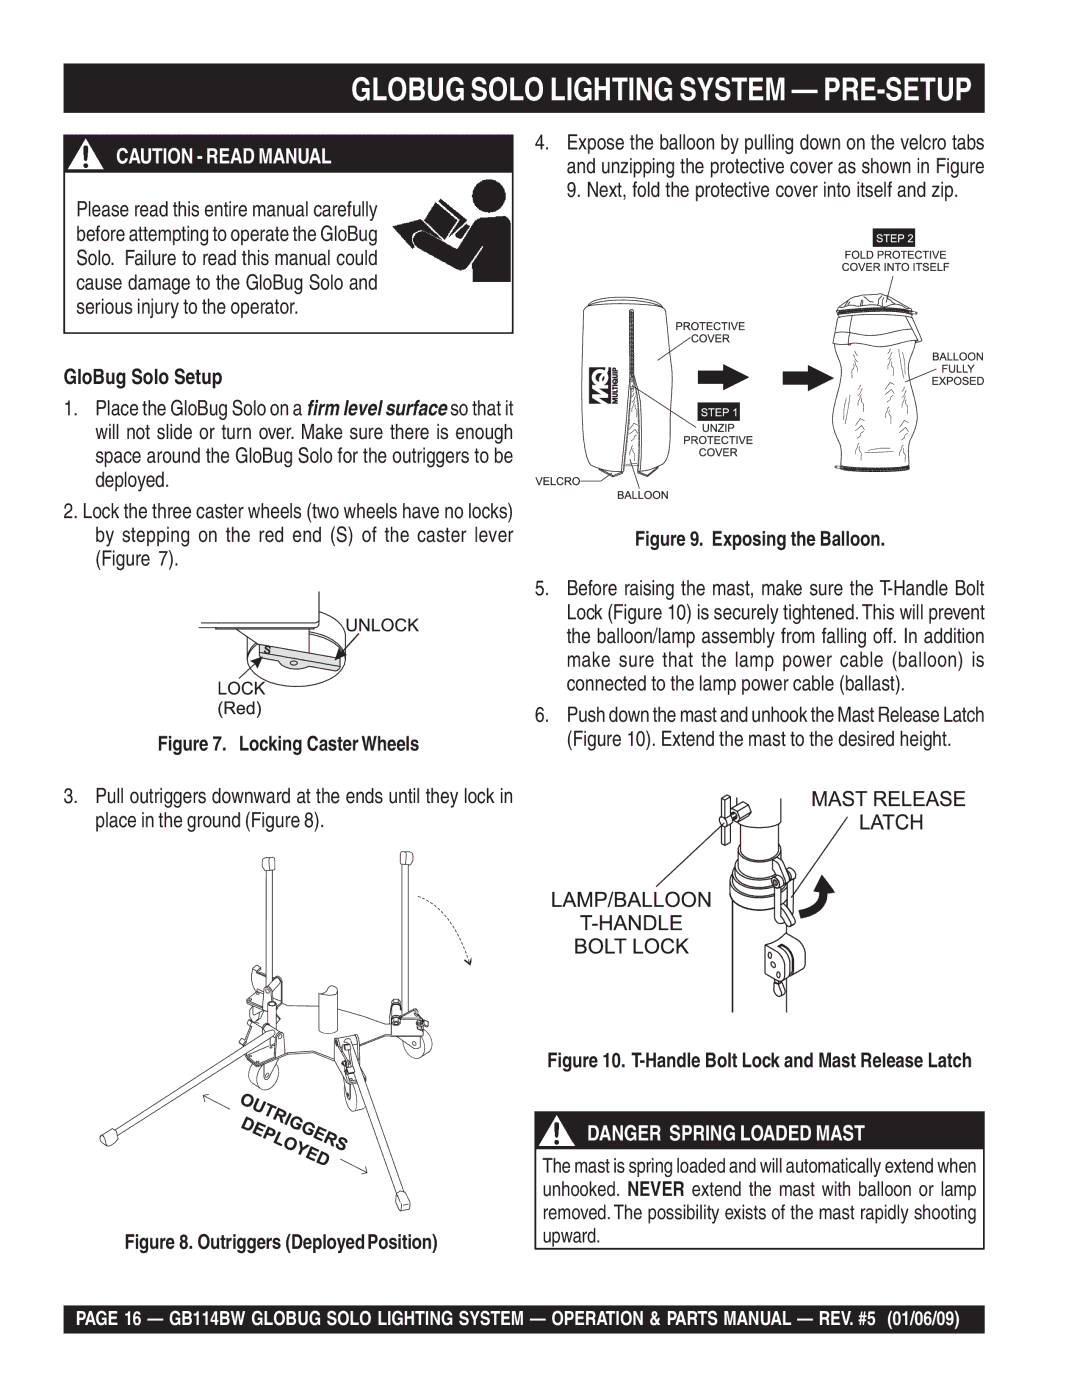
4.Expose the balloon by pulling down on the velcro tabs and unzipping the protective cover as shown in Figure 9. Next, fold the protective cover into itself and zip.
Figure 9. Exposing the Balloon.
5.Before raising the mast, make sure the
6.Push down the mast and unhook the Mast Release Latch (Figure 10). Extend the mast to the desired height.
Figure 10. T-Handle Bolt Lock and Mast Release Latch
Figure 8. Outriggers (DeployedPosition)
DANGER SPRING LOADED MAST
The mast is spring loaded and will automatically extend when unhooked. NEVER extend the mast with balloon or lamp removed. The possibility exists of the mast rapidly shooting upward.
PAGE 16 — GB114BW GLOBUG SOLO LIGHTING SYSTEM — OPERATION & PARTS MANUAL — REV. #5 (01/06/09)