GLOBUG SOLO LIGHTING SYSTEM — SHUTDOWN
Figure 17. Hot Lamp Surface
3.Push down the mast and unhook the Mast Release Latch (Figure 10). Fully lower the mast. Extend the mast to the desired height.
4.When the mast if fully lowered, lock the mast in place with the Mast Lock Lever (Figure 12).
6.Unzip the protective cover as shown in Figure 18, and place cover over balloon/lamp assembly. Fully zip protective cover and fold velcro tabs in place.
Figure 18. Covering the Lamp/Balloon Assembly
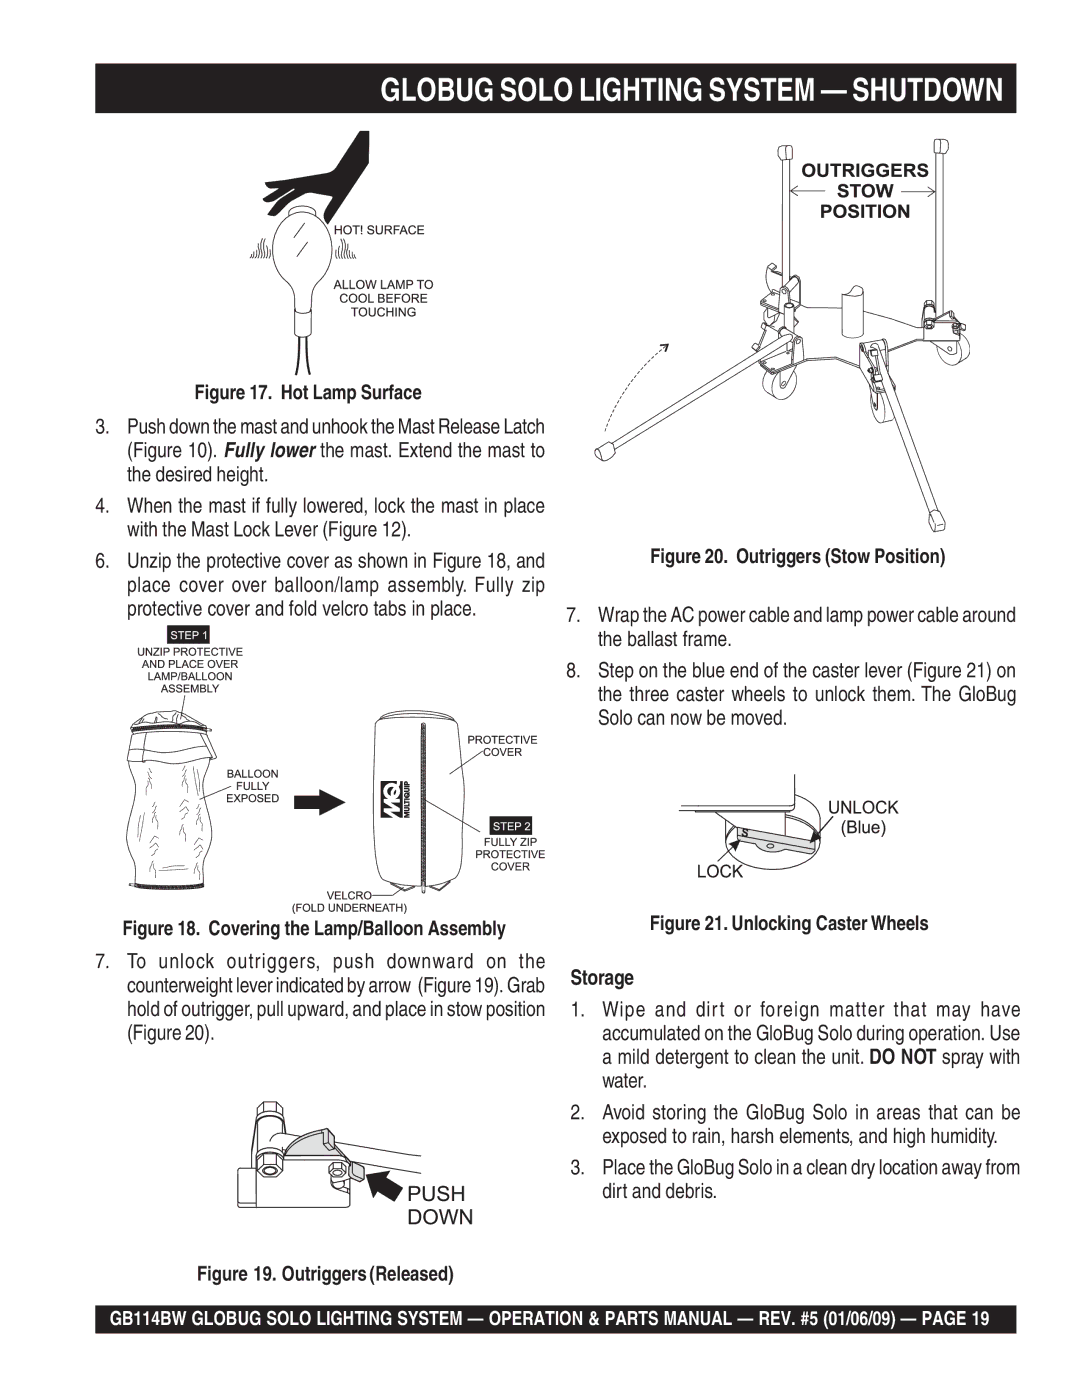
7.To unlock outriggers, push downward on the counterweight lever indicated by arrow (Figure 19). Grab hold of outrigger, pull upward, and place in stow position (Figure 20).
Figure 20. Outriggers (Stow Position)
7.Wrap the AC power cable and lamp power cable around the ballast frame.
8.Step on the blue end of the caster lever (Figure 21) on the three caster wheels to unlock them. The GloBug Solo can now be moved.
Figure 21. Unlocking Caster Wheels
Storage
1.Wipe and dirt or foreign matter that may have accumulated on the GloBug Solo during operation. Use a mild detergent to clean the unit. DO NOT spray with water.
2.Avoid storing the GloBug Solo in areas that can be exposed to rain, harsh elements, and high humidity.
3.Place the GloBug Solo in a clean dry location away from dirt and debris.
Figure 19. Outriggers (Released)
GB114BW GLOBUG SOLO LIGHTING SYSTEM — OPERATION & PARTS MANUAL — REV. #5 (01/06/09) — PAGE 19