Connecting a Personal Computer
Connecting your computer to your LCD monitor will enable you to display your computerÕs screen image. Some video cards and a pixel clock over 165MHz may not display an image correctly.
Your LCD monitor displays proper image by adjusting the factory preset timing signal automatically.
<Factory preset signal timing>
Resolution | Scanning frequency |
| Remarks | ||
Horizontal | Vertical | LCD3215/LCD4215 |
| LCD4615 | |
|
| ||||
|
|
|
|
|
|
640 x 480 | 31.5kHz | 60Hz |
|
|
|
800 x 600 | 37.9kHz | 60Hz |
|
|
|
1024 x 768 | 48.4kHz | 60Hz |
|
|
|
1280 x 768 | 48kHz | 60Hz |
|
|
|
1360 x 768 | 48kHz | 60Hz | Recommended resolution |
| |
1280 x 1024 | 64kHz | 60Hz | Compressed image |
|
|
1600 x 1200 | 75kHz | 60Hz | Compressed image |
| Compressed image |
1920 x 1080 | 66.6kHz | 60Hz | Compressed image |
| Recommended resolution |
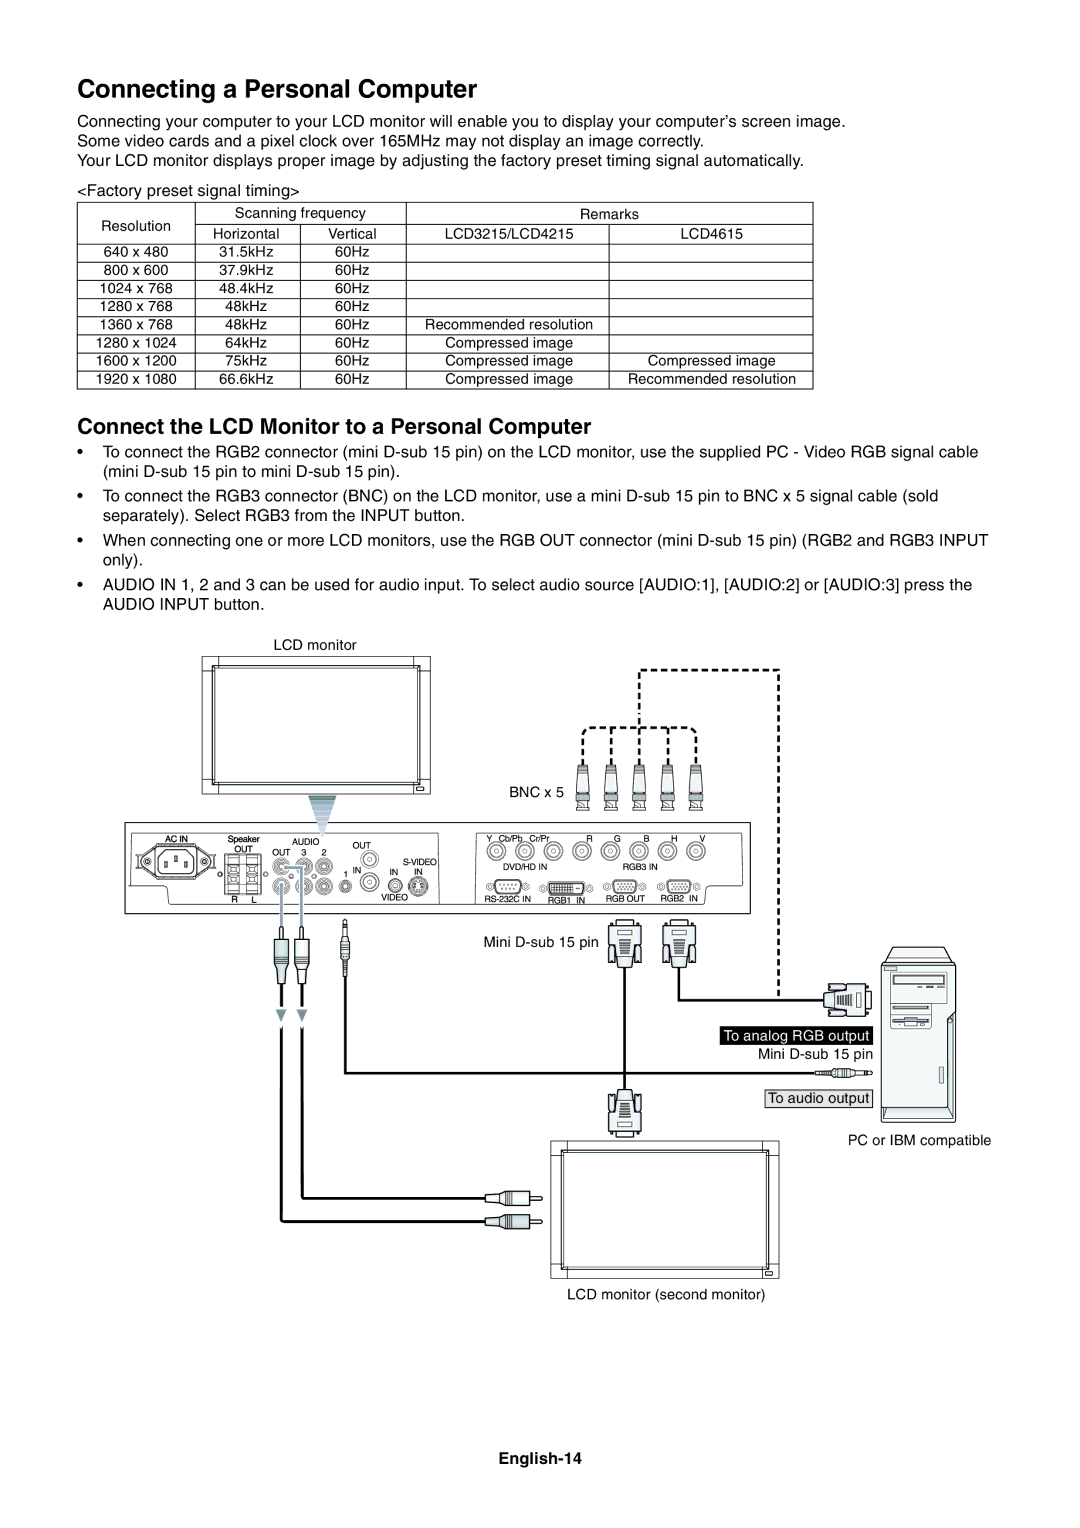
Connect the LCD Monitor to a Personal Computer
¥To connect the RGB2 connector (mini
¥To connect the RGB3 connector (BNC) on the LCD monitor, use a mini
¥When connecting one or more LCD monitors, use the RGB OUT connector (mini
¥AUDIO IN 1, 2 and 3 can be used for audio input. To select audio source [AUDIO:1], [AUDIO:2] or [AUDIO:3] press the AUDIO INPUT button.
LCD monitor
BNC x 5 |
Mini |
To analog RGB output
Mini
To audio output
PC or IBM compatible
LCD monitor (second monitor)