Fig. 12: Removing the converter board
4. Remove the two screws securing the optical device drive to its bracket and put it aside.
Fig. 13: Removing the optical device drive from its bracket
Removing the Hard Disk Drive
To remove the hard disk drive, first remove the stabilisers (see Removing the Stabilisers), open the chassis (see Opening the Chassis), then follow the next steps:
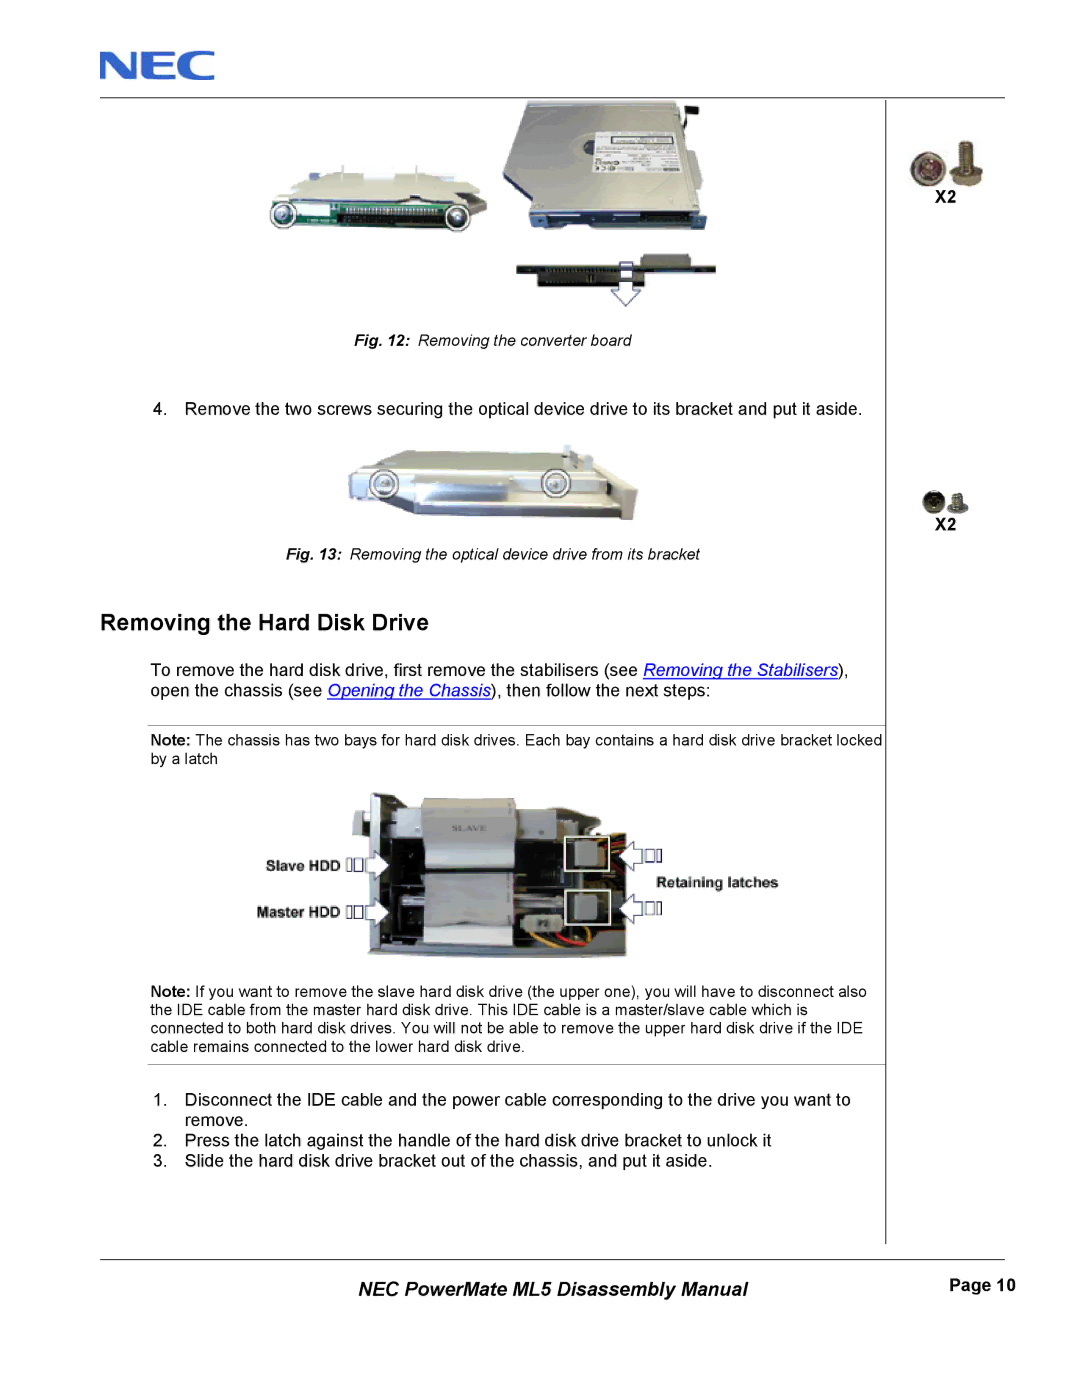
Note: The chassis has two bays for hard disk drives. Each bay contains a hard disk drive bracket locked by a latch
Note: If you want to remove the slave hard disk drive (the upper one), you will have to disconnect also the IDE cable from the master hard disk drive. This IDE cable is a master/slave cable which is connected to both hard disk drives. You will not be able to remove the upper hard disk drive if the IDE cable remains connected to the lower hard disk drive.
1.Disconnect the IDE cable and the power cable corresponding to the drive you want to remove.
2.Press the latch against the handle of the hard disk drive bracket to unlock it
3.Slide the hard disk drive bracket out of the chassis, and put it aside.
X2
X2
NEC PowerMate ML5 Disassembly Manual | Page 10 |