1.Disconnect the auxiliary fan connector from the motherboard.
2.Remove the screws shown in the picture below. Take the auxiliary system fan out of the chassis and put it aside.
Fig. 17: Removing the auxiliary system fan
Removing the CPU
To remove the CPU, first remove the stabilisers (see Removing the Stabilisers), open the chassis (see Opening the Chassis), remove the floppy disk drive (see Removing the Floppy Disk Drive), then follow the next steps:
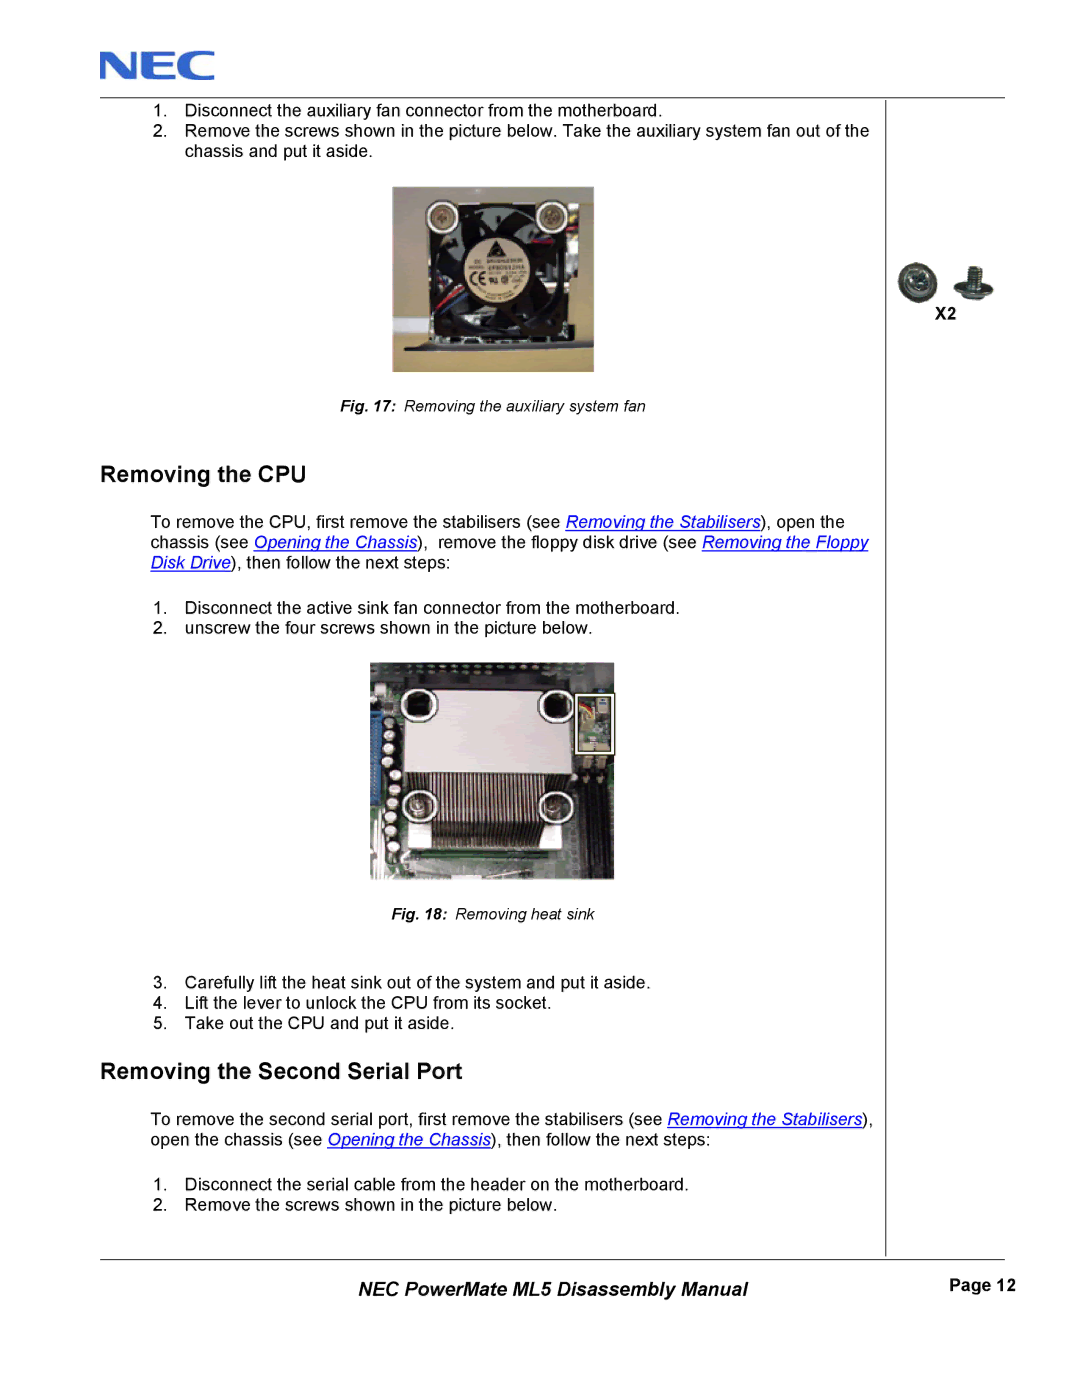
1.Disconnect the active sink fan connector from the motherboard.
2.unscrew the four screws shown in the picture below.
Fig. 18: Removing heat sink
3.Carefully lift the heat sink out of the system and put it aside.
4.Lift the lever to unlock the CPU from its socket.
5.Take out the CPU and put it aside.
Removing the Second Serial Port
To remove the second serial port, first remove the stabilisers (see Removing the Stabilisers), open the chassis (see Opening the Chassis), then follow the next steps:
1.Disconnect the serial cable from the header on the motherboard.
2.Remove the screws shown in the picture below.
X2
NEC PowerMate ML5 Disassembly Manual | Page 12 |
