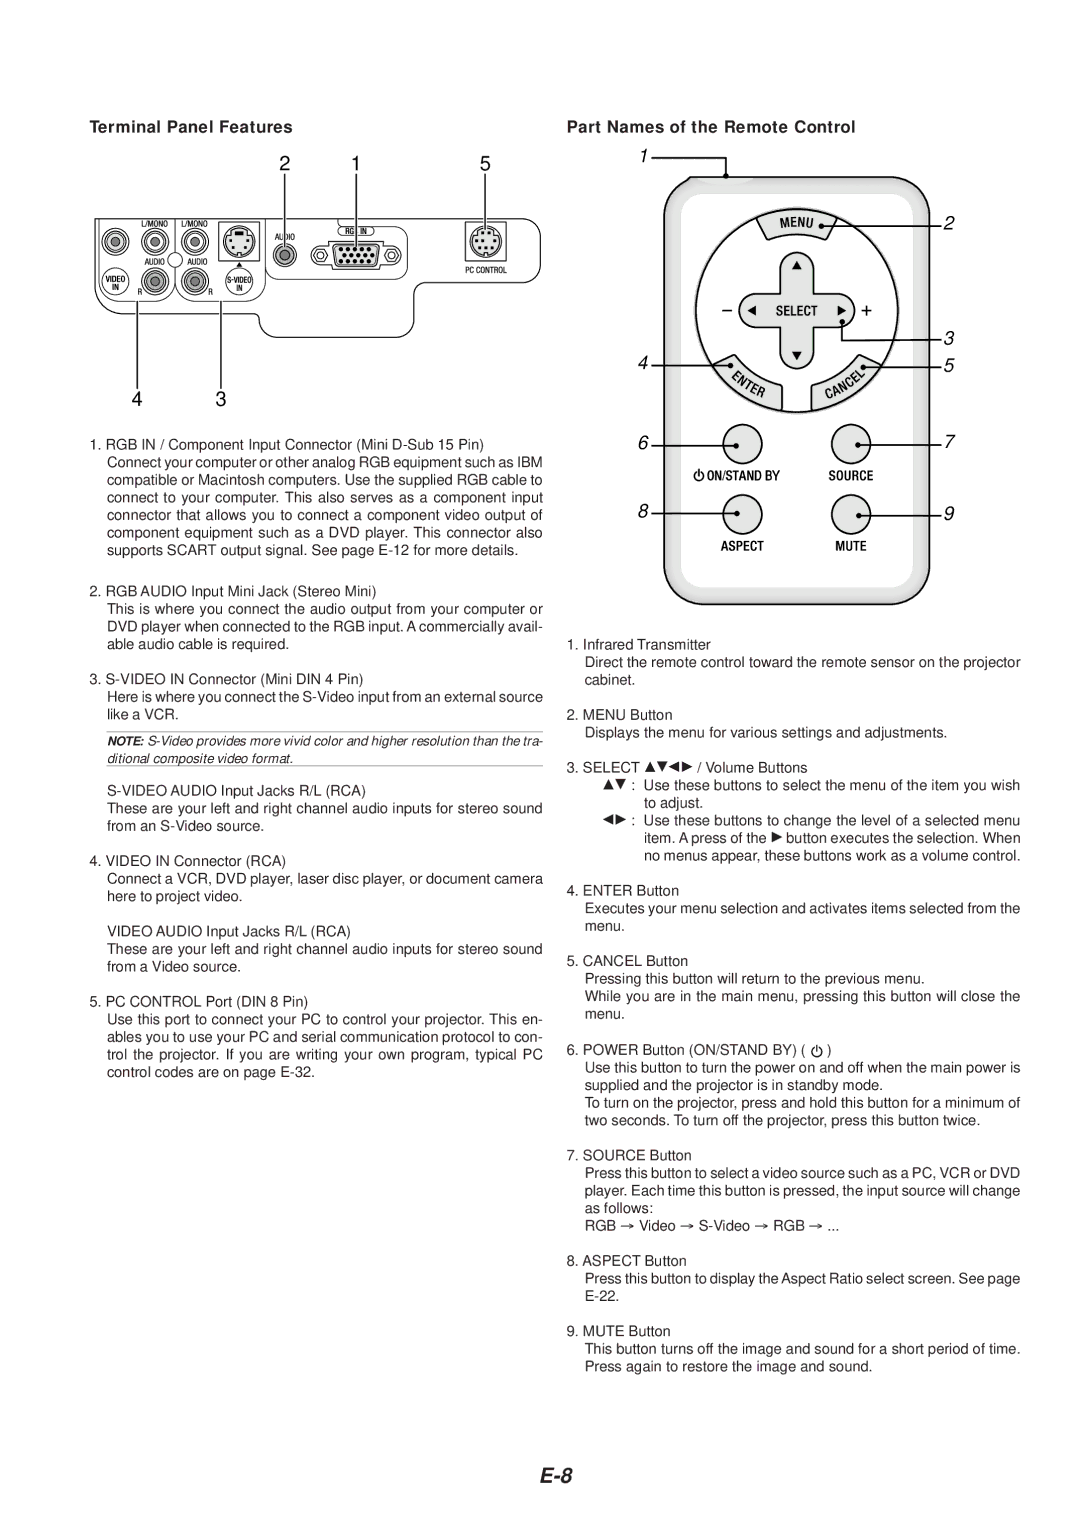
Terminal Panel Features |
|
| Part Names of the Remote Control | ||
2 | 1 | 5 | 1 |
|
|
|
| ||||
|
|
| |||
2
![]() 3
3
4 | 5 |
4 3
1.RGB IN / Component Input Connector (Mini
2.RGB AUDIO Input Mini Jack (Stereo Mini)
This is where you connect the audio output from your computer or DVD player when connected to the RGB input. A commercially avail- able audio cable is required.
3.
Here is where you connect the
NOTE:
These are your left and right channel audio inputs for stereo sound from an
4.VIDEO IN Connector (RCA)
Connect a VCR, DVD player, laser disc player, or document camera here to project video.
VIDEO AUDIO Input Jacks R/L (RCA)
These are your left and right channel audio inputs for stereo sound from a Video source.
5.PC CONTROL Port (DIN 8 Pin)
Use this port to connect your PC to control your projector. This en- ables you to use your PC and serial communication protocol to con- trol the projector. If you are writing your own program, typical PC control codes are on page
6 | 7 |
8 | 9 |
1.Infrared Transmitter
Direct the remote control toward the remote sensor on the projector cabinet.
2.MENU Button
Displays the menu for various settings and adjustments.
3.SELECT GHFE / Volume Buttons
GH : Use these buttons to select the menu of the item you wish to adjust.
FE : Use these buttons to change the level of a selected menu item. A press of the E button executes the selection. When no menus appear, these buttons work as a volume control.
4.ENTER Button
Executes your menu selection and activates items selected from the menu.
5.CANCEL Button
Pressing this button will return to the previous menu.
While you are in the main menu, pressing this button will close the menu.
6.POWER Button (ON/STAND BY) ( ![]() )
)
Use this button to turn the power on and off when the main power is supplied and the projector is in standby mode.
To turn on the projector, press and hold this button for a minimum of two seconds. To turn off the projector, press this button twice.
7.SOURCE Button
Press this button to select a video source such as a PC, VCR or DVD player. Each time this button is pressed, the input source will change as follows:
RGB → Video →
8.ASPECT Button
Press this button to display the Aspect Ratio select screen. See page
9.MUTE Button
This button turns off the image and sound for a short period of time. Press again to restore the image and sound.