GS748T Smart Switch Hardware Installation Guide
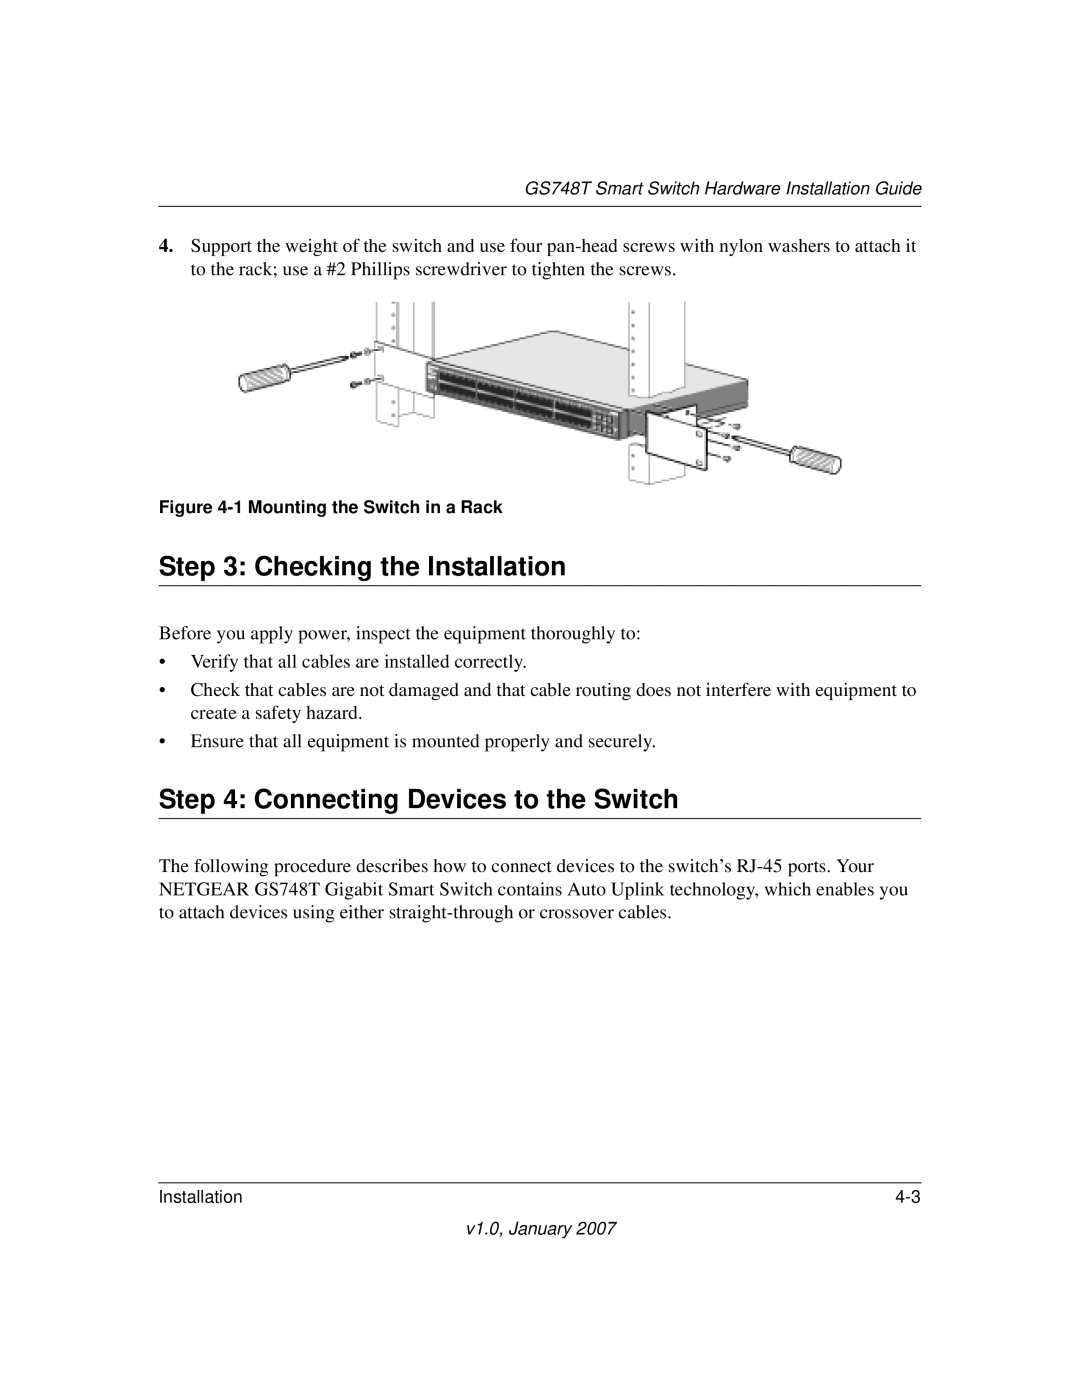
4.Support the weight of the switch and use four
Figure 4-1 Mounting the Switch in a Rack
Step 3: Checking the Installation
Before you apply power, inspect the equipment thoroughly to:
•Verify that all cables are installed correctly.
•Check that cables are not damaged and that cable routing does not interfere with equipment to create a safety hazard.
•Ensure that all equipment is mounted properly and securely.
Step 4: Connecting Devices to the Switch
The following procedure describes how to connect devices to the switch’s
Installation |
