3.Configure the Netopia Cayman
1.Run a Telnet application from the computer on the same network as the Router.
•Windows users: click on the Start menu, select Run, and in the resulting entry box, type telnet 192.168.1.1
•Macintosh OS X users: launch the Terminal application, either from the Dock or from the Utilities folder, and type telnet 192.168.1.1
•Classic Macintosh OS users: you need to install the NCSA Telnet application, included on the Netopia CD, or freely available from user groups or other freeware sources. Then launch NCSA Telnet and type 192.168.1.1
In the Telnet screens, move from field to field with the arrow keys. Select/execute items with the Return key, and toggle items (Yes/No, On/Off, ...) with the Tab key followed by Return.
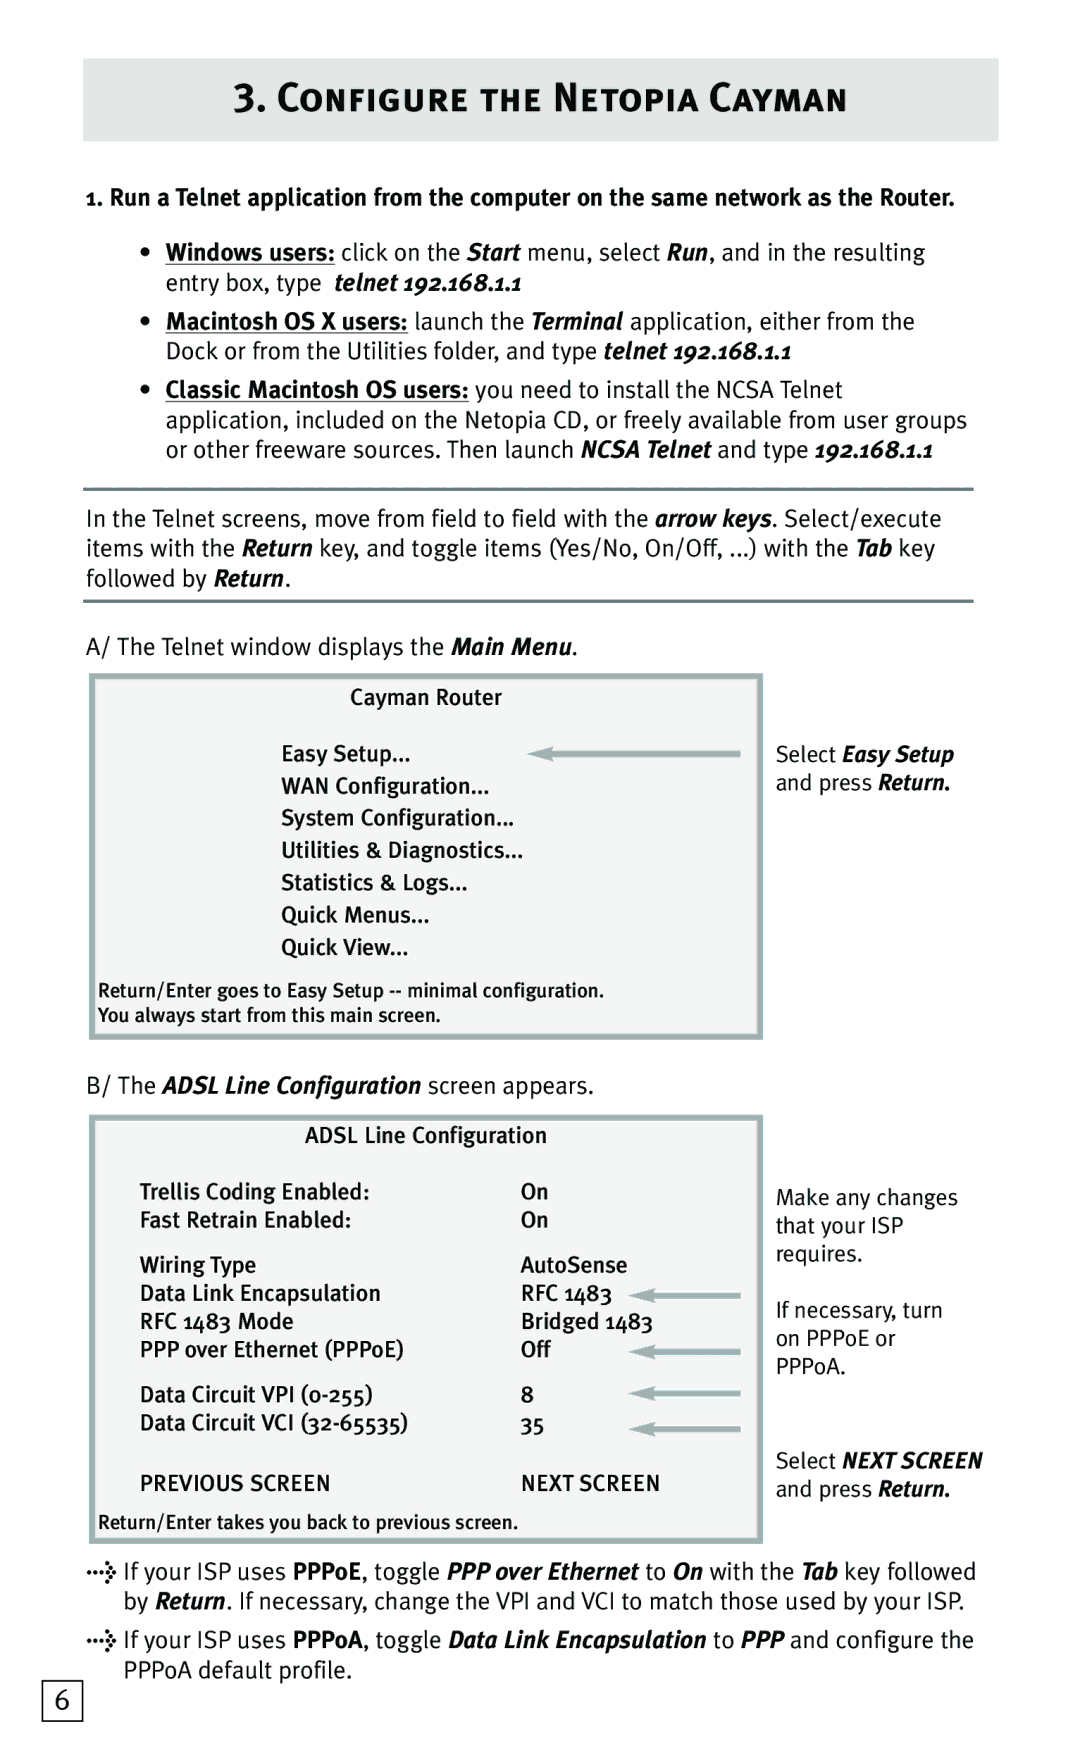
A/ The Telnet window displays the Main Menu.
Cayman Router
Easy Setup...
WAN Configuration...
System Configuration...
Utilities & Diagnostics...
Statistics & Logs...
Quick Menus...
Quick View...
Return/Enter goes to Easy Setup
Select Easy Setup and press Return.
B/ The ADSL Line Configuration screen appears.
ADSL Line Configuration
Trellis Coding Enabled: | On | |
Fast Retrain Enabled: | On | |
Wiring Type | AutoSense | |
Data Link Encapsulation | RFC 1483 |
|
| ||
RFC 1483 Mode | Bridged 1483 | |
PPP over Ethernet (PPPoE) | Off |
|
| ||
Data Circuit VPI | 8 |
|
| ||
Data Circuit VCI | 35 |
|
PREVIOUS SCREEN | NEXT SCREEN | |
Return/Enter takes you back to previous screen.
Make any changes that your ISP requires.
If necessary, turn on PPPoE or PPPoA.
Select NEXT SCREEN and press Return.
>If your ISP uses PPPoE, toggle PPP over Ethernet to On with the Tab key followed by Return. If necessary, change the VPI and VCI to match those used by your ISP.
>If your ISP uses PPPoA, toggle Data Link Encapsulation to PPP and configure the PPPoA default profile.
6
