NTI VEEMUX VIDEO MATRIX SWITCH
INSTALLATION
Connect the Sources and Monitors
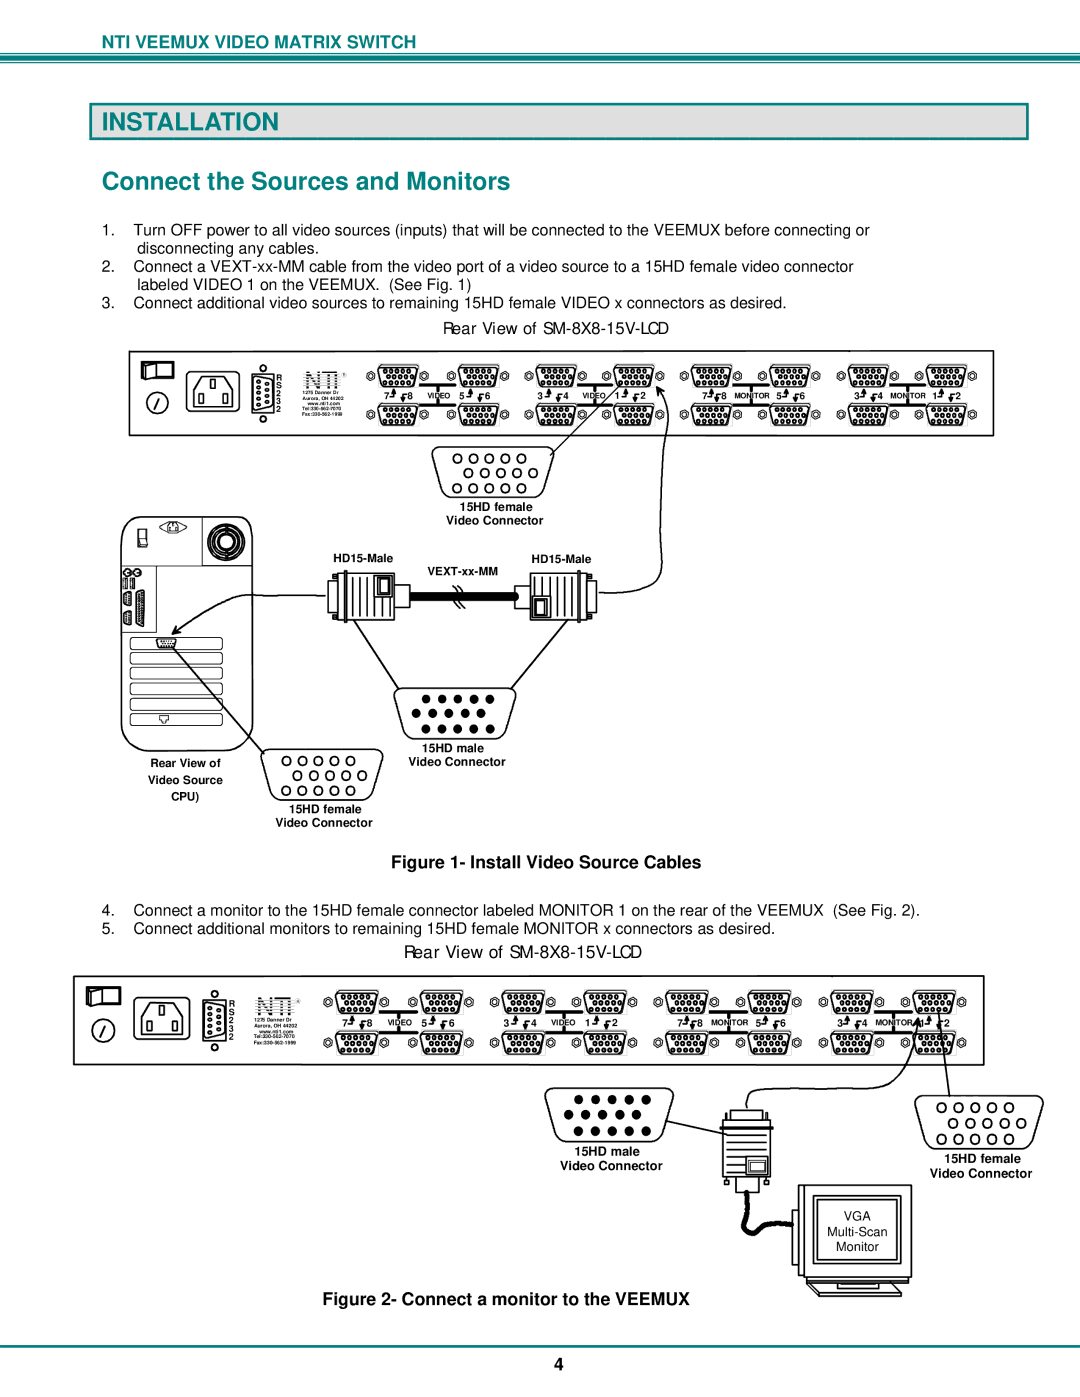
1.Turn OFF power to all video sources (inputs) that will be connected to the VEEMUX before connecting or disconnecting any cables.
2.Connect a
3.Connect additional video sources to remaining 15HD female VIDEO x connectors as desired.
Rear View of
S | NTI |
|
R |
| R |
|
| |
2 | 1275 Danner Dr |
|
3 | Aurora, OH 44202 | |
www.nti1.com |
| |
2 |
| |
|
| |
7 | 8 | VIDEO | 5 | 6 |
3 | 4 | VIDEO | 1 | 2 | 7 | 8 | MONITOR | 5 | 6 | 3 | 4 | MONITOR | 1 | 2 |
15HD female Video Connector
| 15HD male |
Rear View of | Video Connector |
Video Source
CPU)
15HD female Video Connector
Figure 1- Install Video Source Cables
4.Connect a monitor to the 15HD female connector labeled MONITOR 1 on the rear of the VEEMUX (See Fig. 2).
5.Connect additional monitors to remaining 15HD female MONITOR x connectors as desired.
Rear View of SM-8X8-15V-LCD
S | NTI |
|
R |
| R |
|
| |
2 | 1275 Danner Dr |
|
3 | Aurora, OH 44202 | |
www.nti1.com |
| |
2 |
| |
|
| |
7 | 8 | VIDEO | 5 | 6 |
3 | 4 | VIDEO | 1 | 2 | 7 | 8 | MONITOR | 5 | 6 | 3 | 4 | MONITOR | 1 | 2 |
15HD male |
|
|
| 15HD female |
|
|
| ||
Video Connector |
|
|
| |
|
|
| Video Connector | |
|
|
|
| |
|
|
|
|
VGA
Monitor
Figure 2- Connect a monitor to the VEEMUX
4