OUT SIDE AIR INSTALLATION
Select an installation location that will give the best airflow from the front of
the heater to the remainder of the home.
TOOLS FOR INSTALLATION
Drop cloth; 3/32" Metal drill bit; 5/16" magnetic socket chuck adapter; 5/16" wrench (box or socket) or adjustable wrench; Jigsaw with masonry, metal and wood blades
CAUTION
THE STRUCTURAL INTEGRITY OF THE MOBILE HOME FLOOR MUST BE MAINTAINED. (MOVEOPENING AND/OR REPOSITION HEATER LOCATION IF NECESSARY).
1.Remove the protective plastic wrapping from the unit, inspect the unit for any obvious physical damage.
2.Plug the power cord into a 115V AC outlet to test the motor and fan when optional motor is being used. “Do not run power cord under unit or in high traffic areas”. Unplug power cord when installing or moving unit.
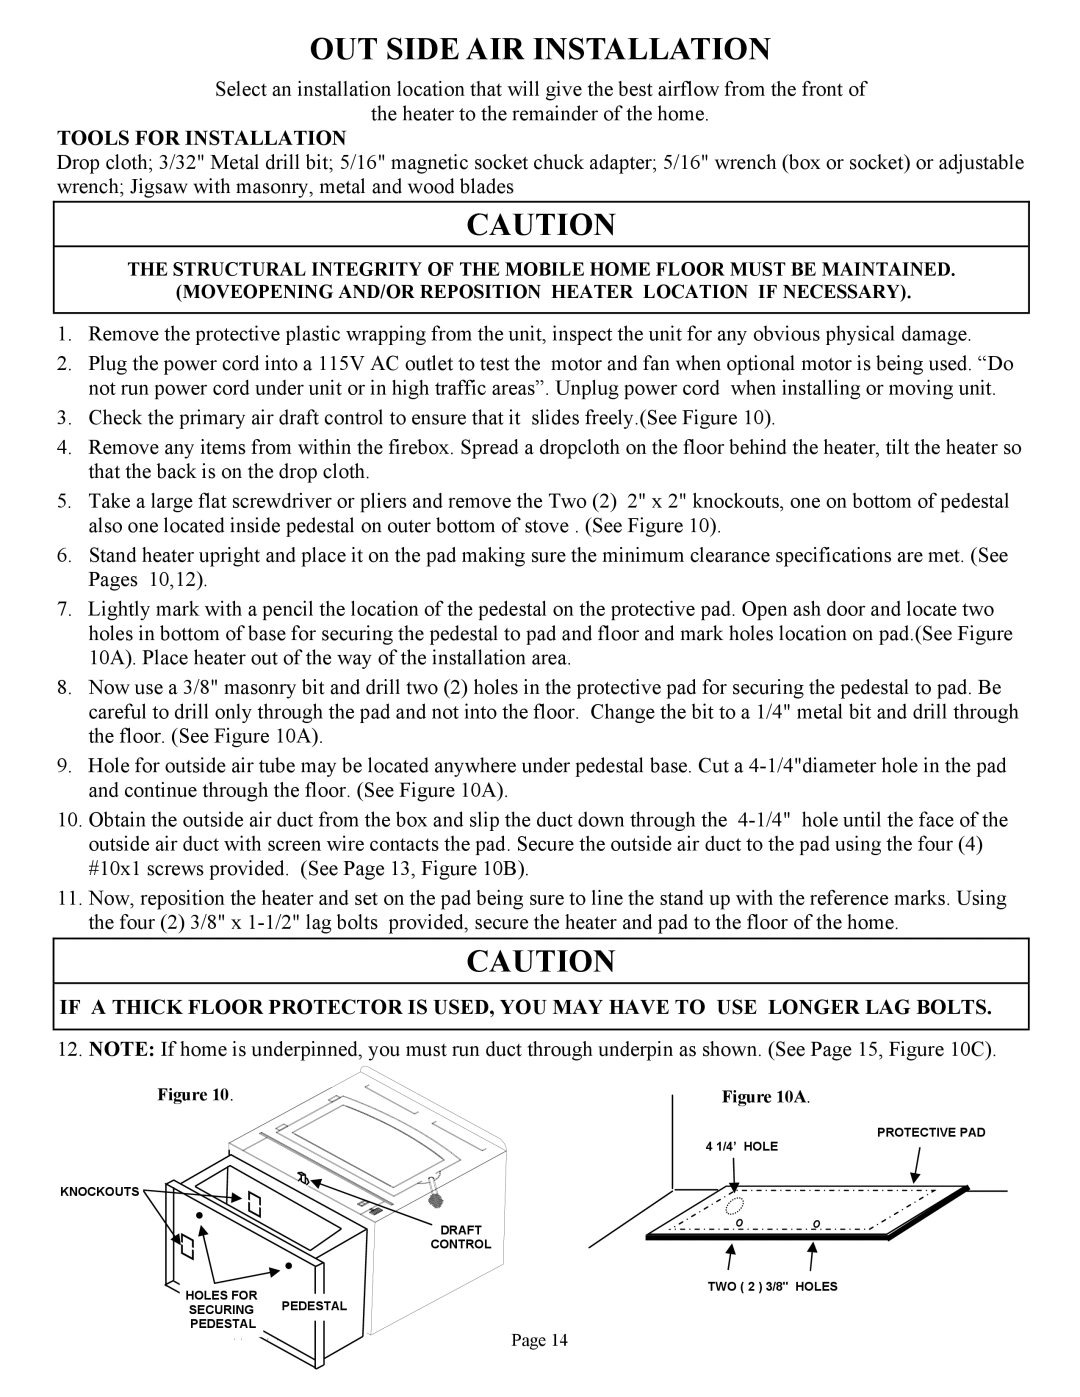
3.Check the primary air draft control to ensure that it slides freely.(See Figure 10).
4.Remove any items from within the firebox. Spread a dropcloth on the floor behind the heater, tilt the heater so that the back is on the drop cloth.
5.Take a large flat screwdriver or pliers and remove the Two (2) 2" x 2" knockouts, one on bottom of pedestal also one located inside pedestal on outer bottom of stove . (See Figure 10).
6.Stand heater upright and place it on the pad making sure the minimum clearance specifications are met. (See Pages 10,12).
7.Lightly mark with a pencil the location of the pedestal on the protective pad. Open ash door and locate two holes in bottom of base for securing the pedestal to pad and floor and mark holes location on pad.(See Figure 10A). Place heater out of the way of the installation area.
8.Now use a 3/8" masonry bit and drill two (2) holes in the protective pad for securing the pedestal to pad. Be careful to drill only through the pad and not into the floor. Change the bit to a 1/4" metal bit and drill through the floor. (See Figure 10A).
9.Hole for outside air tube may be located anywhere under pedestal base. Cut a
10.Obtain the outside air duct from the box and slip the duct down through the
11.Now, reposition the heater and set on the pad being sure to line the stand up with the reference marks. Using the four (2) 3/8" x
CAUTION
IF A THICK FLOOR PROTECTOR IS USED, YOU MAY HAVE TO USE LONGER LAG BOLTS.
12. NOTE: If home is underpinned, you must run duct through underpin as shown. (See Page 15, Figure 10C).
Figure 10.
KNOCKOUTS ![]()
DRAFT
CONTROL
HOLES FOR
SECURING PEDESTAL
PEDESTAL
Page 14
Figure 10A.
PROTECTIVE PAD
4 1/4’ HOLE
TWO ( 2 ) 3/8" HOLES