Installation of (Optional) Close Clearance Shields and Pipe Shield
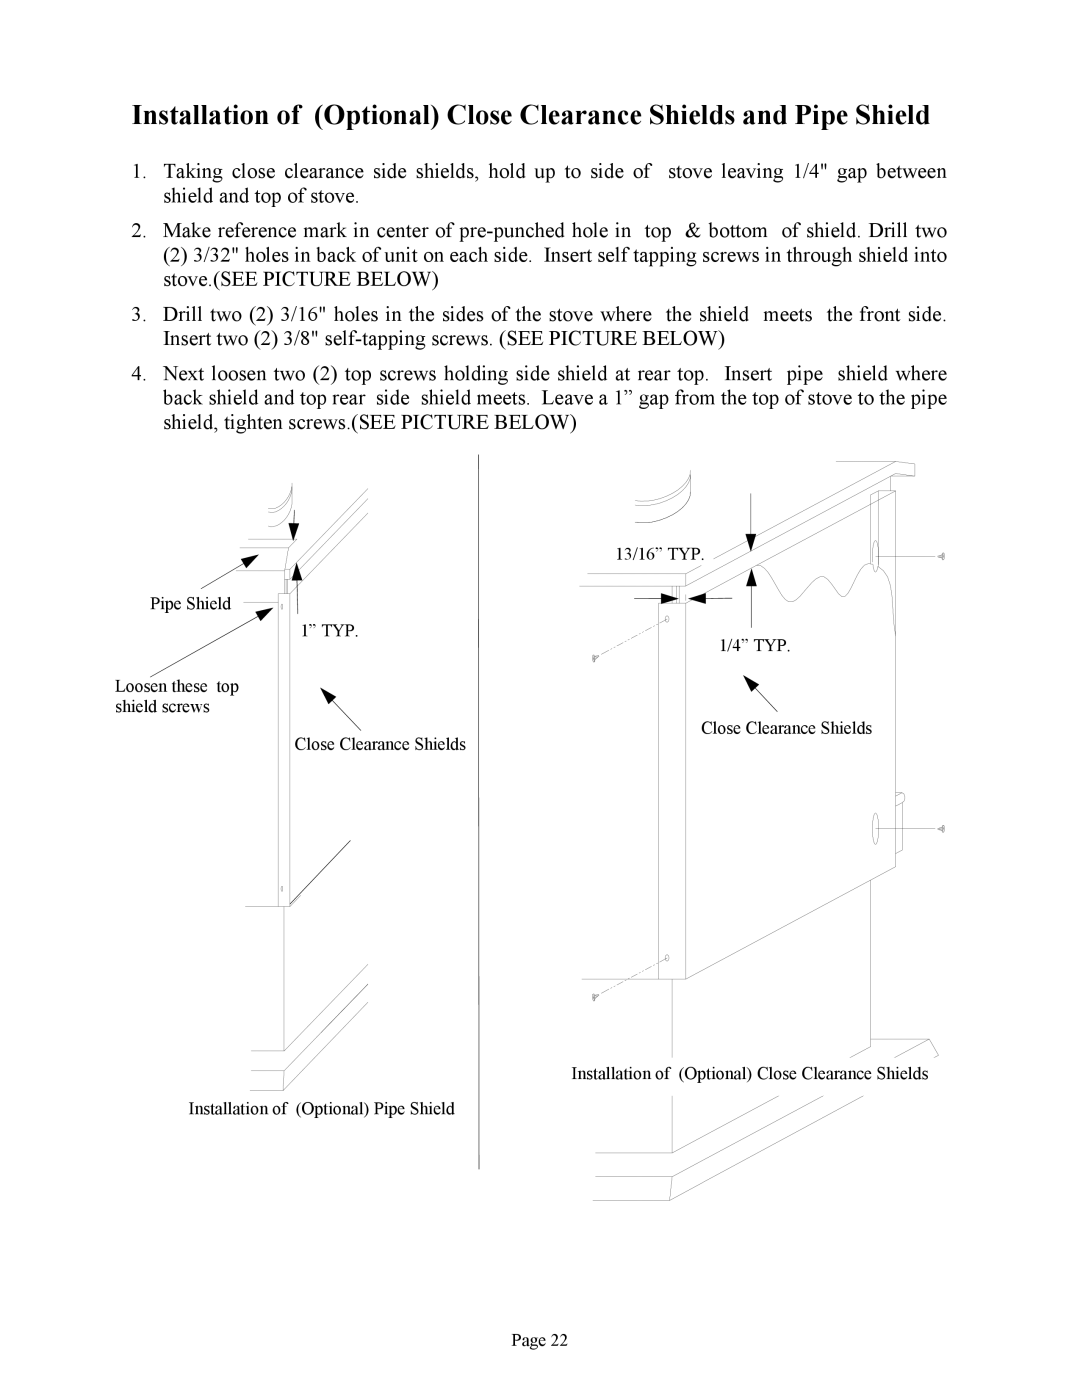
1.Taking close clearance side shields, hold up to side of stove leaving 1/4" gap between shield and top of stove.
2.Make reference mark in center of
(2) 3/32" holes in back of unit on each side. Insert self tapping screws in through shield into stove.(SEE PICTURE BELOW)
3.Drill two (2) 3/16" holes in the sides of the stove where the shield meets the front side. Insert two (2) 3/8"
4.Next loosen two (2) top screws holding side shield at rear top. Insert pipe shield where back shield and top rear side shield meets. Leave a 1” gap from the top of stove to the pipe shield, tighten screws.(SEE PICTURE BELOW)
Pipe Shield
Loosen these top shield screws
13/16” TYP.
1” TYP.
1/4” TYP.
Close Clearance Shields
Close Clearance Shields
Installation of (Optional) Close Clearance Shields
Installation of (Optional) Pipe Shield
Page 22