Example of installation on the floor mat or on the chassis
1.Place the amplifier where it is to be
installed. Insert the supplied tap- ping screws (4 mm ⋅ 18 mm) into the screw holes. Push on the screws with a screwdriver so they make marks where the installation holes are to be located.
2.Drill 2.5 mm diameter holes at the point marked, and install the ampli- fier, either on the carpet or directly to the chassis.
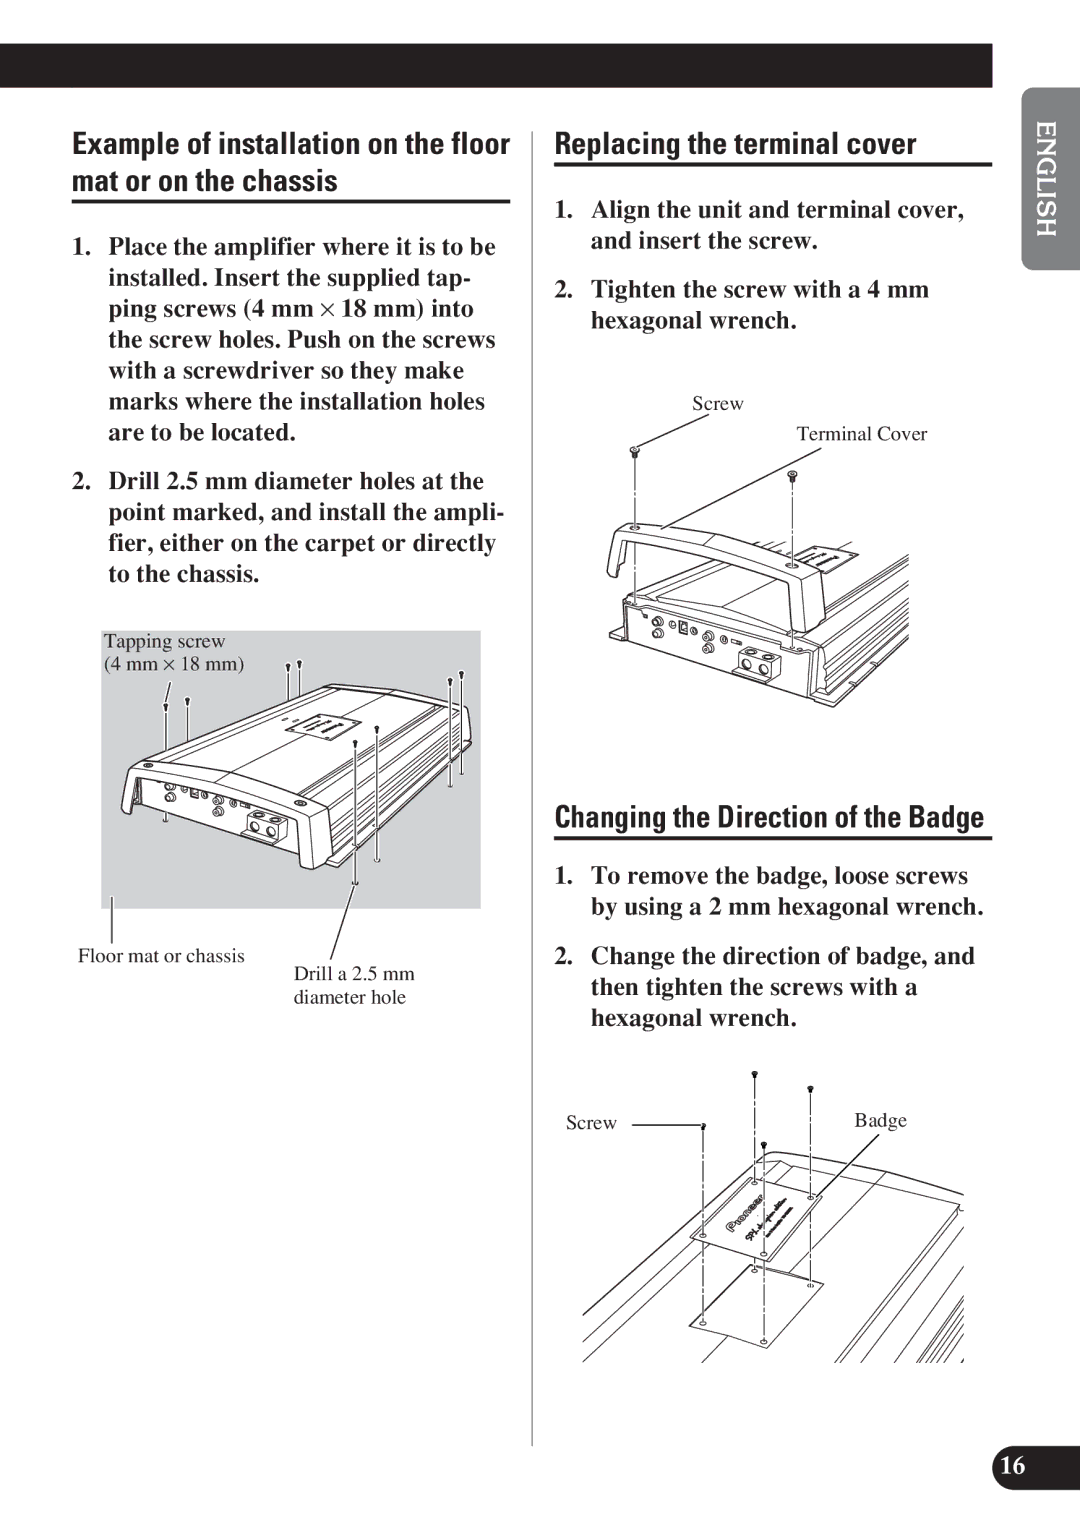
Tapping screw (4 mm ⋅ 18 mm)
Floor mat or chassis
Drill a 2.5 mm diameter hole
Replacing the terminal cover
1.Align the unit and terminal cover, and insert the screw.
2.Tighten the screw with a 4 mm hexagonal wrench.
Screw
Terminal Cover
Changing the Direction of the Badge
1.To remove the badge, loose screws by using a 2 mm hexagonal wrench.
2.Change the direction of badge, and then tighten the screws with a hexagonal wrench.
Screw | Badge |
ENGLISH ESPAÑOL DEUTSCH FRANÇAIS ITALIANO NEDERLANDS êìëëäàâ
16