User’s Manual
5.2.4 Network Setup – Global Access (Connected Directly to Modem)
To access the NETWORK SETUP menu, select Main Menu NETWORK to open the NETWORK SETUP menu.
If you would like to access your DVR while you are outside of your home, please follow the instructions below to configure the NETWORK Setup page of your DVR
Important Note: If you are using a DSL modem, the modem must be set to “bridge mode”.
Important Note: We will not be able to help you set up the network configurations if you have a
RADIUS Server or Network Magic installed.
Note: Prior to changing the NETWORK Setup of your DVR, it is strongly recommended that
you perform the following tasks:
1.Find out from your Internet Service Provider (ISP) what kind of service you are using. Note: Your DVR supports these three common types of Internet Services: DHCP (Cable Modem), PPPoE (DSL Modem) and Static IP (Fiber Optics). Actual service type may vary, please ask your ISP for the exact service type.
2.Write down the: IP Address provided by your ISP (if your ISP is using Static IP), Subnet Mask, Gateway Address, DNS Address(es) provided by your ISP of your DVR for future reference when configuring the DVR
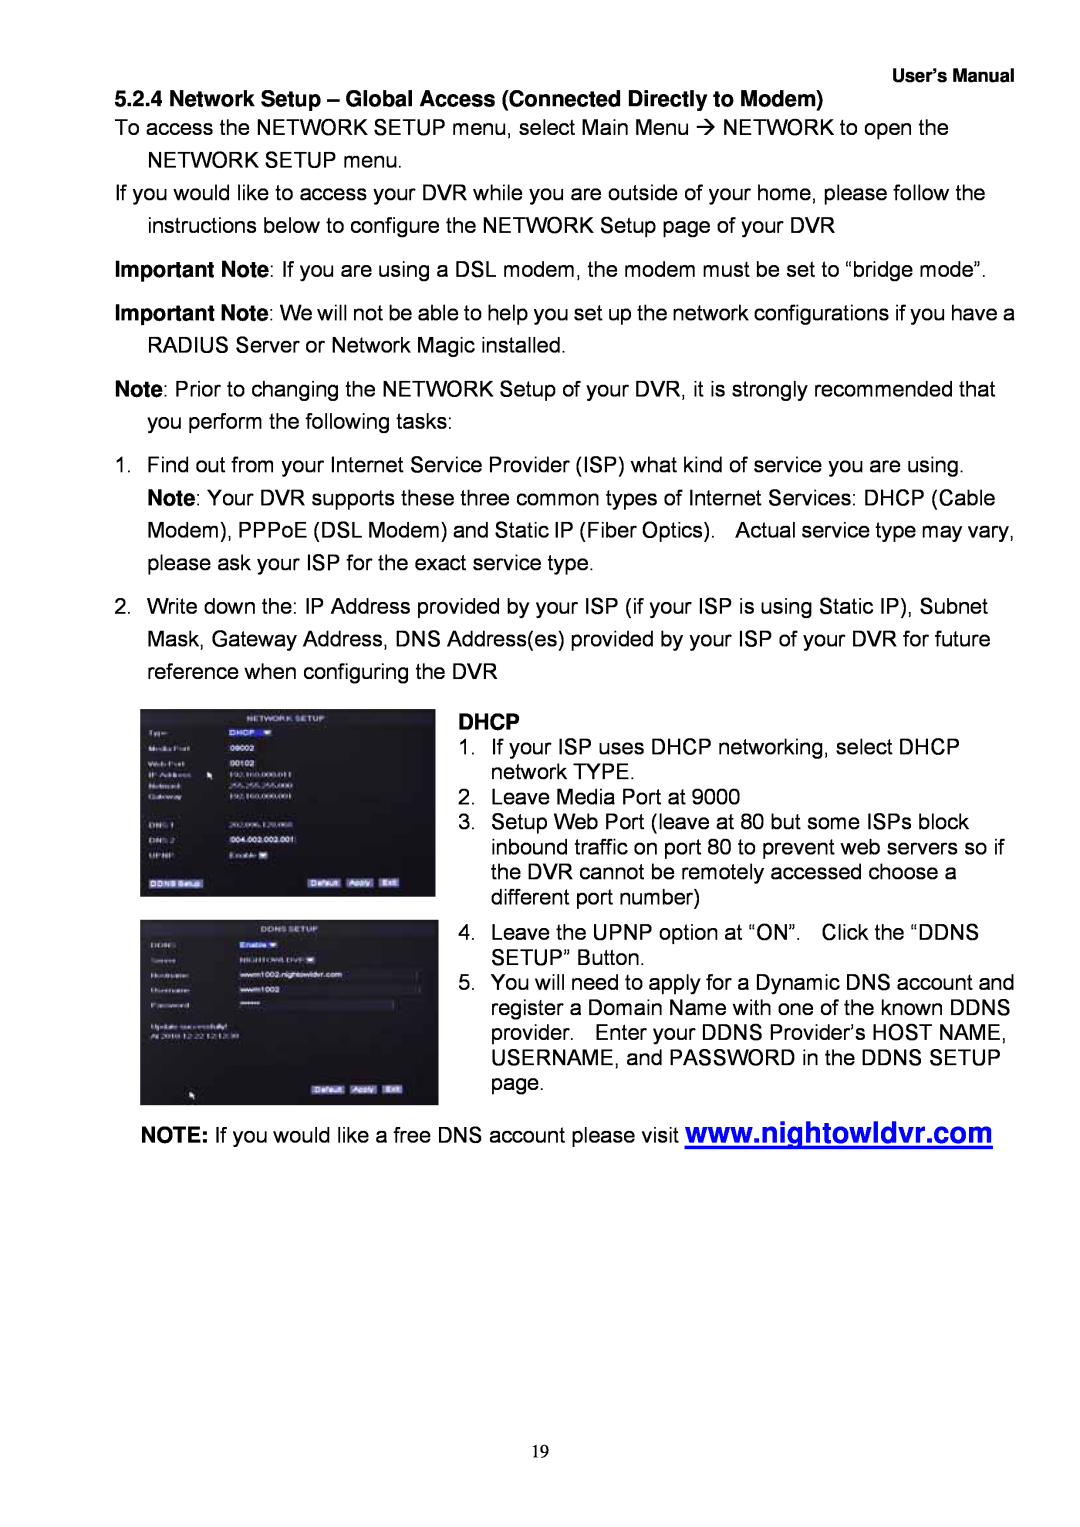
DHCP
1.If your ISP uses DHCP networking, select DHCP network TYPE.
2.Leave Media Port at 9000
3.Setup Web Port (leave at 80 but some ISPs block inbound traffic on port 80 to prevent web servers so if the DVR cannot be remotely accessed choose a different port number)
4.Leave the UPNP option at “ON”. Click the “DDNS SETUP” Button.
5.You will need to apply for a Dynamic DNS account and register a Domain Name with one of the known DDNS provider. Enter your DDNS Provider’s HOST NAME, USERNAME, and PASSWORD in the DDNS SETUP page.
NOTE: If you would like a free DNS account please visit www.nightowldvr.com
19