User’s Manual
5.2.1.2 Motion
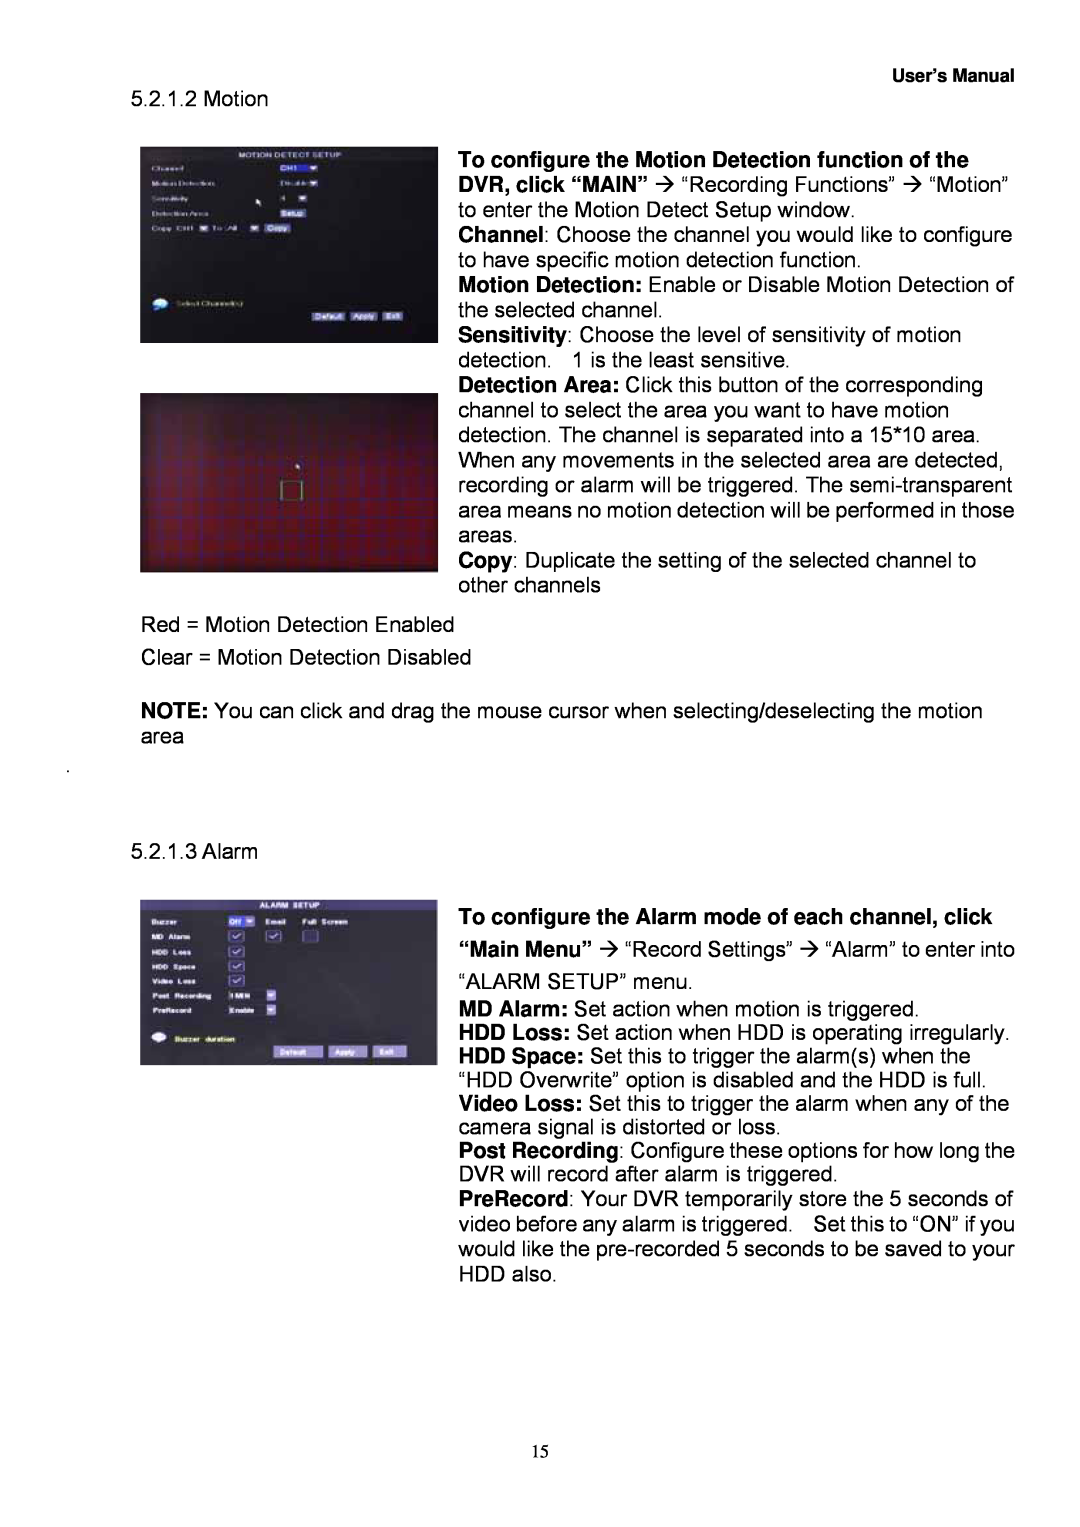
To configure the Motion Detection function of the DVR, click “MAIN” “Recording Functions” “Motion” to enter the Motion Detect Setup window.
Channel: Choose the channel you would like to configure to have specific motion detection function.
Motion Detection: Enable or Disable Motion Detection of the selected channel.
Sensitivity: Choose the level of sensitivity of motion detection. 1 is the least sensitive.
Detection Area: Click this button of the corresponding channel to select the area you want to have motion detection. The channel is separated into a 15*10 area. When any movements in the selected area are detected, recording or alarm will be triggered. The
Copy: Duplicate the setting of the selected channel to other channels
Red = Motion Detection Enabled
Clear = Motion Detection Disabled
NOTE: You can click and drag the mouse cursor when selecting/deselecting the motion area
.
5.2.1.3 Alarm
To configure the Alarm mode of each channel, click “Main Menu” “Record Settings” “Alarm” to enter into
“ALARM SETUP” menu.
MD Alarm: Set action when motion is triggered.
HDD Loss: Set action when HDD is operating irregularly.
HDD Space: Set this to trigger the alarm(s) when the “HDD Overwrite” option is disabled and the HDD is full. Video Loss: Set this to trigger the alarm when any of the camera signal is distorted or loss.
Post Recording: Configure these options for how long the DVR will record after alarm is triggered.
PreRecord: Your DVR temporarily store the 5 seconds of
video before any alarm is triggered. Set this to “ON” if you would like the
15