Communications by Web Browser (continued)
Access Mode Setup
This is the screen for changing the SSL settings.
step1. Select the item to be changed in the “Access Mode Setup.”
•Use SSL for Web Access:
Sets the level of the encoding function (SSL). “No SSL”: Does not use the encoding function. “Menus only”: Uses the encoding function for the menus only.
“Menus + Pictures”: Uses the encoding function for the menus and pictures.
•SSL Port Settings:
Sets the port number used for SSL communication.
•
Controls the band width of the communication.
![]() When you use SSL, the following message appears. Se- lect “Yes” and then continue the operation.
When you use SSL, the following message appears. Se- lect “Yes” and then continue the operation.
![]() When displaying live or playback picture while “Use SSL for Web Access” is set to “Menus only,” the following mes- sage appears. Select “Yes” to display the live or playback picture.
When displaying live or playback picture while “Use SSL for Web Access” is set to “Menus only,” the following mes- sage appears. Select “Yes” to display the live or playback picture.
In this case, the
step2. Set the desired setting in “New Settings” and then select “change” and
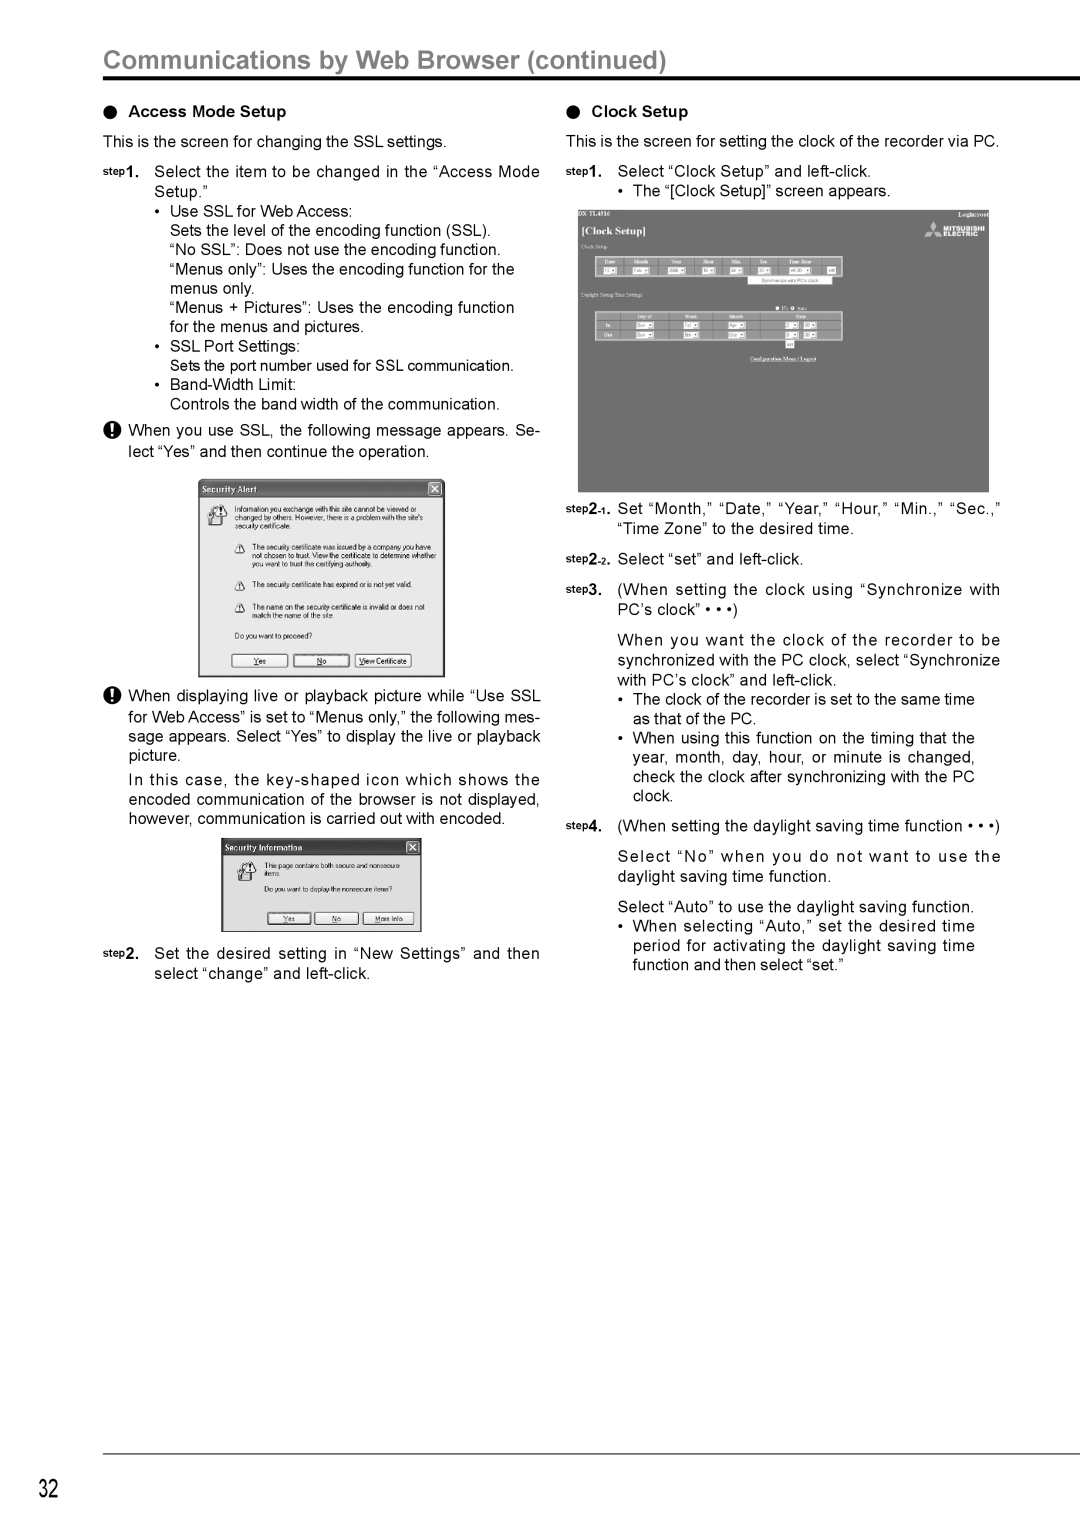
Clock Setup
This is the screen for setting the clock of the recorder via PC.
step1. Select “Clock Setup” and
• The “[Clock Setup]” screen appears.
step3. (When setting the clock using “Synchronize with PC’s clock” • • •)
When you want the clock of the recorder to be synchronized with the PC clock, select “Synchronize with PC’s clock” and
•The clock of the recorder is set to the same time as that of the PC.
•When using this function on the timing that the year, month, day, hour, or minute is changed, check the clock after synchronizing with the PC clock.
step4. (When setting the daylight saving time function • • •)
Select “No” when you do not want to use the daylight saving time function.
Select “Auto” to use the daylight saving function.
•When selecting “Auto,” set the desired time period for activating the daylight saving time function and then select “set.”
32