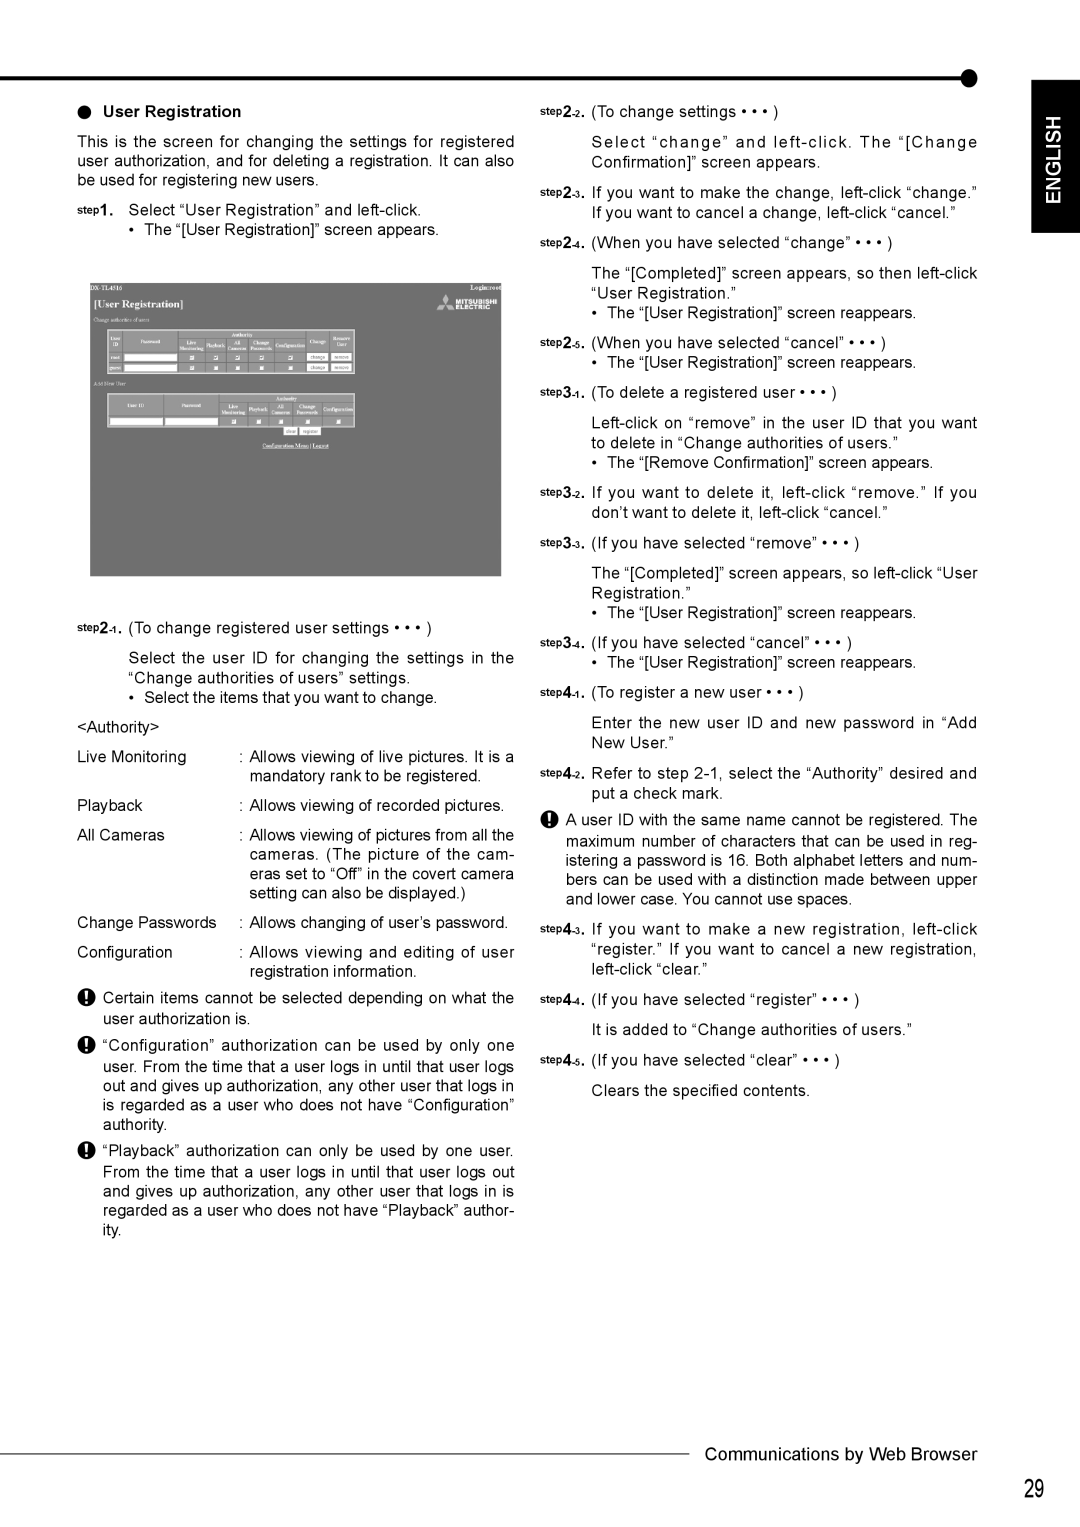
User Registration
This is the screen for changing the settings for registered user authorization, and for deleting a registration. It can also be used for registering new users.
step1. Select “User Registration” and
• The “[User Registration]” screen appears.
Select the user ID for changing the settings in the “Change authorities of users” settings.
•Select the items that you want to change. <Authority>
Live Monitoring | : Allows viewing of live pictures. It is a |
| mandatory rank to be registered. |
Playback | : Allows viewing of recorded pictures. |
All Cameras | : Allows viewing of pictures from all the |
| cameras. (The picture of the cam- |
| eras set to “Off” in the covert camera |
| setting can also be displayed.) |
Change Passwords | : Allows changing of user’s password. |
Configuration | : Allows viewing and editing of user |
| registration information. |
![]() Certain items cannot be selected depending on what the user authorization is.
Certain items cannot be selected depending on what the user authorization is.
![]() “Configuration” authorization can be used by only one user. From the time that a user logs in until that user logs out and gives up authorization, any other user that logs in is regarded as a user who does not have “Configuration” authority.
“Configuration” authorization can be used by only one user. From the time that a user logs in until that user logs out and gives up authorization, any other user that logs in is regarded as a user who does not have “Configuration” authority.
![]() “Playback” authorization can only be used by one user. From the time that a user logs in until that user logs out and gives up authorization, any other user that logs in is regarded as a user who does not have “Playback” author- ity.
“Playback” authorization can only be used by one user. From the time that a user logs in until that user logs out and gives up authorization, any other user that logs in is regarded as a user who does not have “Playback” author- ity.
Select “change” and
The “[Completed]” screen appears, so then
• The “[User Registration]” screen reappears.
•The “[User Registration]” screen reappears.
• The “[Remove Confirmation]” screen appears.
The “[Completed]” screen appears, so
• The “[User Registration]” screen reappears.
•The “[User Registration]” screen reappears.
Enter the new user ID and new password in “Add New User.”
![]() A user ID with the same name cannot be registered. The maximum number of characters that can be used in reg- istering a password is 16. Both alphabet letters and num- bers can be used with a distinction made between upper and lower case. You cannot use spaces.
A user ID with the same name cannot be registered. The maximum number of characters that can be used in reg- istering a password is 16. Both alphabet letters and num- bers can be used with a distinction made between upper and lower case. You cannot use spaces.
It is added to “Change authorities of users.”
Clears the specified contents.
ENGLISH
Communications by Web Browser
29