1
3
6
15
416
7 | 18 | 5 |
|
| 19 |
|
| 11 |
8
10 9
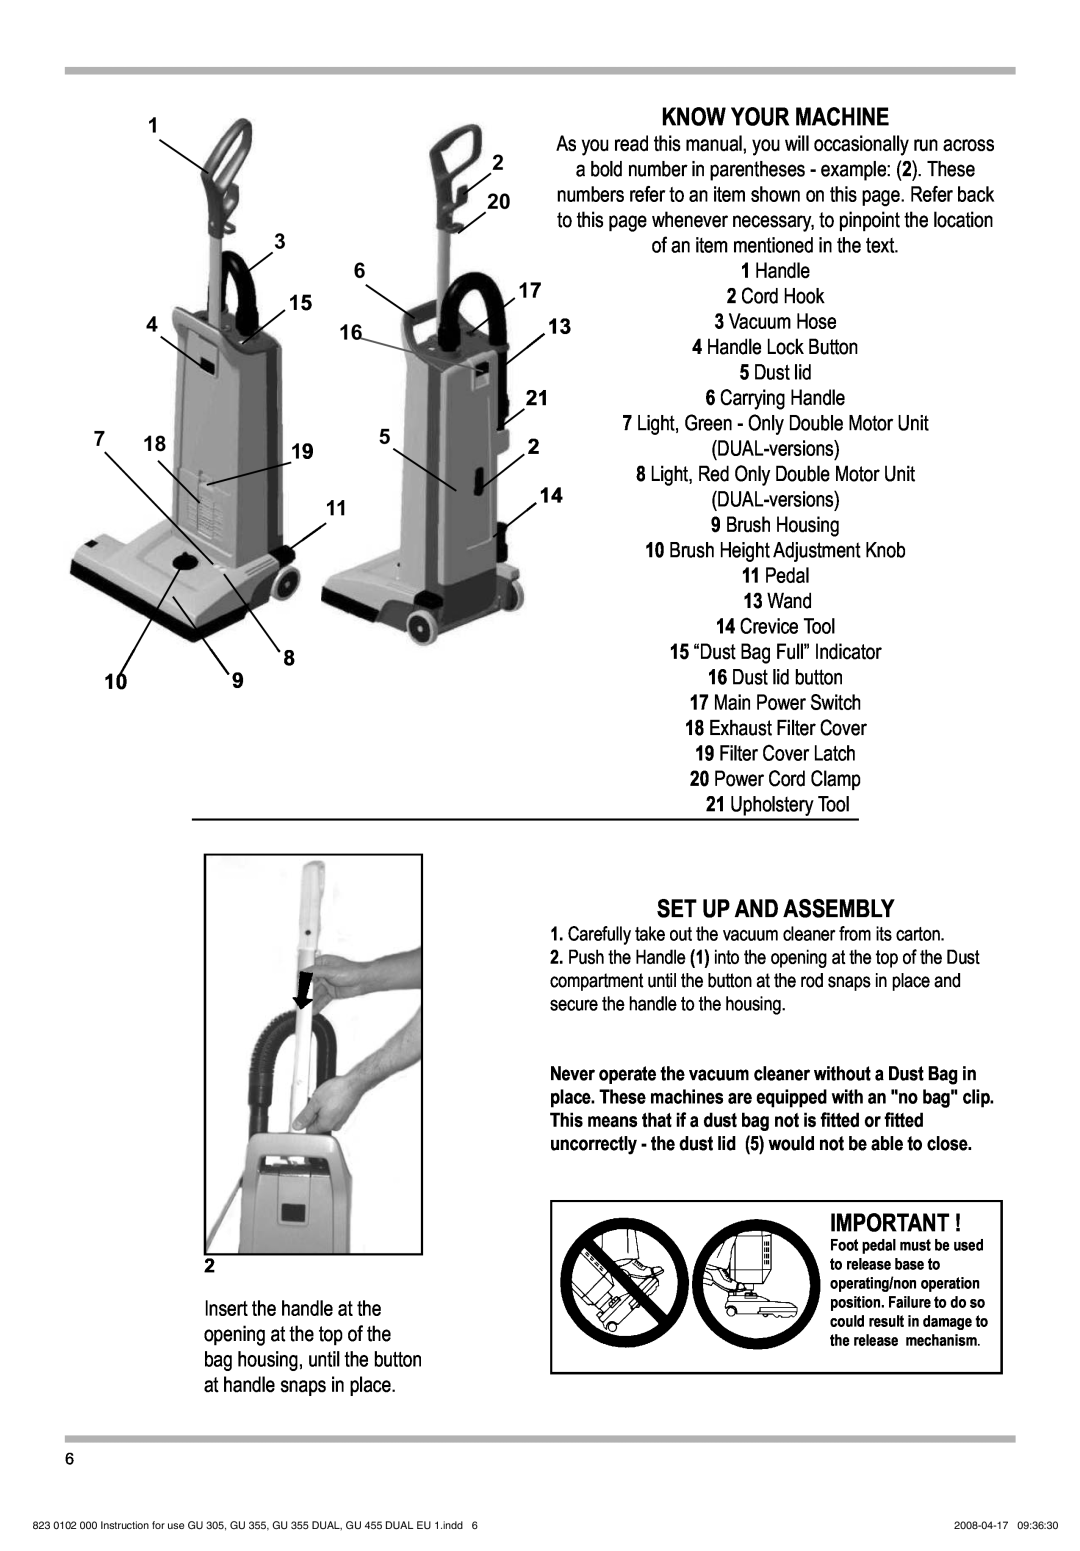
| KNOW YOUR MACHINE |
2 | As you read this manual, you will occasionally run across |
a bold number in parentheses - example: (2). These |
20numbers refer to an item shown on this page. Refer back to this page whenever necessary, to pinpoint the location of an item mentioned in the text.
17 | 1 Handle |
2 Cord Hook | |
13 | 3 Vacuum Hose |
| 4 Handle Lock Button |
| 5 Dust lid |
21 | 6 Carrying Handle |
| 7 Light, Green - Only Double Motor Unit |
2 | |
14 | 8 Light, Red Only Double Motor Unit |
| 9 Brush Housing |
10 Brush Height Adjustment Knob
11 Pedal
13 Wand
14 Crevice Tool
15 “Dust Bag Full” Indicator
16 Dust lid button
17 Main Power Switch
18 Exhaust Filter Cover
19 Filter Cover Latch
20 Power Cord Clamp
21 Upholstery Tool
2
Insert the handle at the opening at the top of the bag housing, until the button at handle snaps in place.
SET UP AND ASSEMBLY
1.Carefully take out the vacuum cleaner from its carton.
2.Push the Handle (1) into the opening at the top of the Dust compartment until the button at the rod snaps in place and secure the handle to the housing.
Never operate the vacuum cleaner without a Dust Bag in place. These machines are equipped with an "no bag" clip. This means that if a dust bag not is fitted or fitted uncorrectly - the dust lid (5) would not be able to close.
IMPORTANT !
Foot pedal must be used to release base to operating/non operation position. Failure to do so could result in damage to ![]() the release mechanism.
the release mechanism.
6
823 0102 000 Instruction for use GU 305, GU 355, GU 355 DUAL, GU 455 DUAL EU 1.indd 6 |