Pulley Alignment
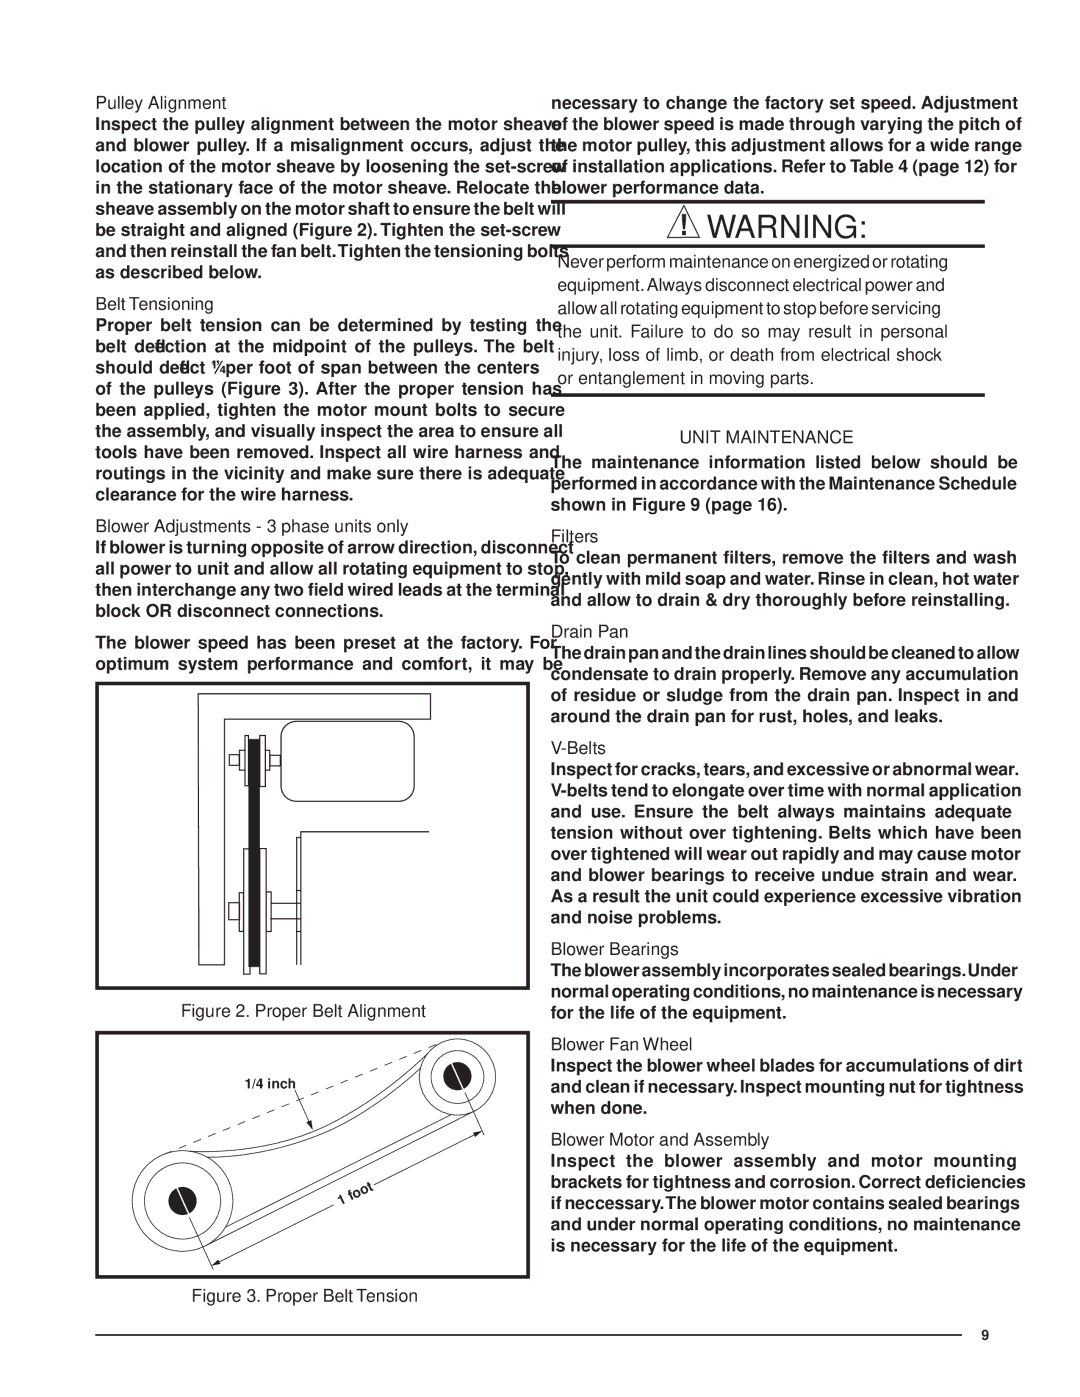
Inspect the pulley alignment between the motor sheave and blower pulley. If a misalignment occurs, adjust the location of the motor sheave by loosening the
Belt Tensioning
Proper belt tension can be determined by testing the belt defl ection at the midpoint of the pulleys. The belt should defl ect ¼” per foot of span between the centers of the pulleys (Figure 3). After the proper tension has been applied, tighten the motor mount bolts to secure the assembly, and visually inspect the area to ensure all tools have been removed. Inspect all wire harness and routings in the vicinity and make sure there is adequate clearance for the wire harness.
Blower Adjustments - 3 phase units only
If blower is turning opposite of arrow direction, disconnect all power to unit and allow all rotating equipment to stop, then interchange any two fi eld wired leads at the terminal block OR disconnect connections.
The blower speed has been preset at the factory. For optimum system performance and comfort, it may be
Figure 2. Proper Belt Alignment
1/4 inch
Figure 3. Proper Belt Tension
necessary to change the factory set speed. Adjustment of the blower speed is made through varying the pitch of the motor pulley, this adjustment allows for a wide range of installation applications. Refer to Table 4 (page 12) for blower performance data.
![]() WARNING:
WARNING:
Never perform maintenance on energized or rotating equipment. Always disconnect electrical power and allow all rotating equipment to stop before servicing the unit. Failure to do so may result in personal injury, loss of limb, or death from electrical shock or entanglement in moving parts.
UNIT MAINTENANCE
The maintenance information listed below should be performed in accordance with the Maintenance Schedule shown in Figure 9 (page 16).
Filters
To clean permanent fi lters, remove the fi lters and wash gently with mild soap and water. Rinse in clean, hot water and allow to drain & dry thoroughly before reinstalling.
Drain Pan
The drain pan and the drain lines should be cleaned to allow condensate to drain properly. Remove any accumulation of residue or sludge from the drain pan. Inspect in and around the drain pan for rust, holes, and leaks.
V-Belts
Inspect for cracks, tears, and excessive or abnormal wear.
Blower Bearings
The blower assembly incorporates sealed bearings.Under normal operating conditions, no maintenance is necessary for the life of the equipment.
Blower Fan Wheel
Inspect the blower wheel blades for accumulations of dirt and clean if necessary. Inspect mounting nut for tightness when done.
Blower Motor and Assembly
Inspect the blower assembly and motor mounting brackets for tightness and corrosion. Correct defi ciencies if neccessary.The blower motor contains sealed bearings and under normal operating conditions, no maintenance is necessary for the life of the equipment.
9
