If you are using a multi- frequency monitor, you may need
aspecial
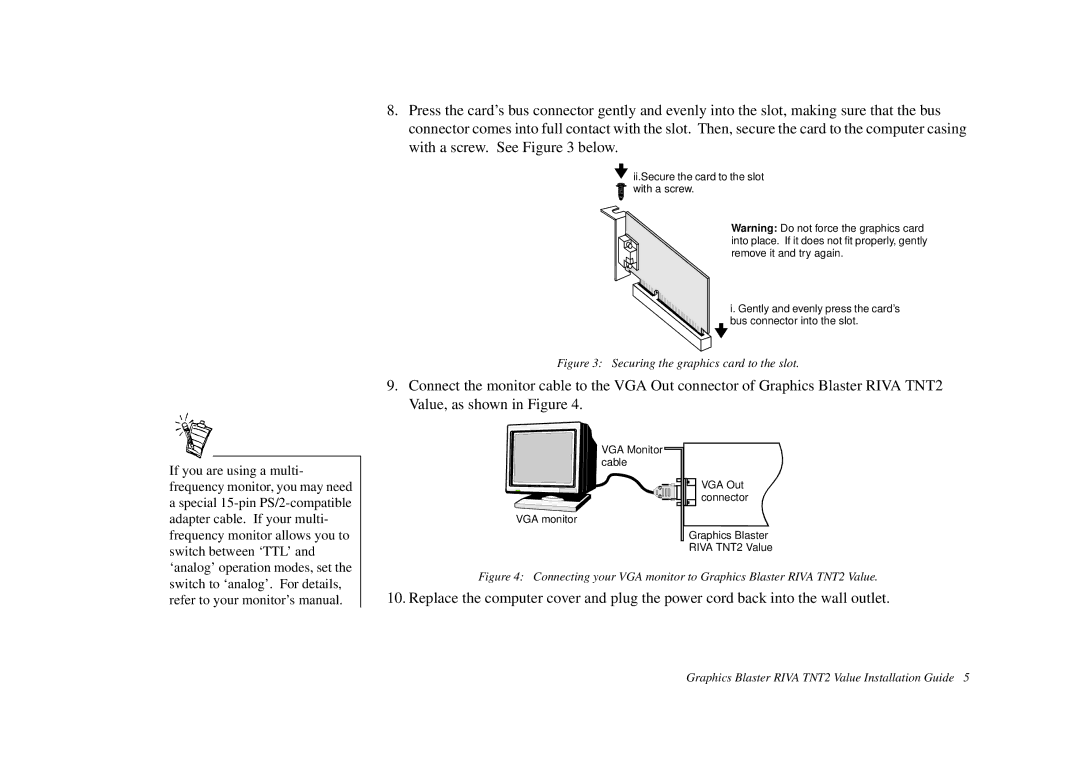
8.Press the card’s bus connector gently and evenly into the slot, making sure that the bus connector comes into full contact with the slot. Then, secure the card to the computer casing with a screw. See Figure 3 below.
![]() ii.Secure the card to the slot
ii.Secure the card to the slot ![]()
![]() with a screw.
with a screw.
Warning: Do not force the graphics card into place. If it does not fit properly, gently remove it and try again.
i. Gently and evenly press the card’s bus connector into the slot.
Figure 3: Securing the graphics card to the slot.
9.Connect the monitor cable to the VGA Out connector of Graphics Blaster RIVA TNT2 Value, as shown in Figure 4.
VGA Monitor ![]() cable
cable
![]()
![]() VGA Out connector
VGA Out connector
VGA monitor
Graphics Blaster
RIVA TNT2 Value
Figure 4: Connecting your VGA monitor to Graphics Blaster RIVA TNT2 Value.
10. Replace the computer cover and plug the power cord back into the wall outlet.
Graphics Blaster RIVA TNT2 Value Installation Guide 5