2.0 INSTALLING THE DISPLAY
DISPLAY INSTALLATION
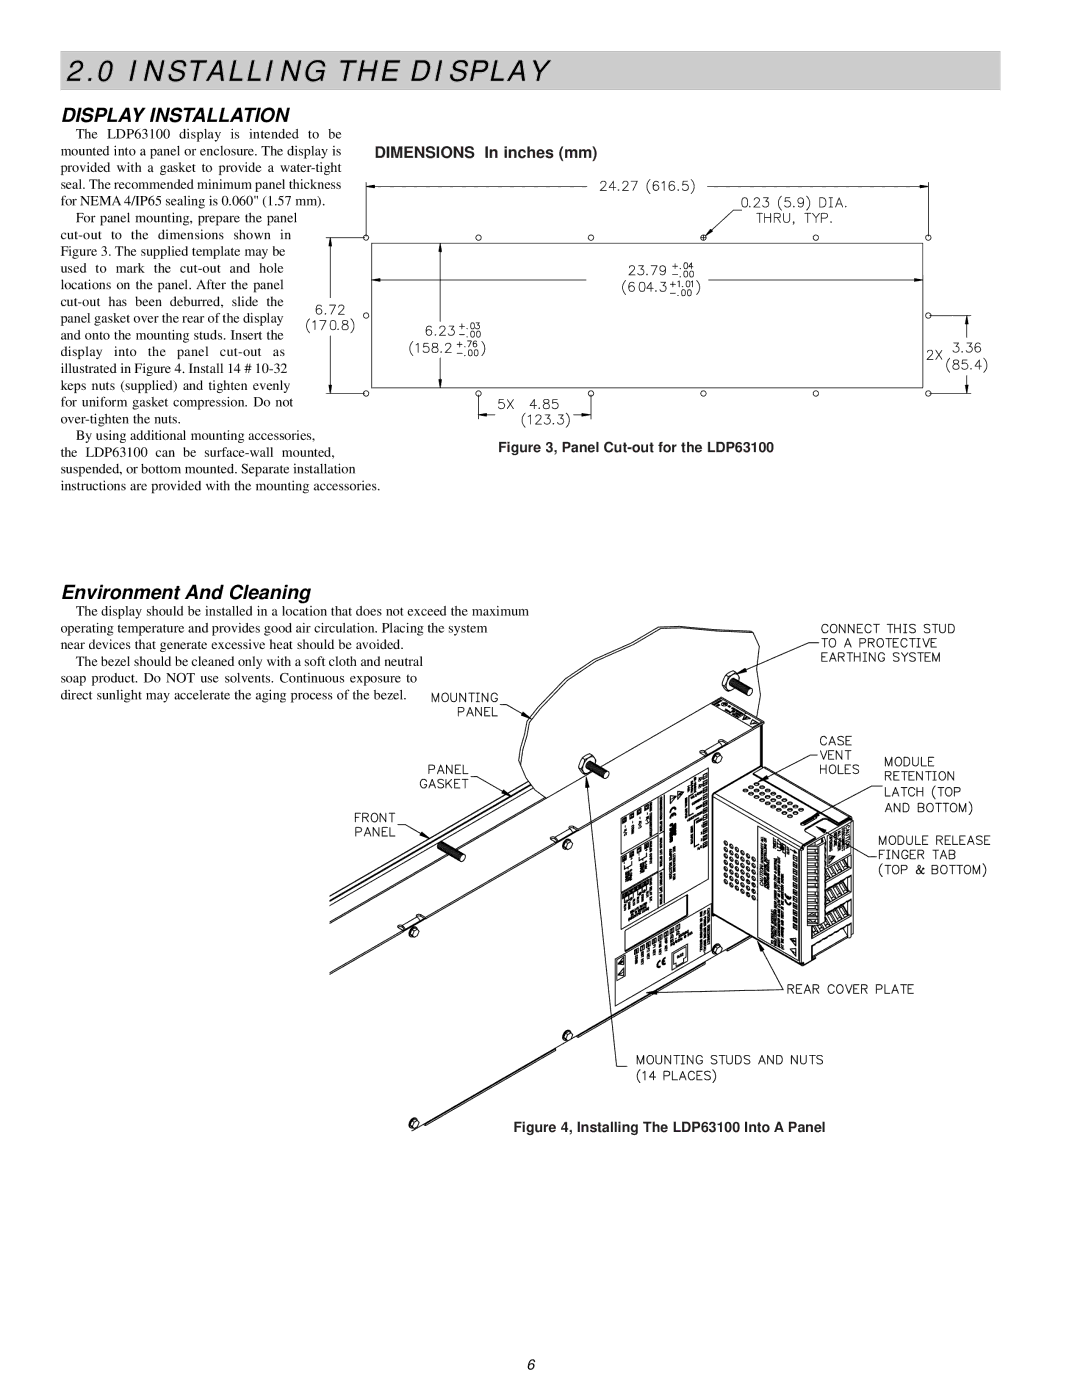
The LDP63100 display is intended to be |
|
mounted into a panel or enclosure. The display is | DIMENSIONS In inches (mm) |
provided with a gasket to provide a |
|
seal. The recommended minimum panel thickness |
|
for NEMA 4/IP65 sealing is 0.060" (1.57 mm). |
|
For panel mounting, prepare the panel |
|
| |
Figure 3. The supplied template may be |
|
used to mark the |
|
locations on the panel. After the panel |
|
|
|
panel gasket over the rear of the display |
|
and onto the mounting studs. Insert the |
|
display into the panel |
|
illustrated in Figure 4. Install 14 # |
|
keps nuts (supplied) and tighten evenly |
|
for uniform gasket compression. Do not |
|
|
|
By using additional mounting accessories, | Figure 3, Panel |
the LDP63100 can be | |
suspended, or bottom mounted. Separate installation |
|
instructions are provided with the mounting accessories.
Environment And Cleaning
The display should be installed in a location that does not exceed the maximum operating temperature and provides good air circulation. Placing the system
near devices that generate excessive heat should be avoided. The bezel should be cleaned only with a soft cloth and neutral
soap product. Do NOT use solvents. Continuous exposure to direct sunlight may accelerate the aging process of the bezel.
Figure 4, Installing The LDP63100 Into A Panel
6