Connecting the DV-L55—Continued
Basic Setup
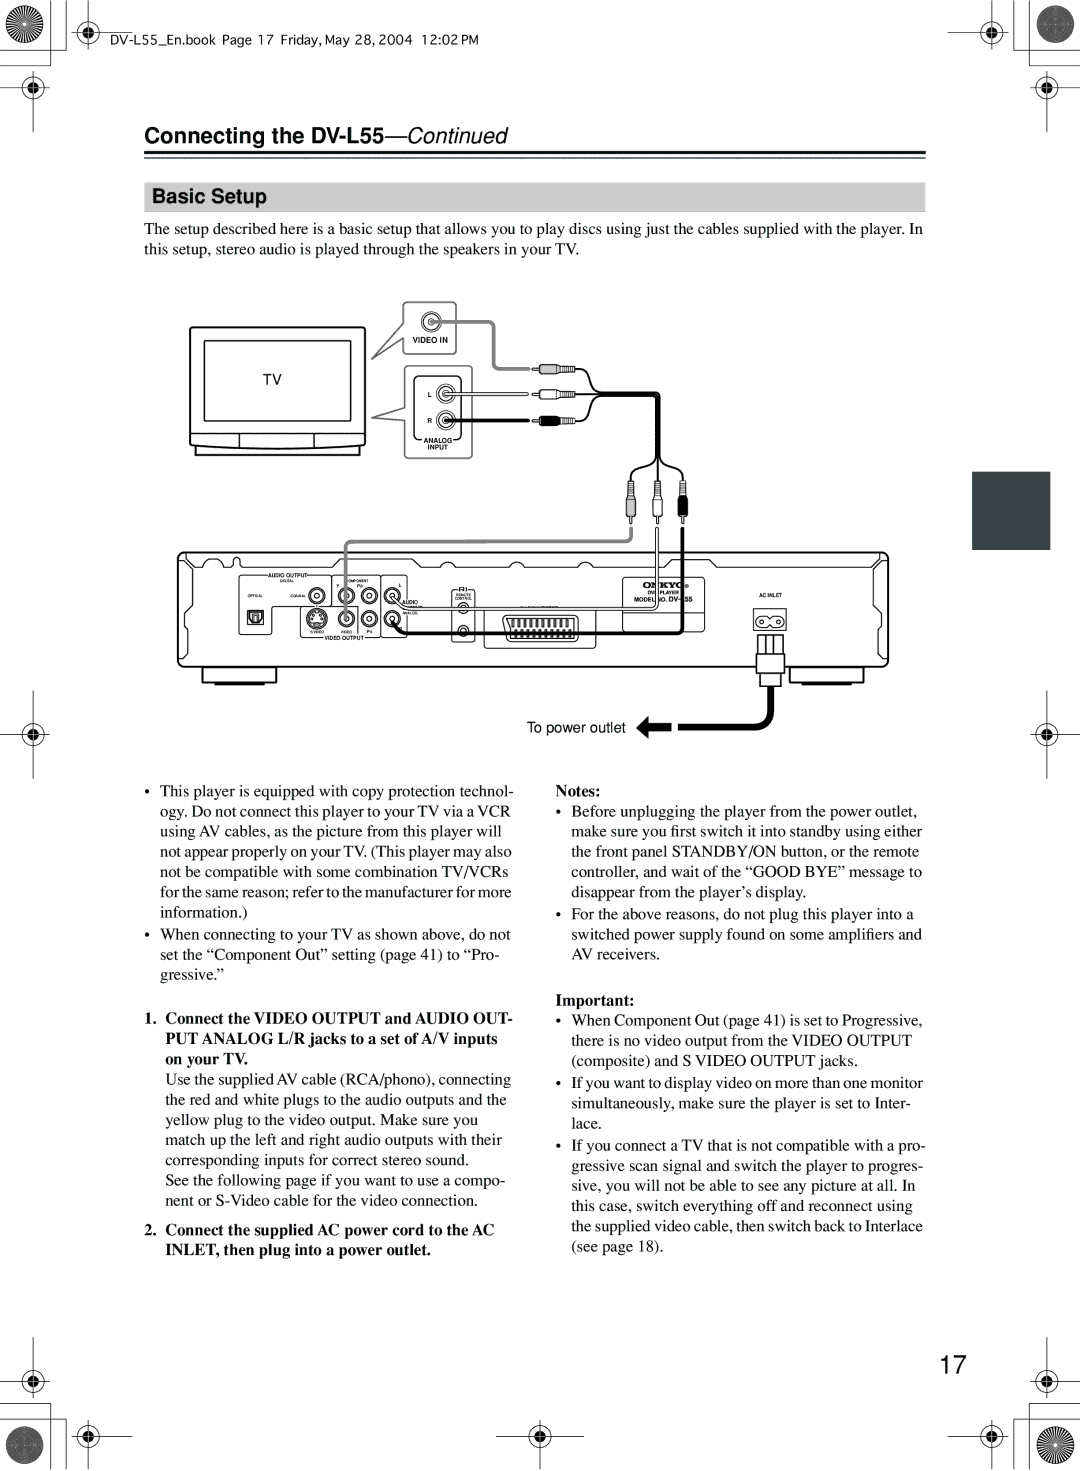
The setup described here is a basic setup that allows you to play discs using just the cables supplied with the player. In this setup, stereo audio is played through the speakers in your TV.
VIDEO IN
TV
L
R
ANALOG
INPUT
AUDIO OUTPUT
| DIGITAL | COMPONENT |
| |
| Y | PB | L |
|
OPTICAL | COAXIAL |
| REMOTE | AC INLET |
|
|
| CONTROL |
|
|
|
| AUDIO |
|
|
|
| OUTPUT | AV CONNECTOR |
|
|
| ANALOG |
|
| S VIDEO | VIDEO | R |
|
| PR |
| ||
VIDEO OUTPUT
To power outlet
•This player is equipped with copy protection technol- ogy. Do not connect this player to your TV via a VCR using AV cables, as the picture from this player will not appear properly on your TV. (This player may also not be compatible with some combination TV/VCRs for the same reason; refer to the manufacturer for more information.)
•When connecting to your TV as shown above, do not set the “Component Out” setting (page 41) to “Pro- gressive.”
1.Connect the VIDEO OUTPUT and AUDIO OUT- PUT ANALOG L/R jacks to a set of A/V inputs on your TV.
Use the supplied AV cable (RCA/phono), connecting the red and white plugs to the audio outputs and the yellow plug to the video output. Make sure you match up the left and right audio outputs with their corresponding inputs for correct stereo sound.
See the following page if you want to use a compo- nent or
2.Connect the supplied AC power cord to the AC INLET, then plug into a power outlet.
Notes:
•Before unplugging the player from the power outlet, make sure you first switch it into standby using either the front panel STANDBY/ON button, or the remote controller, and wait of the “GOOD BYE” message to disappear from the player’s display.
•For the above reasons, do not plug this player into a switched power supply found on some amplifiers and AV receivers.
Important:
•When Component Out (page 41) is set to Progressive, there is no video output from the VIDEO OUTPUT (composite) and S VIDEO OUTPUT jacks.
•If you want to display video on more than one monitor simultaneously, make sure the player is set to Inter- lace.
•If you connect a TV that is not compatible with a pro- gressive scan signal and switch the player to progres- sive, you will not be able to see any picture at all. In this case, switch everything off and reconnect using the supplied video cable, then switch back to Interlace (see page 18).
17