Appendices
Ceiling Mount Installation
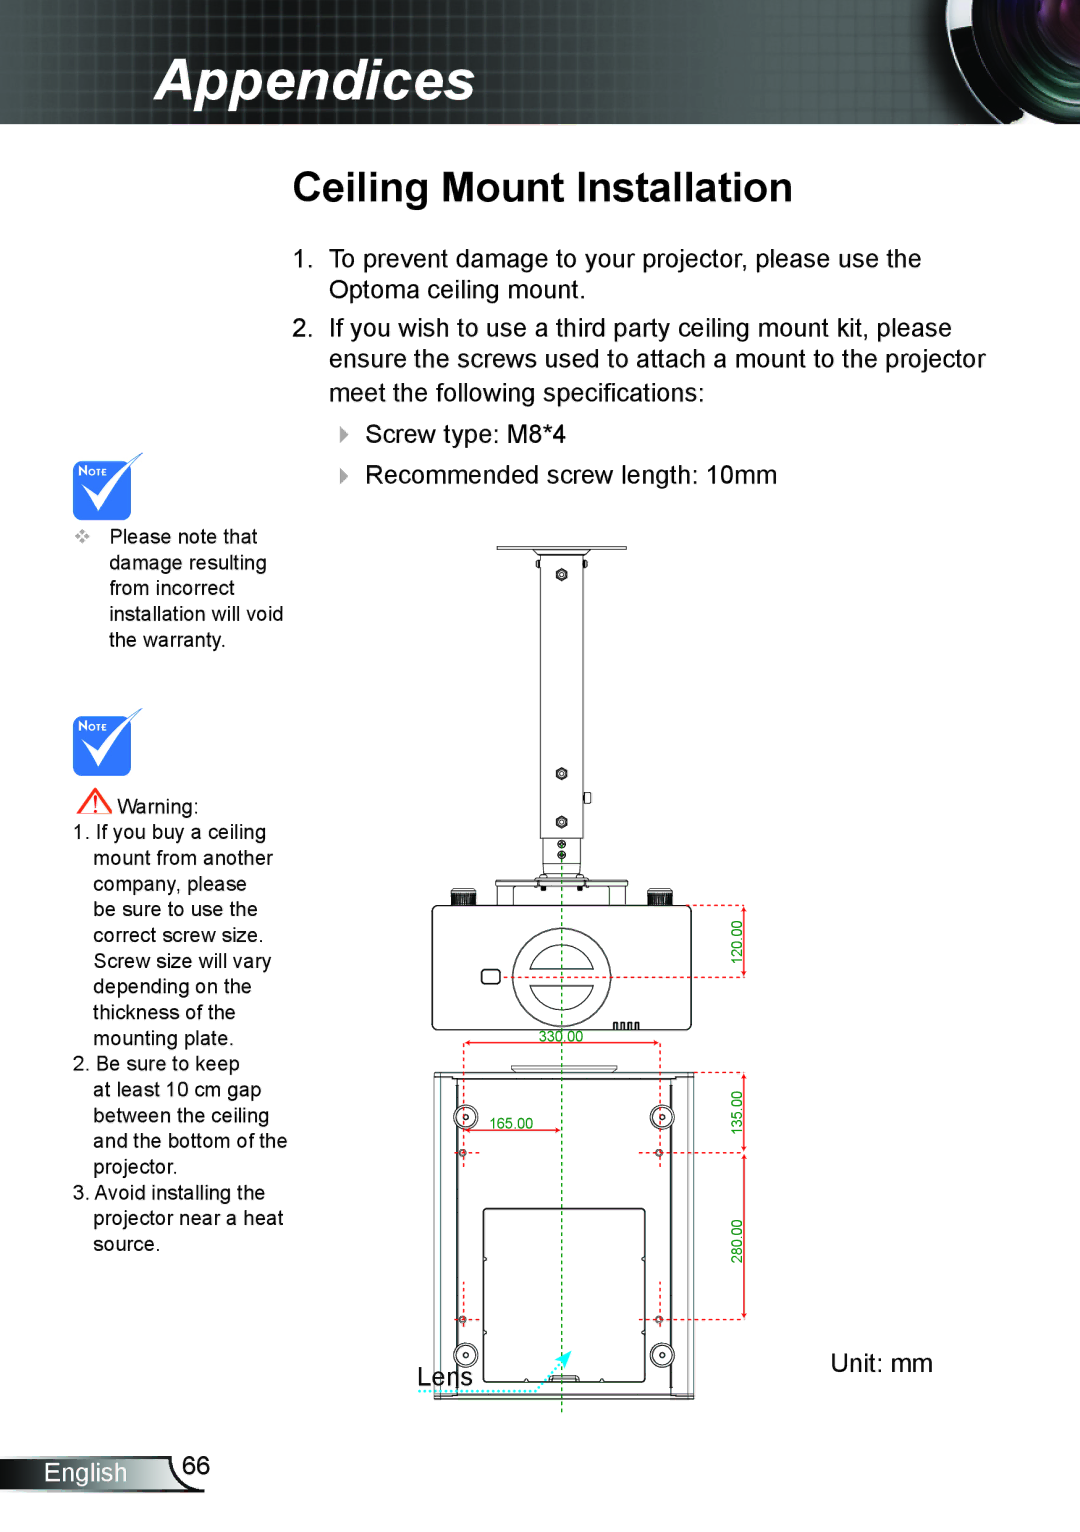
1.To prevent damage to your projector, please use the Optoma ceiling mount.
2.If you wish to use a third party ceiling mount kit, please ensure the screws used to attach a mount to the projector meet the following specifications:
Screw type: M8*4
Recommended screw length: 10mm
Please note that
damage resulting from incorrect installation will void the warranty.
Warning: |
|
|
1. If you buy a ceiling |
|
|
mount from another |
|
|
company, please |
|
|
be sure to use the |
| 120.00 |
correct screw size. |
| |
|
| |
Screw size will vary |
|
|
depending on the |
|
|
thickness of the |
|
|
mounting plate. |
| 330.00 |
2. Be sure to keep |
|
|
at least 10 cm gap |
| 135.00 |
between the ceiling | 165.00 | |
and the bottom of the |
|
|
projector. |
|
|
3. Avoid installing the |
|
|
projector near a heat |
| 280.00 |
source. |
| |
|
| |
| Lens | Unit: mm |
|
|
English 66