3.Slide the Mode Switch to the desired setting.
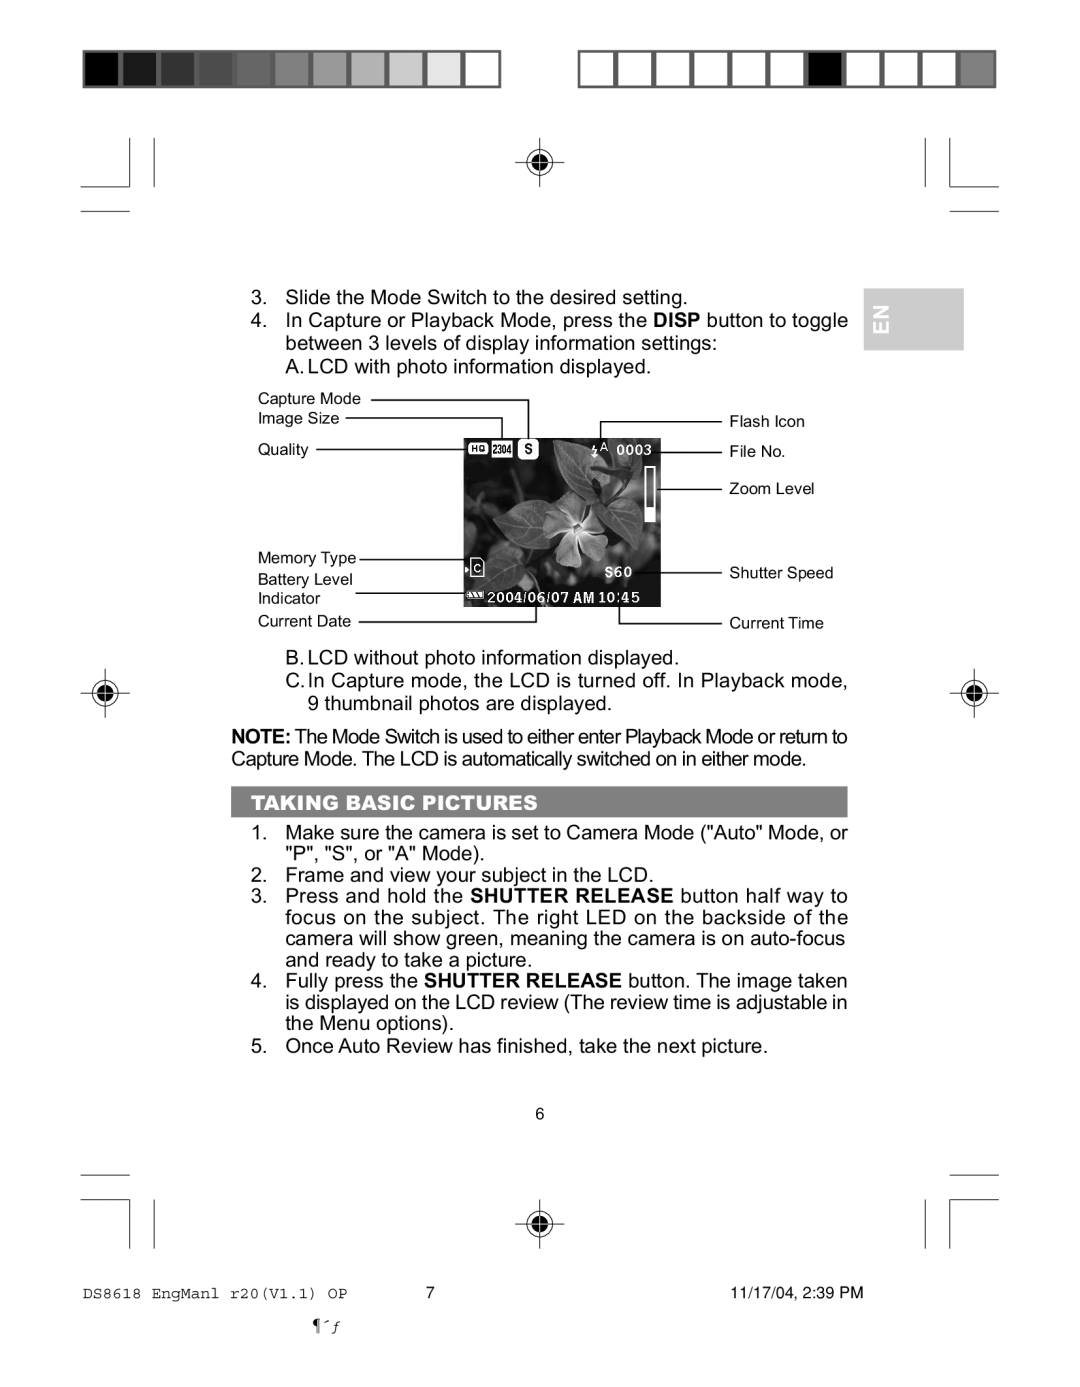
4.In Capture or Playback Mode, press the DISP button to toggle between 3 levels of display information settings:
A. LCD with photo information displayed.
EN
Capture Mode Image Size
Quality
Memory Type
Battery Level
Indicator
Current Date
Flash Icon
File No.
Zoom Level
Shutter Speed
Current Time
B. LCD without photo information displayed.
C.In Capture mode, the LCD is turned off. In Playback mode, 9 thumbnail photos are displayed.
NOTE: The Mode Switch is used to either enter Playback Mode or return to Capture Mode. The LCD is automatically switched on in either mode.
TAKING BASIC PICTURES
1.Make sure the camera is set to Camera Mode ("Auto" Mode, or "P", "S", or "A" Mode).
2.Frame and view your subject in the LCD.
3.Press and hold the SHUTTER RELEASE button half way to focus on the subject. The right LED on the backside of the camera will show green, meaning the camera is on
4.Fully press the SHUTTER RELEASE button. The image taken is displayed on the LCD review (The review time is adjustable in the Menu options).
5.Once Auto Review has finished, take the next picture.
6
DS8618 EngManl r20(V1.1) OP | 7 | 11/17/04, 2:39 PM |
¶´ƒ
