Adjustment in D-Sub/DVI Mode
With working in
Adjusting Image Horizontal Size
1 Press MENU to display the menu main page.
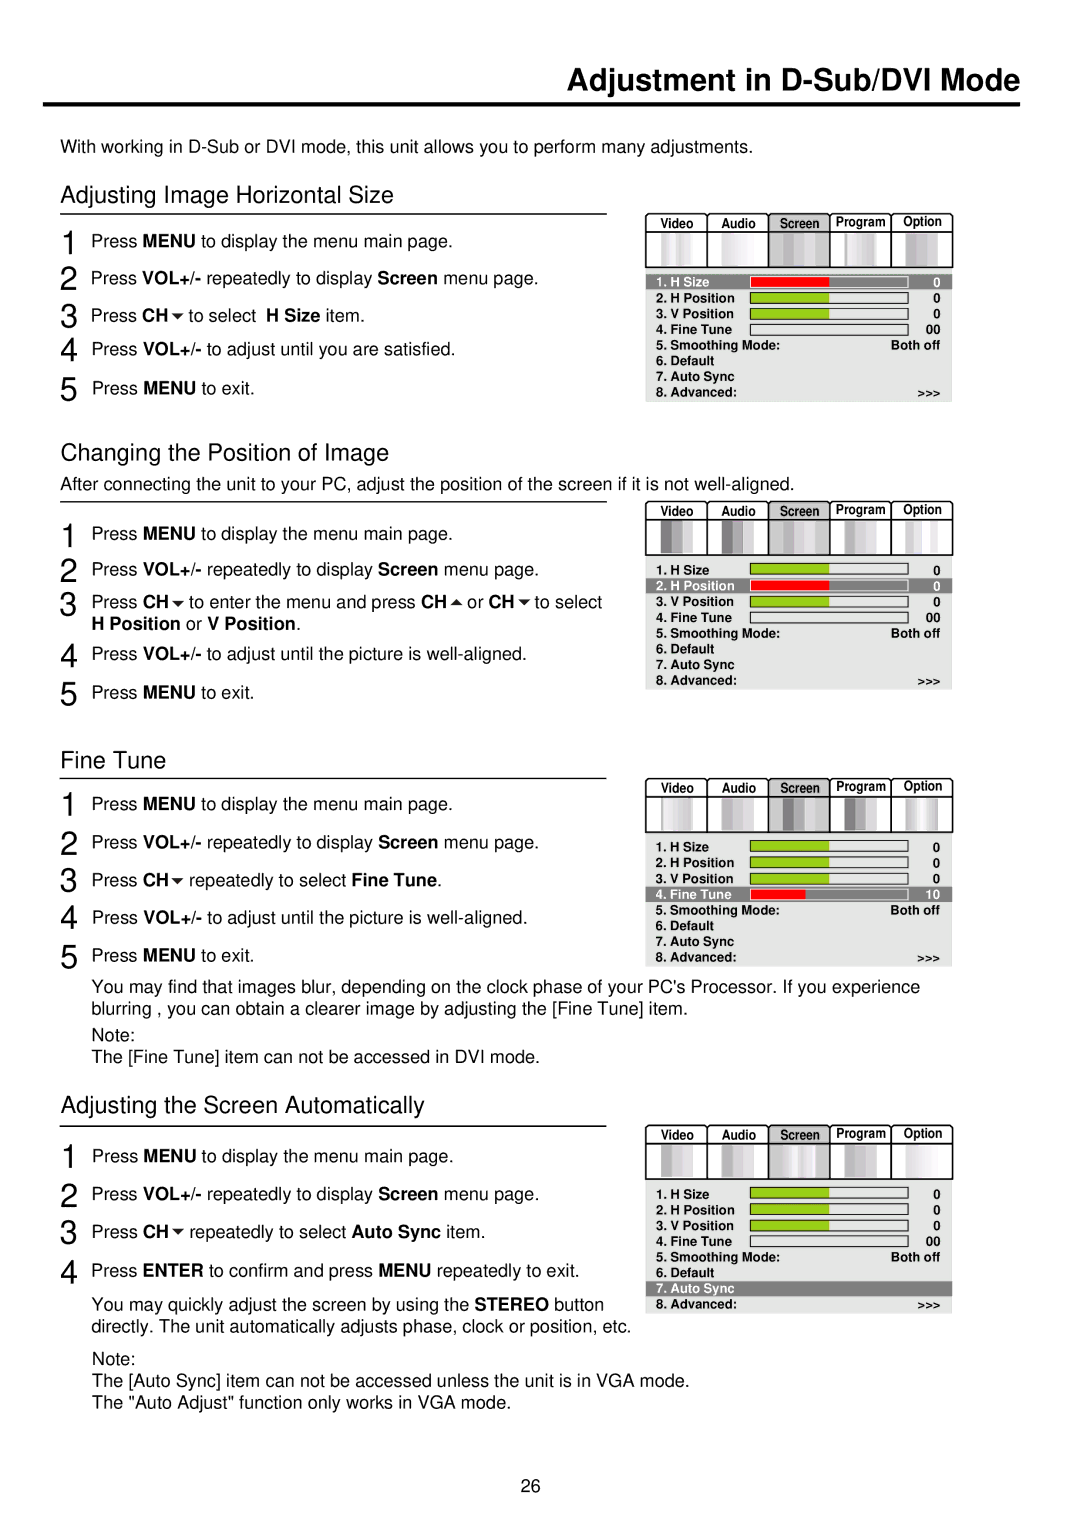
2 Press VOL+/- repeatedly to display Screen menu page. 3 Press CH![]() to select H Size item.
to select H Size item.
4 Press VOL+/- to adjust until you are satisfied.
5 Press MENU to exit.
Changing the Position of Image
Video | Audio | Screen Program Option | |||||||
|
|
|
|
|
|
|
|
|
|
1. | H Size |
|
|
| 0 | ||||
2. | H Position |
|
| 0 | |||||
3. | V Position |
|
| 0 | |||||
|
| ||||||||
4. | Fine Tune |
|
| 00 | |||||
|
| ||||||||
5. Smoothing Mode: |
|
| Both off | ||||||
6.Default
7.Auto Sync
8.Advanced:>>>
After connecting the unit to your PC, adjust the position of the screen if it is not
1 | Press MENU to display the menu main page. |
2 | Press VOL+/- repeatedly to display Screen menu page. |
3 | Press CH to enter the menu and press CH or CH to select |
4 | H Position or V Position. |
Press VOL+/- to adjust until the picture is | |
5 | Press MENU to exit. |
Fine Tune
1 Press MENU to display the menu main page.
2 Press VOL+/- repeatedly to display Screen menu page. 3 Press CH![]() repeatedly to select Fine Tune.
repeatedly to select Fine Tune.
4 Press VOL+/- to adjust until the picture is
Video | Audio | Screen | Program Option | ||||||
|
|
|
|
|
|
|
|
|
|
1. | H Size |
|
|
|
|
| 0 | ||
|
|
|
|
| |||||
2. | H Position |
| 0 | ||||||
3. | V Position |
|
|
| 0 | ||||
4. | Fine Tune |
|
|
| 00 | ||||
|
|
| |||||||
5. Smoothing Mode: |
|
| Both off | ||||||
6. | Default |
|
|
|
|
|
|
| |
7. | Auto Sync |
| >>> | ||||||
8. | Advanced: |
| |||||||
Video | Audio | Screen Program Option | |||||||
|
|
|
|
|
|
|
|
|
|
1. | H Size |
|
|
|
| 0 | |||
|
|
|
| ||||||
|
|
|
|
|
| ||||
2. | H Position |
|
| 0 | |||||
3. | V Position |
|
|
|
|
| 0 | ||
|
| ||||||||
4. | Fine Tune | 10 | |||||||
5. Smoothing Mode: |
|
| Both off | ||||||
6.Default
7.Auto Sync
8.Advanced:>>>
You may find that images blur, depending on the clock phase of your PC's Processor. If you experience blurring , you can obtain a clearer image by adjusting the [Fine Tune] item.
Note:
The [Fine Tune] item can not be accessed in DVI mode.
Adjusting the Screen Automatically
1 Press MENU to display the menu main page.
2 Press VOL+/- repeatedly to display Screen menu page.
3 Press CH![]() repeatedly to select Auto Sync item.
repeatedly to select Auto Sync item.
4 Press ENTER to confirm and press MENU repeatedly to exit. You may quickly adjust the screen by using the STEREO button directly. The unit automatically adjusts phase, clock or position, etc.
Video | Audio | Screen Program Option | |||||||
|
|
|
|
|
|
|
|
|
|
1. | H Size |
|
|
|
| 0 | |||
|
|
|
| ||||||
|
|
|
|
|
| ||||
2. | H Position |
|
| 0 | |||||
3. | V Position |
|
|
|
|
| 0 | ||
|
| ||||||||
4. | Fine Tune |
|
| 00 | |||||
|
| ||||||||
5. Smoothing Mode: |
|
| Both off | ||||||
6.Default
7.Auto Sync
8.Advanced:>>>
Note:
The [Auto Sync] item can not be accessed unless the unit is in VGA mode. The "Auto Adjust" function only works in VGA mode.
26
