
AW-RP400, AW-RL400, AW-RC400, AW-PH400 specifications
The Panasonic AW-RC400, AW-PH400, AW-RL400, and AW-RP400 are advanced broadcast and production tools designed to streamline the process of remote control and automation in various environments, including television studios, houses of worship, and live event venues. Together, these devices enhance flexibility, precision, and usability in professional video production.The AW-RC400 is a sophisticated remote camera controller that enables users to manage multiple camera settings in a seamless manner. Its intuitive interface allows operators to control various parameters, including pan, tilt, zoom, focus, and iris adjustments, ensuring that every shot is perfectly framed and focused. The RC400 also supports a range of camera protocols, making it compatible with various Panasonic models and other manufacturers' cameras. With its upgraded multi-camera control capabilities, it can handle up to 100 cameras, making it ideal for large-scale productions.
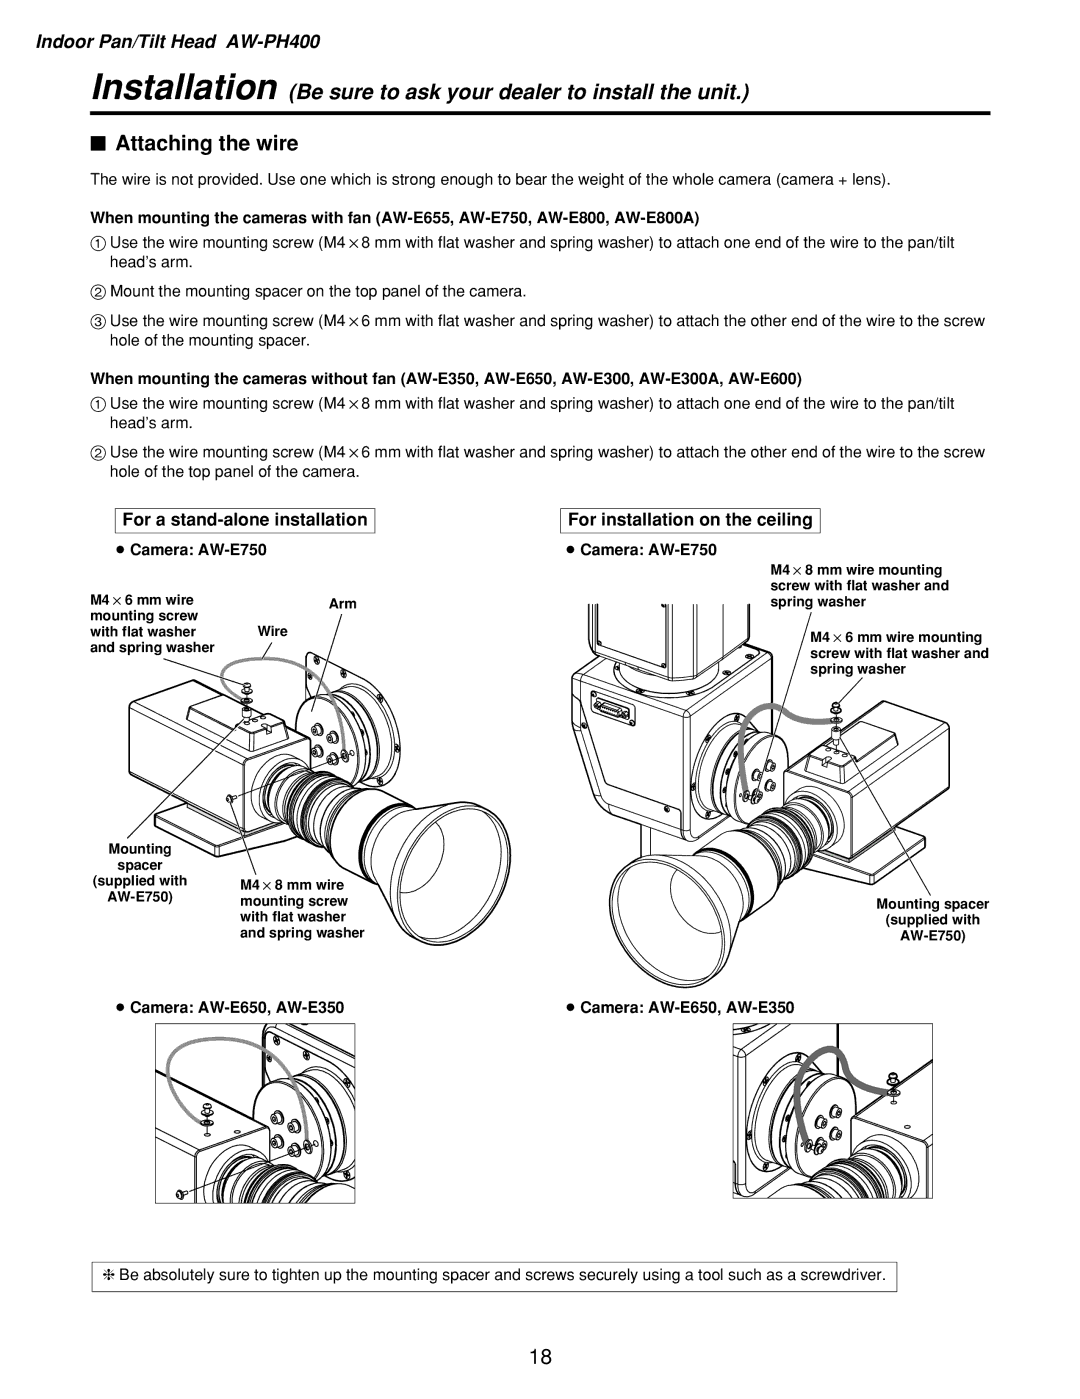
The AW-PH400 is a highly functional pan and tilt head designed for efficient camera movement. It is engineered for high stability and precision, offering smooth and quick positioning of the camera during live events or recorded sessions. Its robust construction ensures durability, even in demanding conditions. The PH400 also features preset positions which allow operators to save and recall specific camera angles easily, increasing efficiency during production.
The AW-RL400 is a compact and lightweight remote zoom lens that complements the RC400 and PH400 controllers. It offers optical precision and a versatile zoom range, ensuring that operators can achieve the desired framing without sacrificing image quality. The lens is designed with advanced optical technology, delivering sharp and clear images, whether for close-ups or wide-angle shots. Additionally, the RL400 features automated focus and zoom functions that can be controlled via the RC400, providing comprehensive control over camera functions.
Lastly, the AW-RP400 is a joystick-based remote control that is ergonomically designed for ease of use during operation. This controller integrates all key functionalities in a single interface, allowing operators to manipulate camera movements and settings seamlessly. The RP400's programmable buttons enable custom presets, catering to specific production requirements, while its smooth joystick action facilitates precise control during dynamic filming scenarios.
Overall, these Panasonic products combine to offer an integrated solution for remote production, enhancing the workflow and creative possibilities for content creators. Their state-of-the-art technologies, user-friendly interfaces, and advanced features make them invaluable tools in modern broadcast environments.