Indoor Pan/Tilt Head
Installation (Be sure to ask your dealer to install the unit.)
$ Attaching the wire
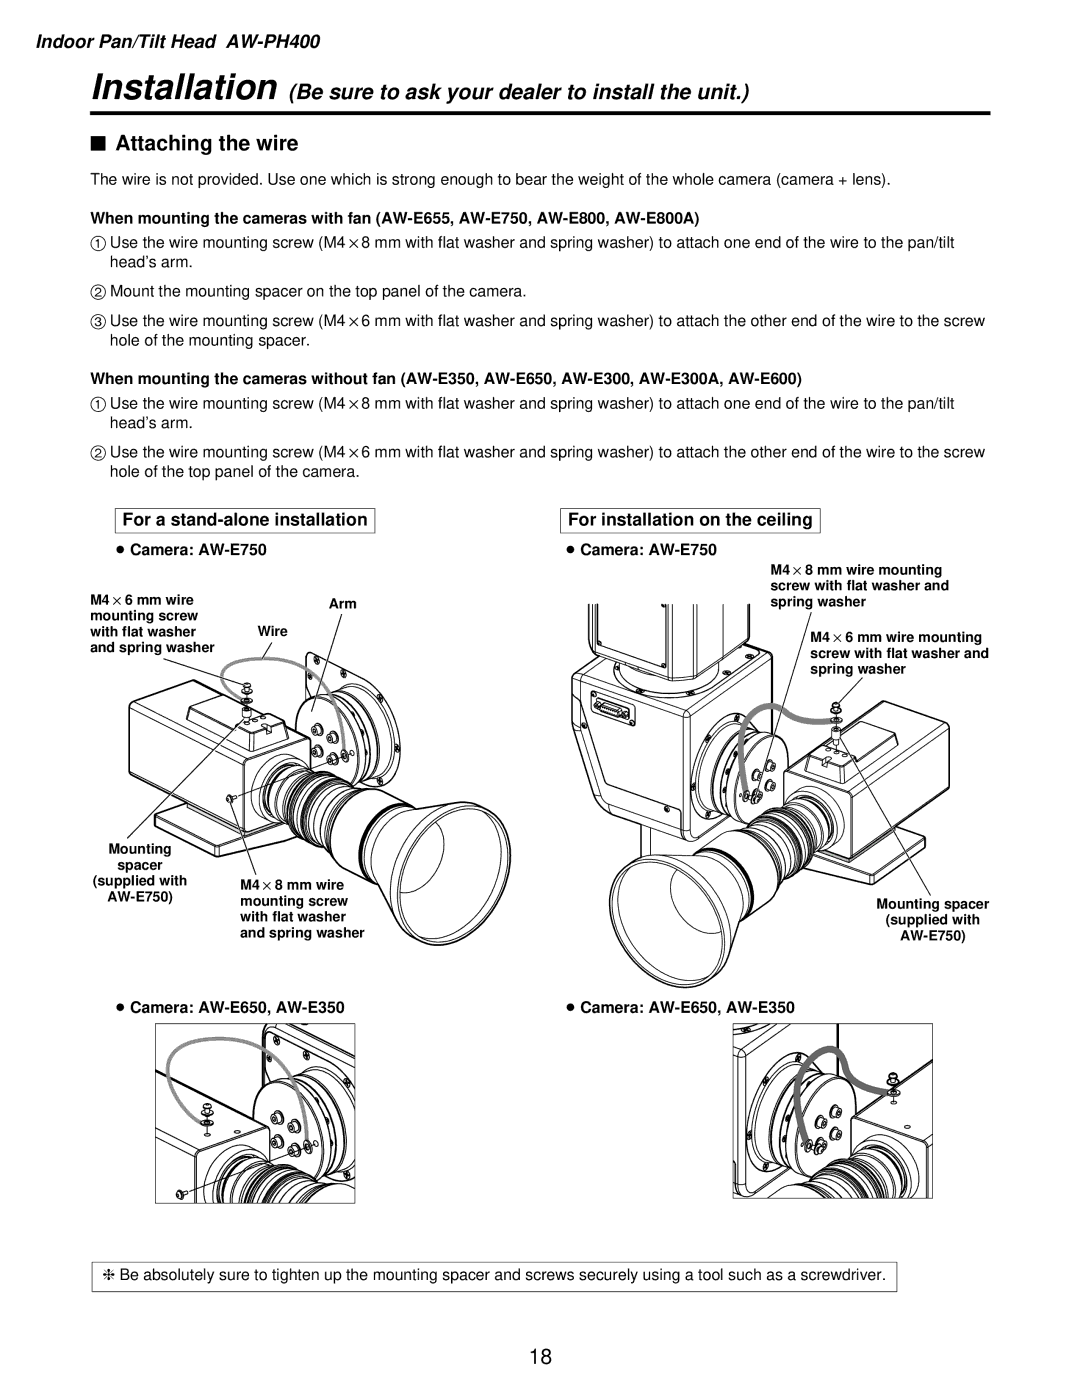
The wire is not provided. Use one which is strong enough to bear the weight of the whole camera (camera + lens).
When mounting the cameras with fan
1Use the wire mounting screw (M4!8 mm with flat washer and spring washer) to attach one end of the wire to the pan/tilt head’s arm.
2Mount the mounting spacer on the top panel of the camera.
3Use the wire mounting screw (M4!6 mm with flat washer and spring washer) to attach the other end of the wire to the screw hole of the mounting spacer.
When mounting the cameras without fan
1Use the wire mounting screw (M4!8 mm with flat washer and spring washer) to attach one end of the wire to the pan/tilt head’s arm.
2Use the wire mounting screw (M4!6 mm with flat washer and spring washer) to attach the other end of the wire to the screw hole of the top panel of the camera.
For a stand-alone installation
≥Camera: AW-E750
M4!6 mm wire | Arm |
mounting screw | Wire |
with flat washer | |
and spring washer |
|
Mounting |
| |
spacer |
| |
(supplied with | M4!8 mm wire | |
mounting screw | ||
| with flat washer | |
| and spring washer |
For installation on the ceiling
≥Camera:
M4!8 mm wire mounting screw with flat washer and spring washer
M4!6 mm wire mounting screw with flat washer and spring washer
Mounting spacer
(supplied with
≥ Camera: | ≥ Camera: |
❈Be absolutely sure to tighten up the mounting spacer and screws securely using a tool such as a screwdriver.
18
