Using the Drive
Inserting/Removing the Drive
For details on how to insert and remove the drive, refer to “Multimedia Pocket” in the Reference Manual included with your computer.
Preparations
Windows Vista
AClick ![]() (Start) - [Control Panel] - [System and Maintenance] - [System] - [Device Manager].
(Start) - [Control Panel] - [System and Maintenance] - [System] - [Device Manager].
A standard user needs to enter an administrator password.
BClick [View] - [Devices by connection] -
CConfirm that the check mark has been added for [Enabled DMA]. If it has not, add the check mark.
Windows XP
Confirm that [Transfer Mode] is set to [DMA if available] in [start] - [Control Panel] - [Performance and Maintenance] - [System] - [Hardware] - [Device Manager] - [IDE ATA/ ATAPI controllers] - [Primary IDE Channel] - [Advanced Settings] - [Device 0]. Perform this setting if it has not yet been made.
Setting a Disc
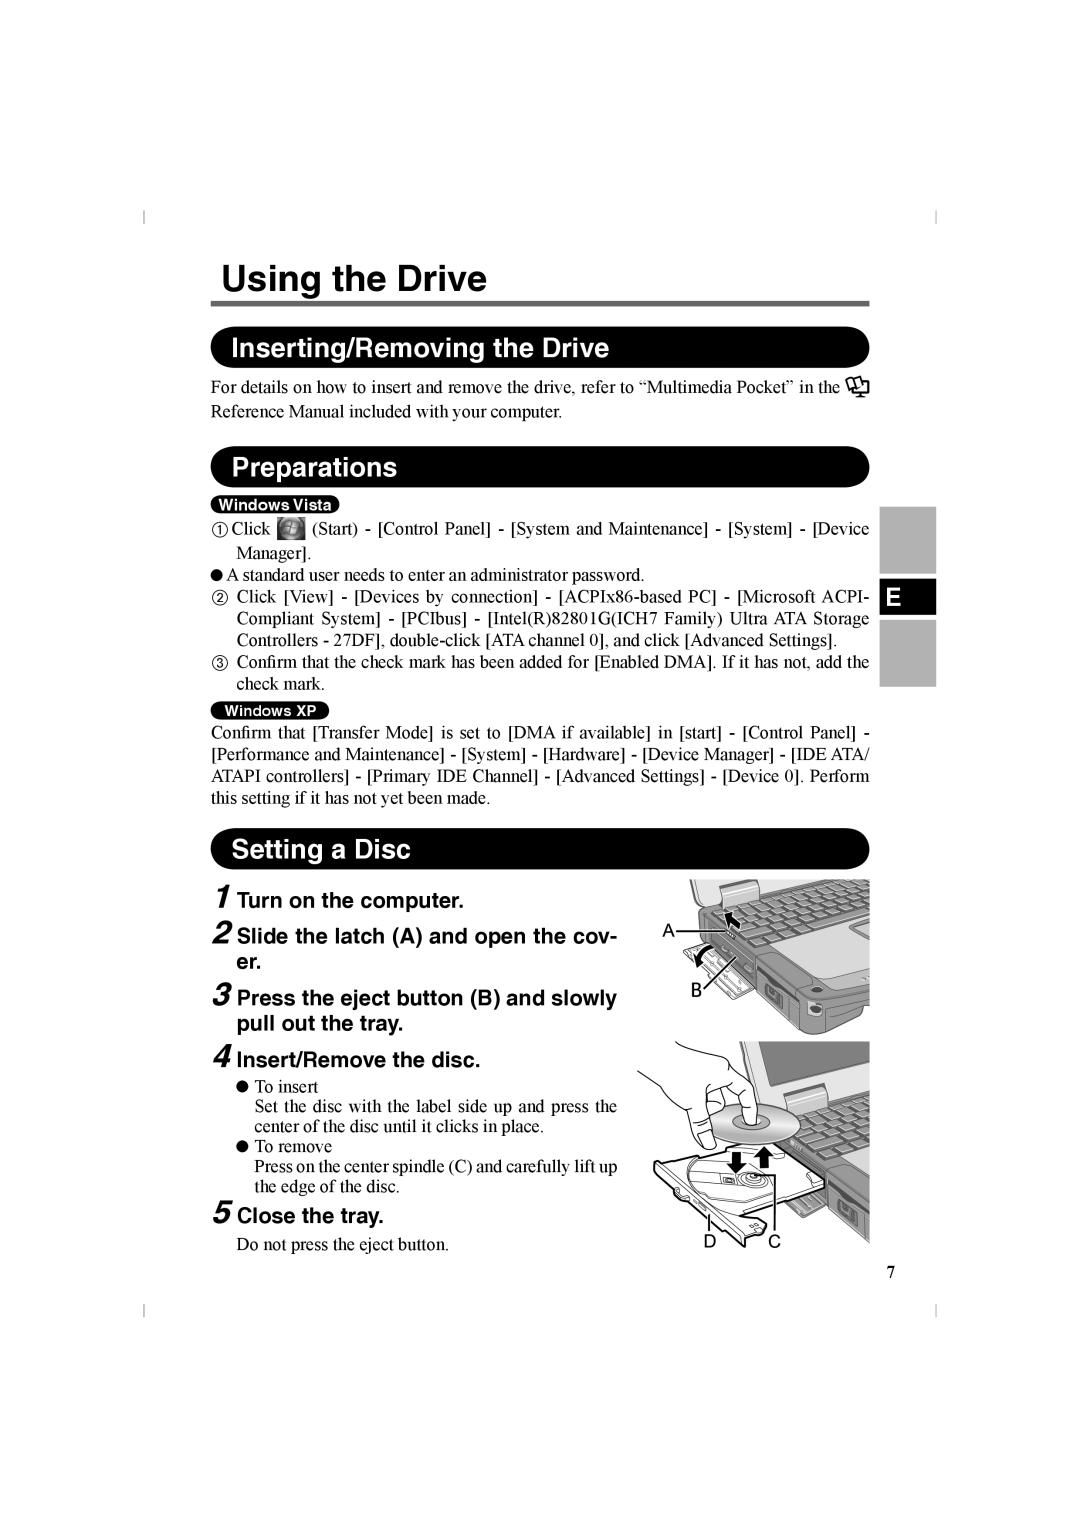
1 Turn on the computer.
2 Slide the latch (A) and open the cov- er.
3 Press the eject button (B) and slowly pull out the tray.
4
5
Insert/Remove the disc.
![]() To insert
To insert
Set the disc with the label side up and press the center of the disc until it clicks in place.
![]() To remove
To remove
Press on the center spindle (C) and carefully lift up the edge of the disc.
Close the tray.
Do not press the eject button.
7