E N G L I S H
Installation (continued)
To Remove the Unit
Switch off the power of the unit.
25
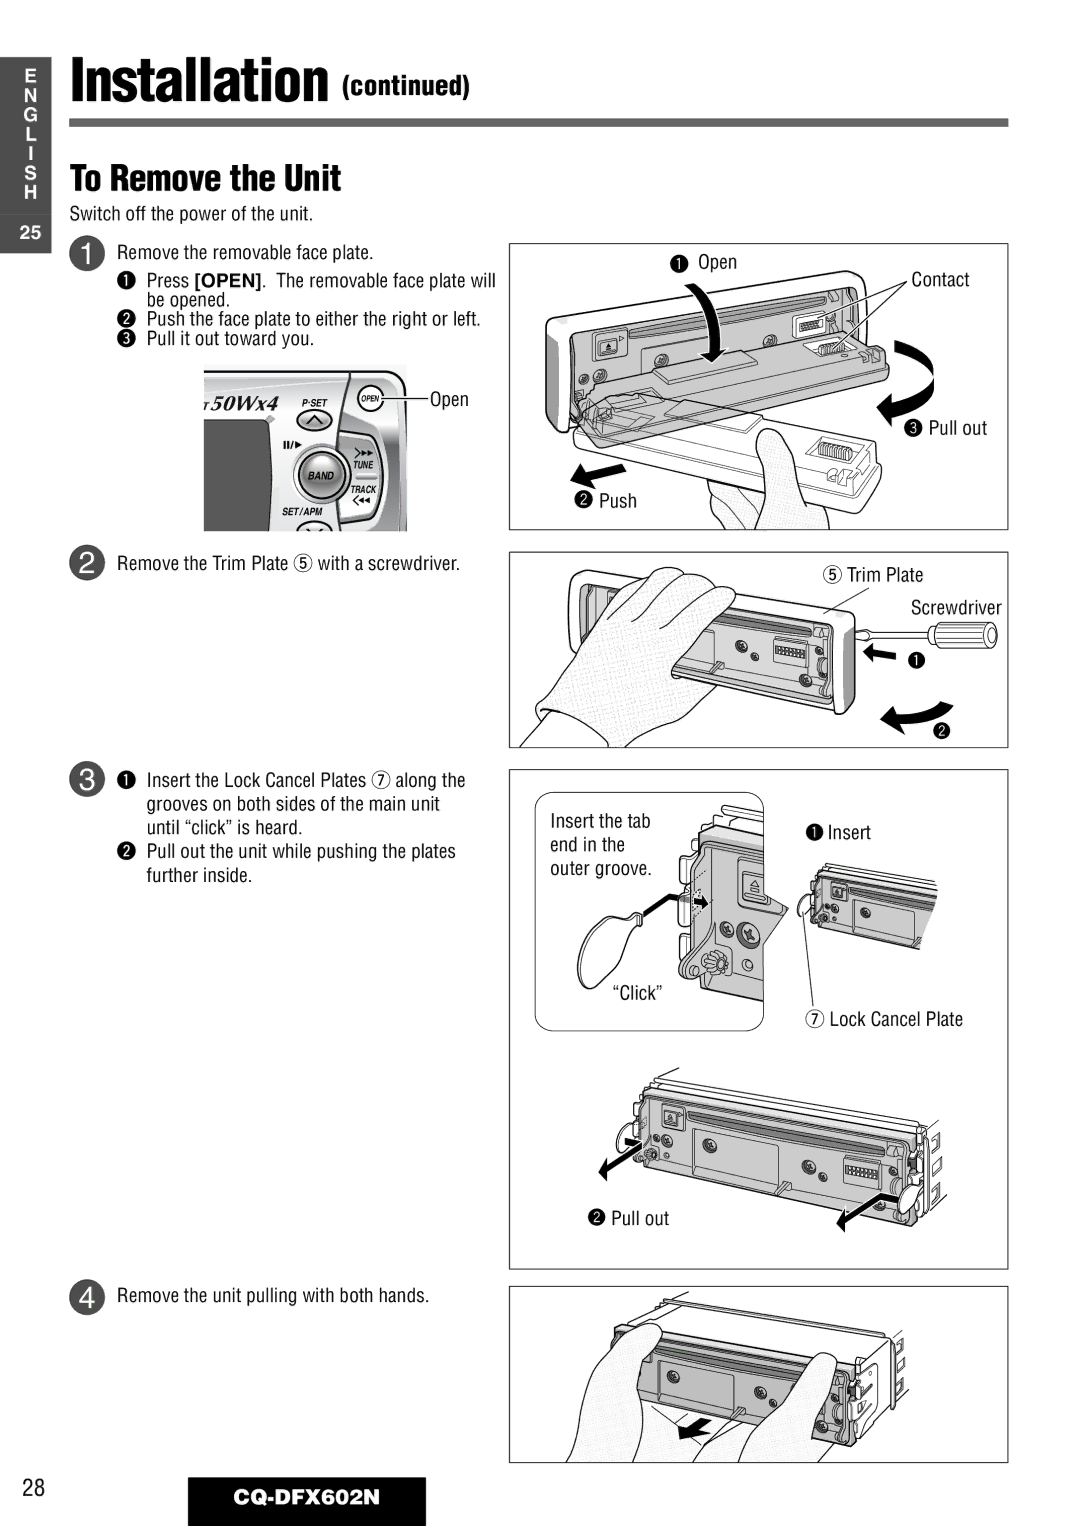
1 | Remove the removable face plate. |
| 1 Open | |
| q Press [OPEN]. The removable face plate will | Contact | ||
| be opened. |
|
|
|
| w Push the face plate to either the right or left. |
| ||
| e Pull it out toward you. |
|
|
|
| P·SET | OPEN | Open |
|
|
|
|
| Pull out |
| BAND | TUNE |
|
|
|
|
|
| |
|
| TRACK |
| 2 Push |
| SET / APM |
|
| |
|
|
|
| |
2 | Remove the Trim Plate t with a screwdriver. | t Trim Plate | ||
|
|
|
| |
|
|
| Screwdriver |
|
|
| 1 |
|
|
| 2 |
3 | q Insert the Lock Cancel Plates u along the |
|
|
| grooves on both sides of the main unit | Insert the tab |
|
| until “click” is heard. | 1 Insert | |
| end in the | ||
| w Pull out the unit while pushing the plates |
| |
| outer groove. |
| |
| further inside. |
| |
|
|
| |
|
| “Click” |
|
|
|
| u Lock Cancel Plate |
|
| 2 Pull out |
|
4 Remove the unit pulling with both hands.
