16.2. Outdoor Electronic Controller Removal Procedure
![]() Caution! When handling electronic controller, be careful of electrostatic discharge.
Caution! When handling electronic controller, be careful of electrostatic discharge.
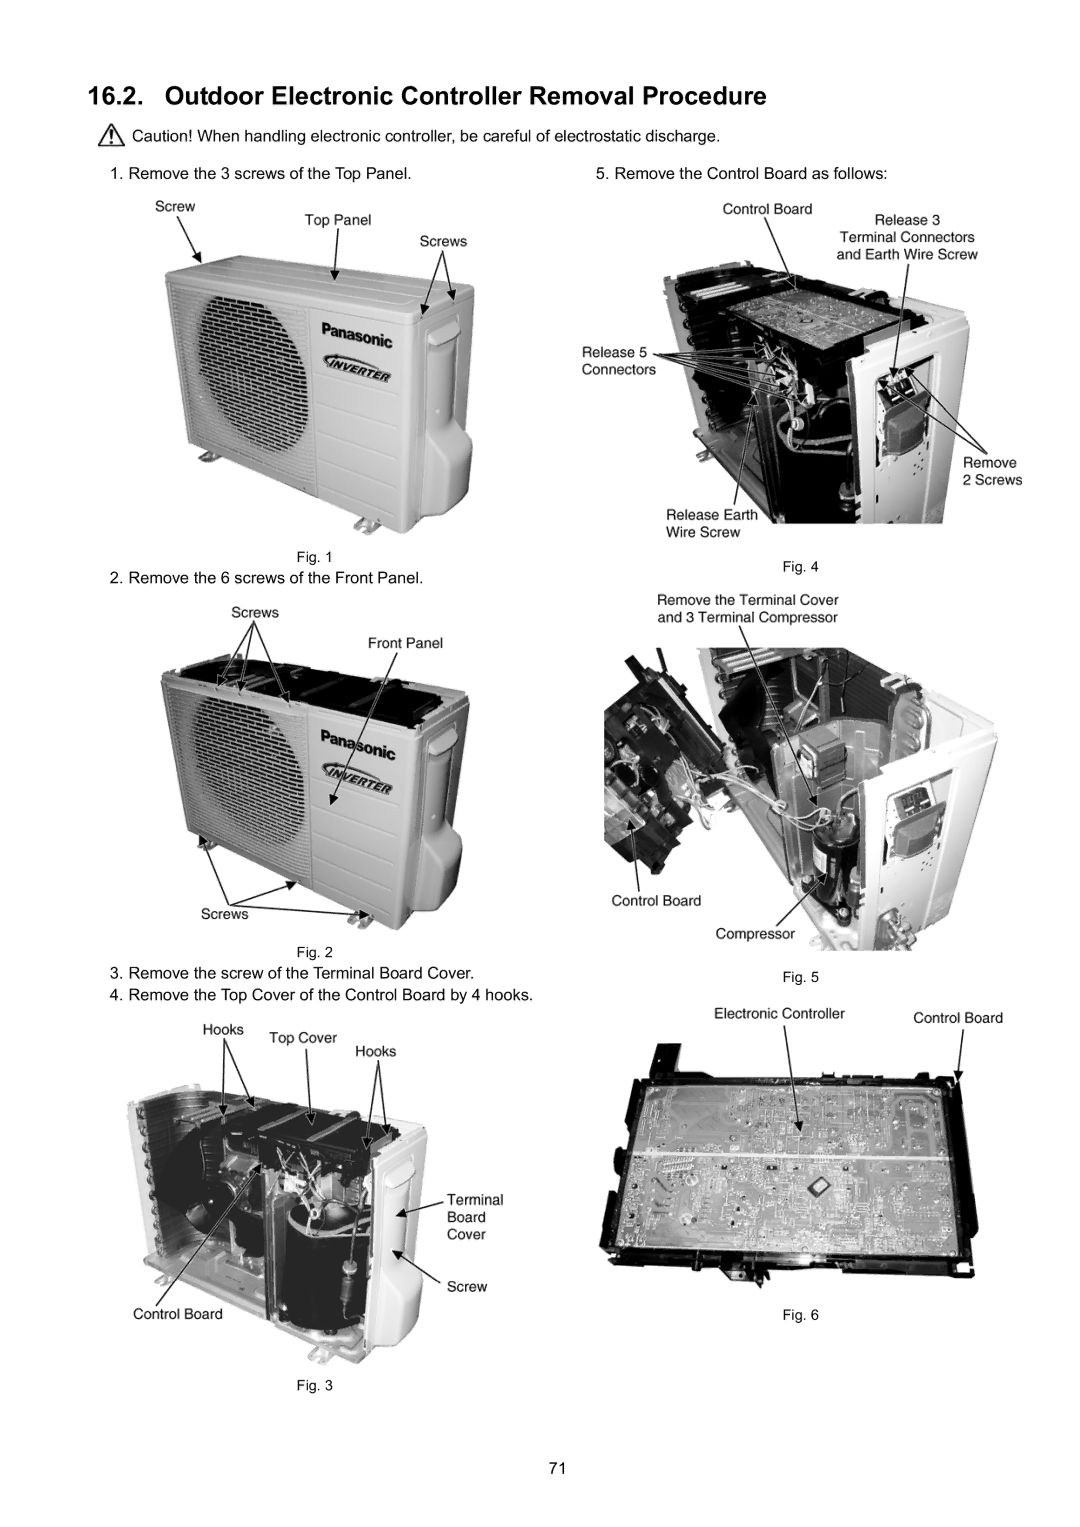
1. Remove the 3 screws of the Top Panel. | 5. Remove the Control Board as follows: |
Fig. 1
Fig. 4
2. Remove the 6 screws of the Front Panel.
| Fig. 2 |
|
3. | Remove the screw of the Terminal Board Cover. | Fig. 5 |
4. | Remove the Top Cover of the Control Board by 4 hooks. |
|
Fig. 6
Fig. 3
71
