Making Copies Before Starting
Function Problem Solving Network Scanner
English
Useful Office Functions
Multi-Tasking Job Table
Operating Instructions Outline
Symbols/Icons
Place originals on the ADF
Table of Contents Getting to Know Your Machine
Function
Appendix
Table of Contents Network Scanner
Problem Solving
Precautions
Laser Safety
For Your Safety
Others
Consumable Safeguards
Supplies
It is unlawful to make copies of certain documents
Black
For U.K
AND-YELLOW
Hole Cover
Procedures
Original Position
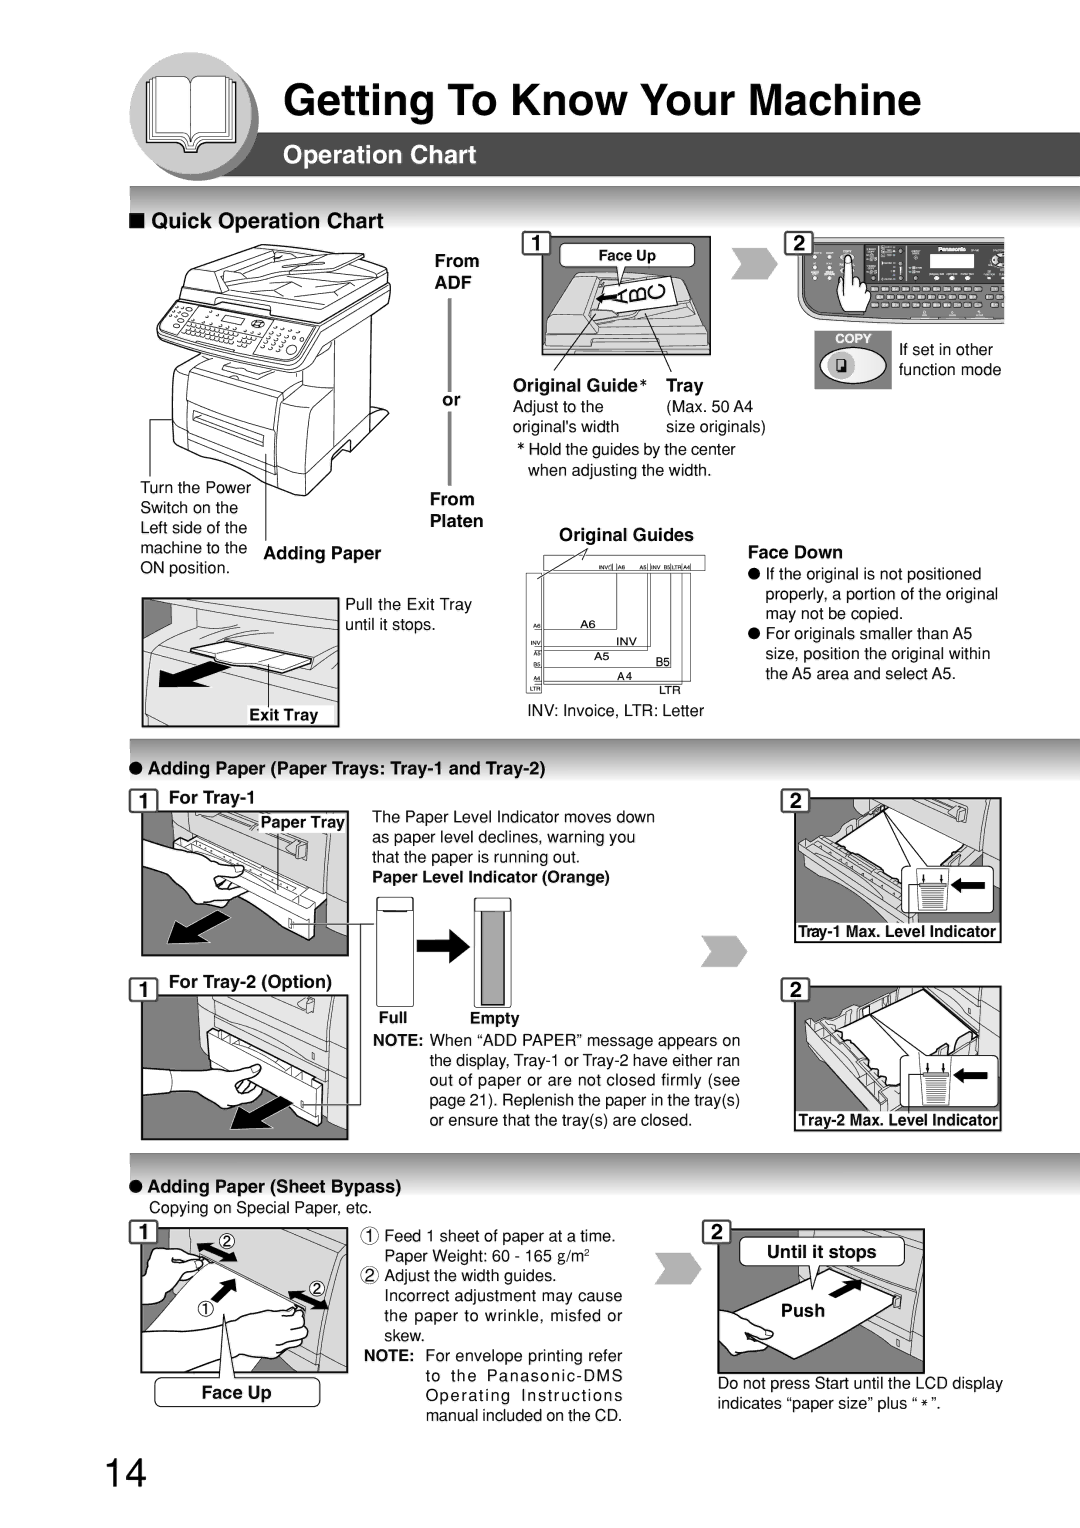
Operation Chart
Quick Operation Chart
Before Pressing Start Key
Making Copies
Replacing Toner Cartridge and/or Drum Unit
To replace the Drum Unit
Cleaner
To replace the Toner Cartridge
For replacing the Toner Cartridge only
Removing Misfed Paper ADF J70, J71, J79, J90, J92, J93
J44, J82, J83
J43, J44, J80
Front Cover Misfed Paper
Paper Transport Knob
Code Check Points
User Error Codes U Code
Jam Error Codes J Code
Adding Paper / Tray-2
CorrectIncorrect
Adding Paper / Sheet Bypass
M1 Key
Icon Contents Memory in key Color Key
Resolution Key Original Size Key
Original Key
Icon Contents Keypad Sets copy quantities or
Icon Contents Reset Key
Alarm LED RED Lights/Flashes when trouble occurs
Function settings
Basic Copy
Sort Mode
Copying with Preset or Variable Zoom Ratios
Copying the Same Size Originals
Using the ADF
Copy, 2 1 Copy
Creative Features
Copy
Platen only
Exits this mode
From
For 2 1 Copy
Combination for N in 1 copy operation
Mode Originals Layout
1 Copy
Available
For Preset Ratios A4 A4-R A5 A5-R
Steps 7 to 11 from Platen only
Digital Skyshot Mode
Other Features
Skyshot Mode
Double Exposure
4- 2 to step Starts making copies
A4 A4-R A5 A5 A5-R
Sleep/Shutdown Mode
Energy Saver Power Saver Mode, Sleep/Shutdown Mode
Power Saver Mode
To store a job in memory
Set up
Job Memory
To recall a job stored in memory
General Settings
Using Function Modes to Change the Initial Machine Modes
Procedure
Printer Settings
Copier Settings
When selecting the Key Operator Mode Ex. General Settings
General Settings
Modes Function Initial Setting
ORIG. SET Beep ADF
1INVALID / 2VALID DEPT. Counter Mode
Dhcp Default
2VALID
Copier Settings
Printer Settings
Printer Settings
1LONG Edge / 2SHORT Edge Resolution
Symbol Table PCL
Sided Print
Scanner Settings Scan Parameters
Changing the Paper Size Paper Tray
If set in other function mode
For Example
Changing the Paper Size Sheet Bypass
Others
Select Paper Size
For LETTER/A4
For Department Counter For Maximum Copies
Network Settings
Department Counter
For ID Identification Code
SET
19 TCP/IP Address
Document Scanning
Document Scanning
Name
23-3
Select a Station PCs IP Address Abbr
Search
Editing/Erasing your PCs IP Address
Address Book
Adding your PCs IP Address
Enter a Station Name
For Scan File Name
Select Mode
Scan Parameters
For Compression
For Gray Scale
Network
Remote Copy
Remote Copy
Remote Copy NO. of COPY=
Machine
Direct Connection with Crossover Cable
Direct Connection with Crossover Cable
Rear Side of Machine To PC
Subnet Mask
For Windows
For Windows XP
Unit Does Not Operate
Troubleshooting
Check Action
Light Copies
Sheet
Machine Care
Marked Copies
Platen glass
Set the Date and Time continues steps 6 to
Replacing the Battery/Set the Date and Time
Battery Holder
Used
New
ADF Standard
Specifications
DP-180 For Copier
FLS
Combined Function Table
Network Scanner Standard
2nd Paper Feed Module DA-DS188 Option
Next Selections
Supplies
Options and Supplies
Options
Part Name Remarks
Important Information
Energy Star
For Service, Call