![]() WARNING:
WARNING:
If you do not insert the saw blade deep enough, the saw blade may be ejected unexpectedly during operation. This can be extremely dangerous.
Removal
1.Lift up the blade Attach/Remove lever.
2.Pull out the blade.
Adjusting the base
1.Use the hex wrench to loosen the base fixing screw.
2.Move the base along the base ad- justment hole to set its position. (See the diagram at right.)
•The base can be adjusted to be- tween 0° and 45° sideways and the forward/back position can also be adjusted. If tilting the base side- ways, remove the dust cover first.
•Refer to the bevel index to deter- mine the angle.
•Rip fence fixing screw should be located on the opposite side tool is beveled.
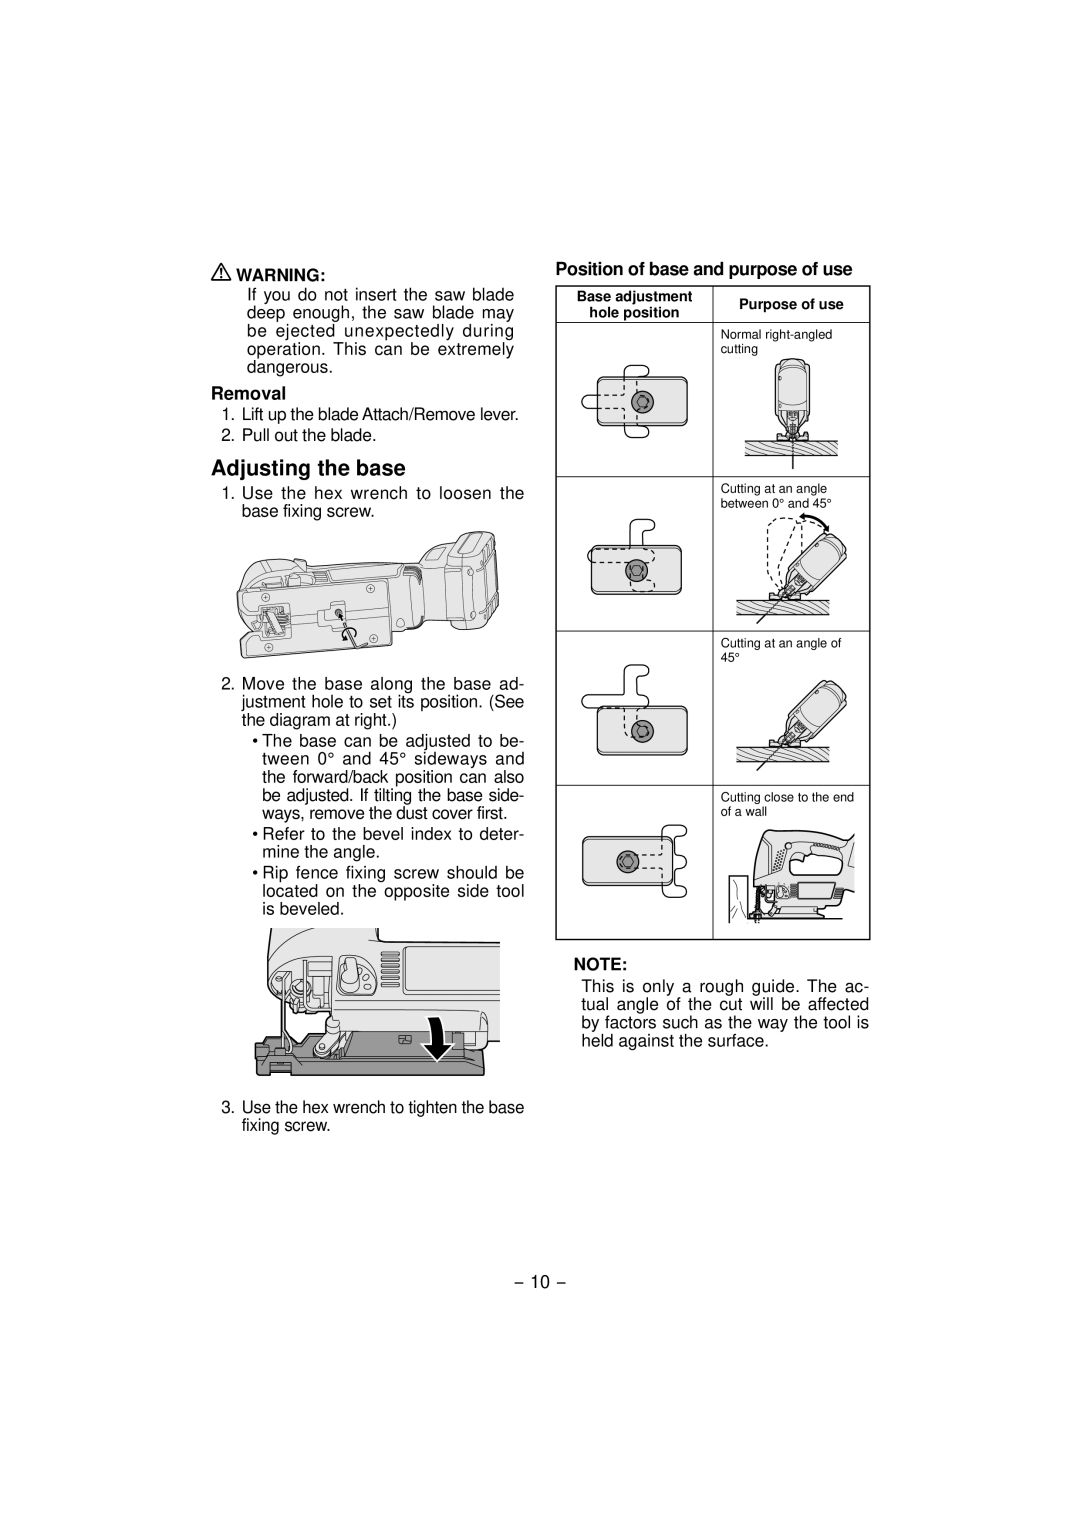
Position of base and purpose of use
Base adjustment | Purpose of use | |
hole position | ||
|
Normal
Cutting at an angle between 0° and 45°
Cutting at an angle of 45°
Cutting close to the end of a wall
3 | 2 |
| 1 |
| 0 |
NOTE:
This is only a rough guide. The ac- tual angle of the cut will be affected by factors such as the way the tool is held against the surface.
3.Use the hex wrench to tighten the base fixing screw.
- 10 -