3.Press the OK button to accept the select- ed setting.
•The control panel will stop flashing and light up.
Checking Tool Settings
•This section describes how to have the tool display current settings for approx- imately 3 seconds when the tool is stopped.
•You cannot check tool settings when the control panel is turned off. First, engage the switch briefly to reactivate the display.
Checking the torque clutch setting
1.Press the torque set button.
•Control panel display
Display: The torque set lights up.
Battery indication lamp: The upper bar of the battery flashes on and off.
Checking the interval
1.Press the interval set button.
•Control panel display
Display: The interval set lights up.
Battery indication lamp: The middle bar of the battery flashes on and off.
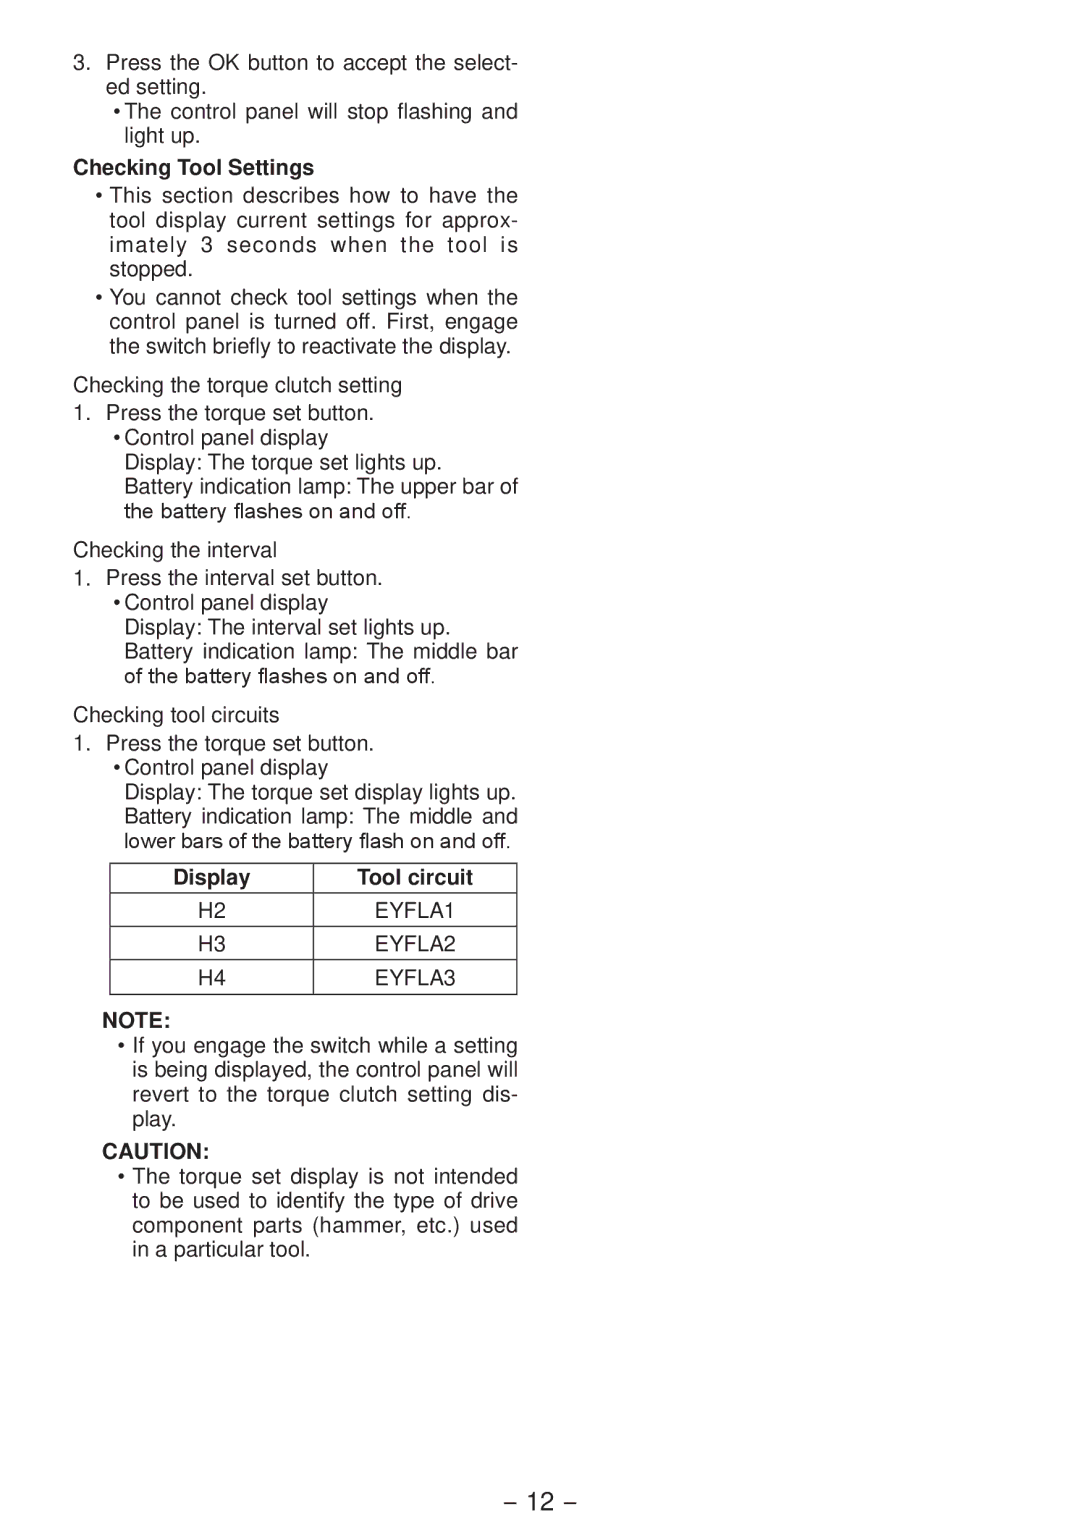
Checking tool circuits
1.Press the torque set button.
•Control panel display
Display: The torque set display lights up.
Battery indication lamp: The middle and lower bars of the battery flash on and off.
Display | Tool circuit |
H2 | EYFLA1 |
H3 | EYFLA2 |
H4 | EYFLA3 |
NOTE:
•If you engage the switch while a setting is being displayed, the control panel will revert to the torque clutch setting dis- play.
CAUTION:
•The torque set display is not intended to be used to identify the type of drive component parts (hammer, etc.) used in a particular tool.
- 12 -