Setting up
 Connection
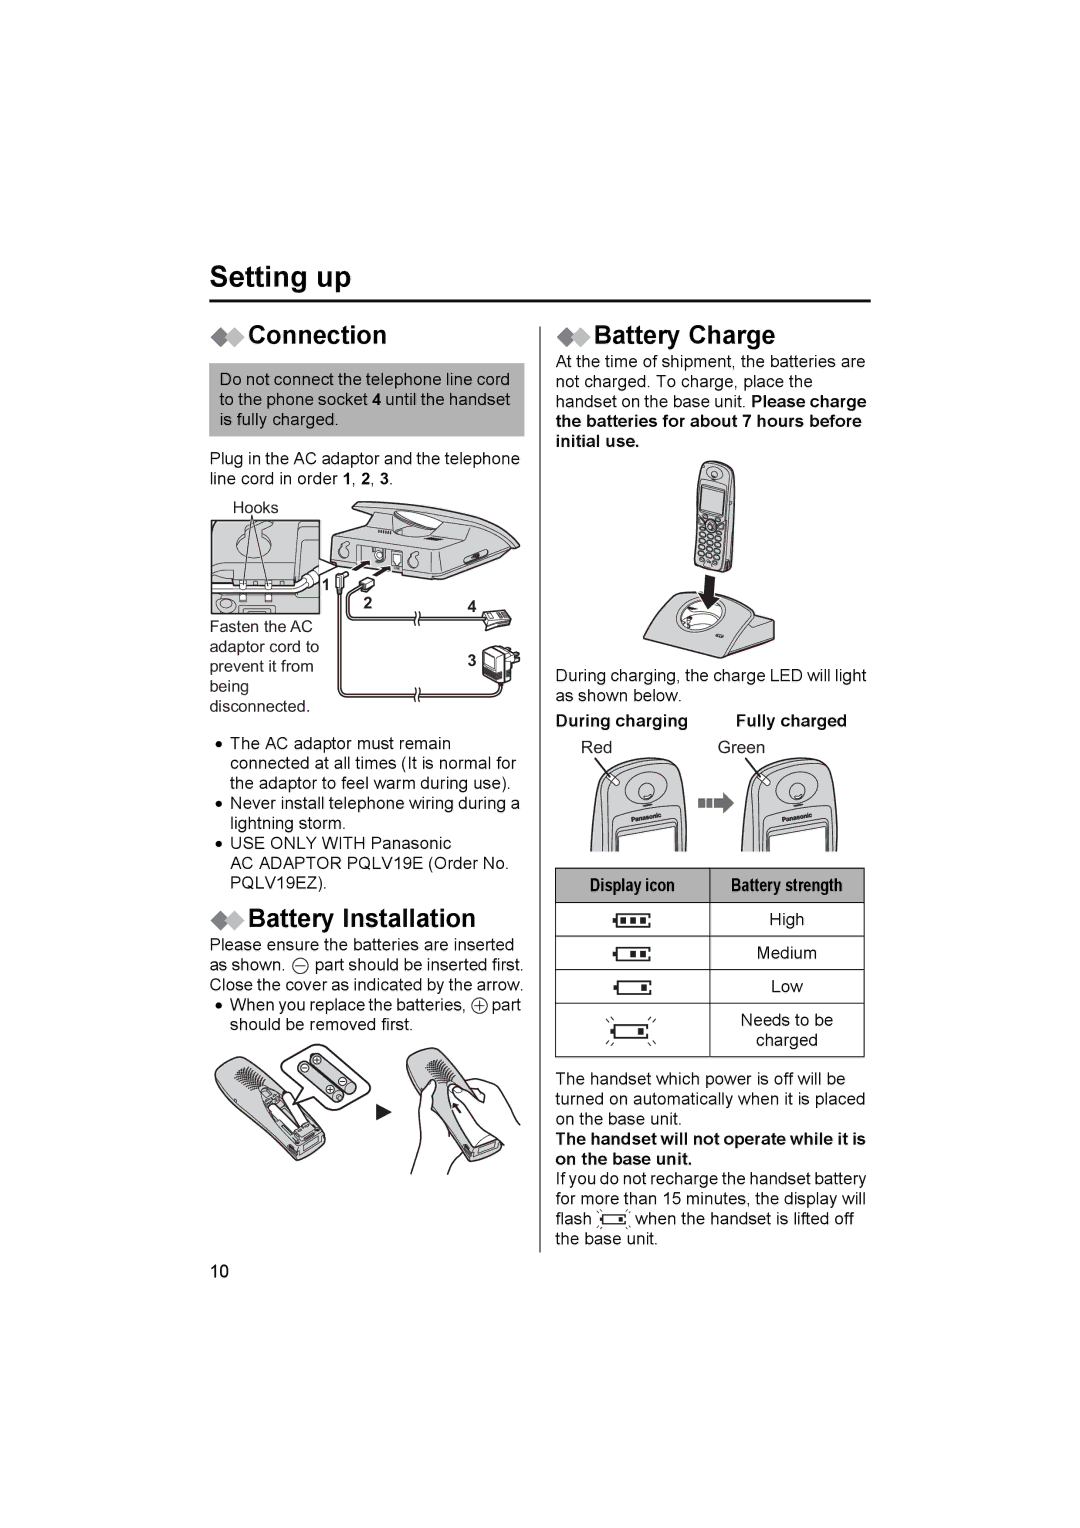
Do not connect the telephone line cord to the phone socket 4 until the handset is fully charged.
Plug in the AC adaptor and the telephone line cord in order 1, 2, 3.
Hooks |
|
|
| 1 |
|
| 2 | 4 |
|
| |
Fasten the AC |
|
|
adaptor cord to |
| 3 |
prevent it from |
| |
|
| |
being |
|
|
disconnected. |
|
|
•The AC adaptor must remain connected at all times (It is normal for the adaptor to feel warm during use).
•Never install telephone wiring during a lightning storm.
•USE ONLY WITH Panasonic
AC ADAPTOR PQLV19E (Order No. PQLV19EZ).
 Battery Installation
Please ensure the batteries are inserted as shown. ![]() part should be inserted first. Close the cover as indicated by the arrow.
part should be inserted first. Close the cover as indicated by the arrow.
•When you replace the batteries, ![]() part should be removed first.
part should be removed first.
 Battery Charge
At the time of shipment, the batteries are not charged. To charge, place the handset on the base unit. Please charge the batteries for about 7 hours before initial use.
During charging, the charge LED will light as shown below.
During charging | Fully charged |
RedGreen
Display icon | Battery strength |
| High |
| Medium |
| Low |
| Needs to be |
| charged |
The handset which power is off will be turned on automatically when it is placed on the base unit.
The handset will not operate while it is on the base unit.
If you do not recharge the handset battery for more than 15 minutes, the display will
flash ![]() when the handset is lifted off the base unit.
when the handset is lifted off the base unit.
10
