Phonebook
Handset phonebook
You can add up to 50 items to the handset phonebook and search for phonebook items by name.
Adding items to the phonebook
1{Phonebook}
2 {Add}
3Enter the name (max. 16 characters). i{Next}
4Enter the phone number (max. 32 digits). i{Next} i{Save} LTo add other items, repeat from
step 2.
5{OFF}
Note:
LYour service provider/telephone company may charge you for a local call if the number dialled has the area code prefix included. If this is unacceptable, dial only the
LCaller ID subscribers can use ringer ID and
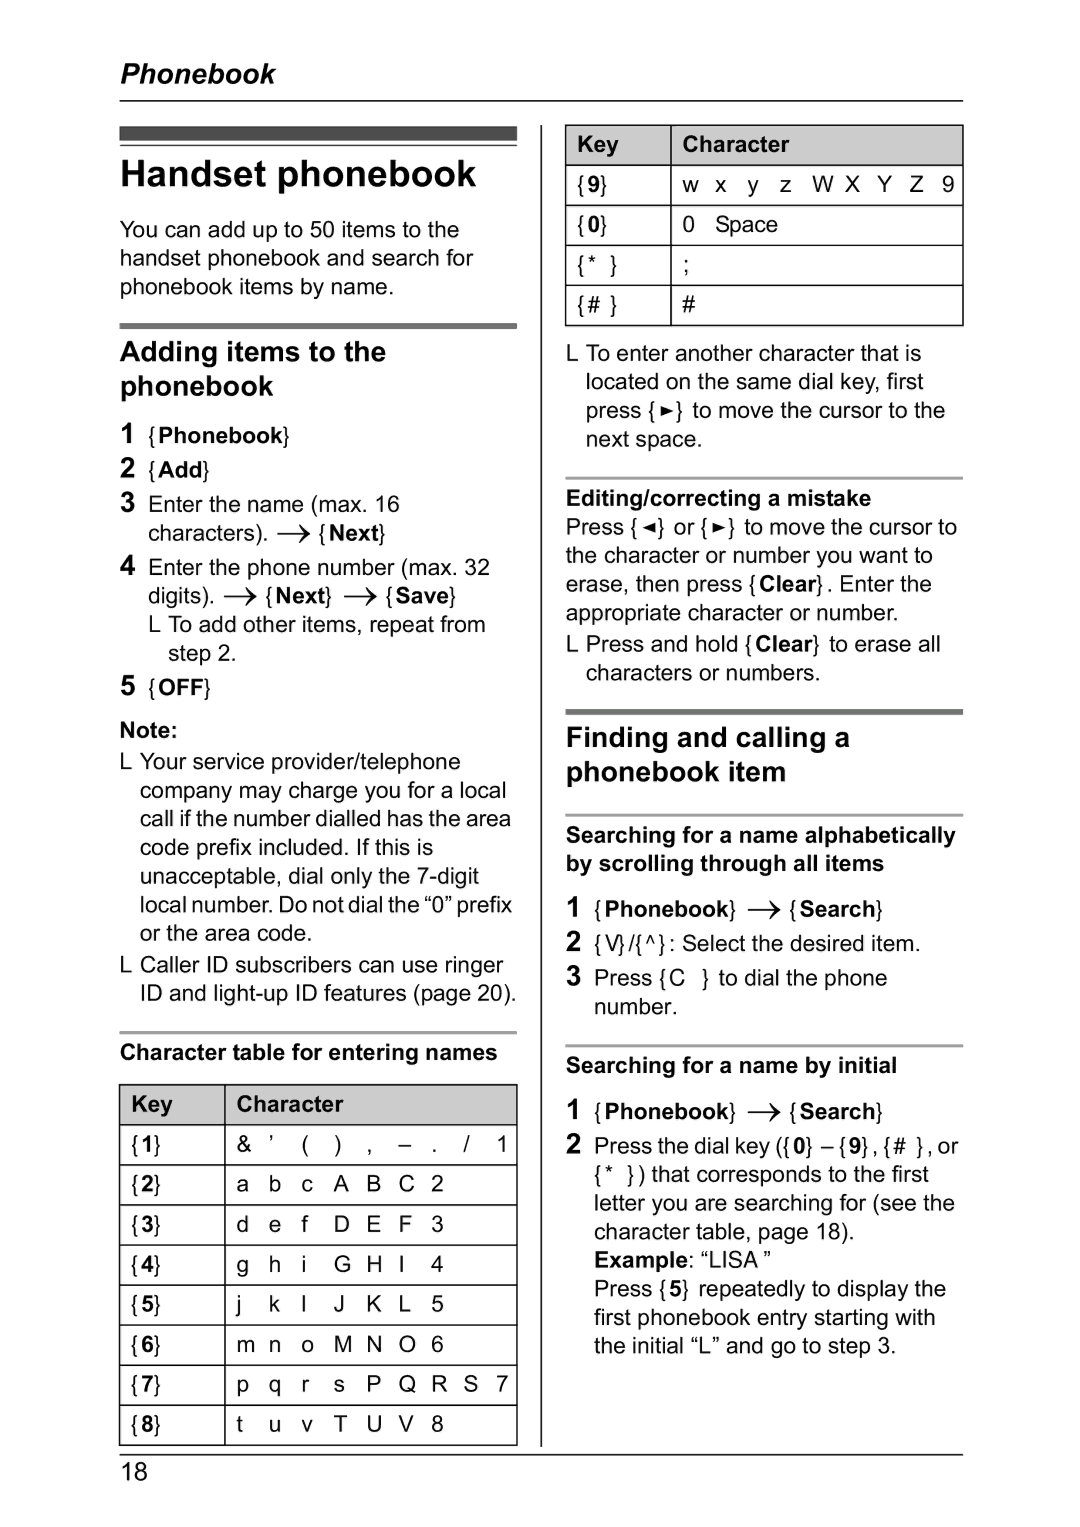
Character table for entering names
Key | Character |
|
|
| |||
{1} | & | ’ | ( | ) | , | – | . / 1 |
|
|
|
|
|
|
|
|
{2} | a | b | c | A | B | C | 2 |
|
|
|
|
|
|
|
|
{3} | d | e | f | D | E | F | 3 |
|
|
|
|
|
|
|
|
{4} | g | h | i | G | H | I | 4 |
|
|
|
|
|
|
|
|
{5} | j | k | l | J | K | L | 5 |
|
|
|
|
|
|
|
|
{6} | m | n | o | M | N | O | 6 |
|
|
|
|
|
|
| |
{7} | p | q | r | s | P | Q R S 7 | |
|
|
|
|
|
|
|
|
{8} | t | u | v | T | U | V | 8 |
|
|
|
|
|
|
|
|
Key | Character | |
{9} | w | x y z W X Y Z 9 |
|
|
|
{0} | 0 | Space |
|
|
|
{*} | ; |
|
|
|
|
{#} | # |
|
|
|
|
LTo enter another character that is located on the same dial key, first press {>} to move the cursor to the next space.
Editing/correcting a mistake
Press {<} or {>} to move the cursor to the character or number you want to erase, then press {Clear}. Enter the appropriate character or number.
LPress and hold {Clear} to erase all characters or numbers.
Finding and calling a phonebook item
Searching for a name alphabetically by scrolling through all items
1{Phonebook} i{Search}
2{V}/{^}: Select the desired item.
3Press {C} to dial the phone number.
Searching for a name by initial
1{Phonebook} i{Search}
2Press the dial key ({0} – {9}, {#}, or {*}) that corresponds to the first
letter you are searching for (see the character table, page 18).
Example: “LISA”
Press {5} repeatedly to display the first phonebook entry starting with the initial “L” and go to step 3.
18