How to adjust the lens position to the left or right
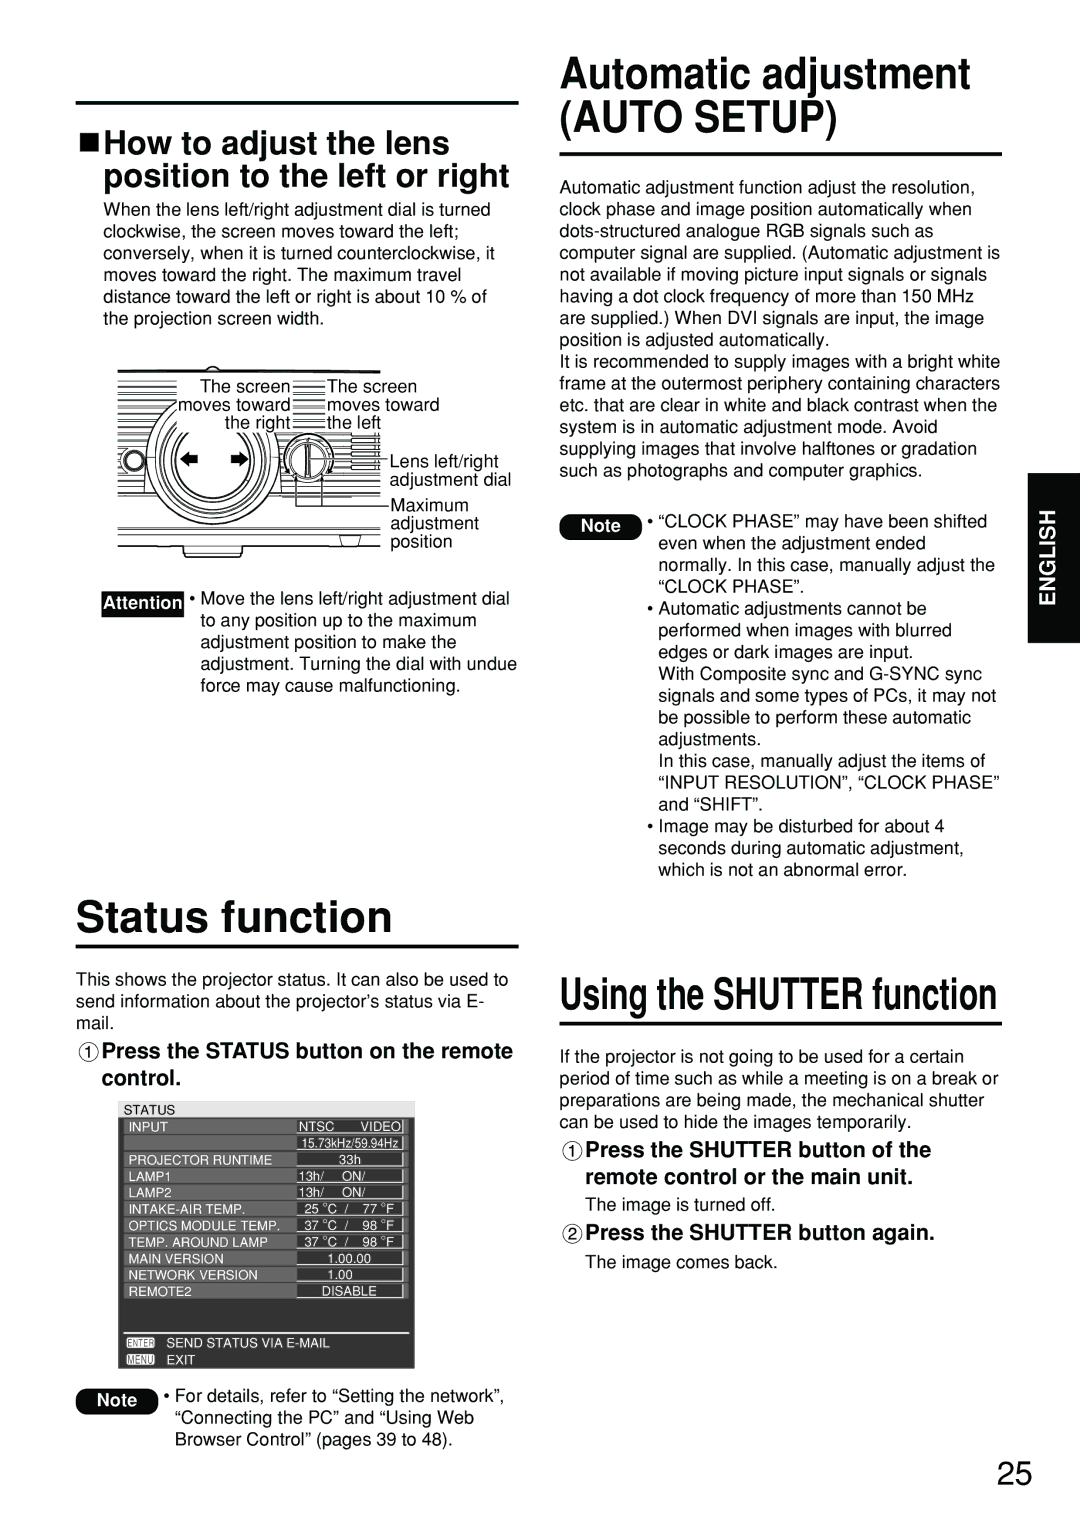
When the lens left/right adjustment dial is turned clockwise, the screen moves toward the left; conversely, when it is turned counterclockwise, it moves toward the right. The maximum travel distance toward the left or right is about 10 % of the projection screen width.
The screen | The screen |
moves toward | moves toward |
the right | the left |
Lens left/right |
adjustment dial |
Maximum |
adjustment |
position |
Attention • Move the lens left/right adjustment dial to any position up to the maximum
adjustment position to make the adjustment. Turning the dial with undue force may cause malfunctioning.
Status function
This shows the projector status. It can also be used to send information about the projector’s status via E- mail.
 Press the STATUS button on the remote control.
STATUS |
|
|
|
|
| |
|
|
|
|
|
| |
| INPUT | NTSC |
| VIDEO |
|
|
|
| 15.73kHz/59.94Hz |
| |||
| PROJECTOR RUNTIME |
| 33h |
| ||
| LAMP1 | 13h/ | ON/ |
| ||
| LAMP2 | 13h/ | ON/ |
| ||
| 25 °C / | 77 °F |
| |||
| OPTICS MODULE TEMP. | 37 °C / | 98 °F |
| ||
| TEMP. AROUND LAMP | 37 °C / | 98 °F |
| ||
MAIN VERSION | 1.00.00 |
NETWORK VERSION | 1.00 |
REMOTE2 | DISABLE |
SEND STATUS VIA
EXIT
Note • For details, refer to “Setting the network”, “Connecting the PC” and “Using Web Browser Control” (pages 39 to 48).
Automatic adjustment
(AUTO SETUP)
Automatic adjustment function adjust the resolution, clock phase and image position automatically when
It is recommended to supply images with a bright white frame at the outermost periphery containing characters etc. that are clear in white and black contrast when the system is in automatic adjustment mode. Avoid supplying images that involve halftones or gradation such as photographs and computer graphics.
Note • “CLOCK PHASE” may have been shifted | ENGLISH |
even when the adjustment ended |
|
normally. In this case, manually adjust the |
|
“CLOCK PHASE”. |
|
• Automatic adjustments cannot be |
|
performed when images with blurred |
|
edges or dark images are input. |
|
With Composite sync and |
|
signals and some types of PCs, it may not |
|
be possible to perform these automatic |
|
adjustments. |
|
In this case, manually adjust the items of |
|
“INPUT RESOLUTION”, “CLOCK PHASE” |
|
and “SHIFT”. |
|
• Image may be disturbed for about 4 |
|
seconds during automatic adjustment, |
|
which is not an abnormal error. |
|
Using the SHUTTER function
If the projector is not going to be used for a certain period of time such as while a meeting is on a break or preparations are being made, the mechanical shutter can be used to hide the images temporarily.
![]() Press the SHUTTER button of the remote control or the main unit.
Press the SHUTTER button of the remote control or the main unit.
The image is turned off.
 Press the SHUTTER button again.
The image comes back.
25