Remote control operation
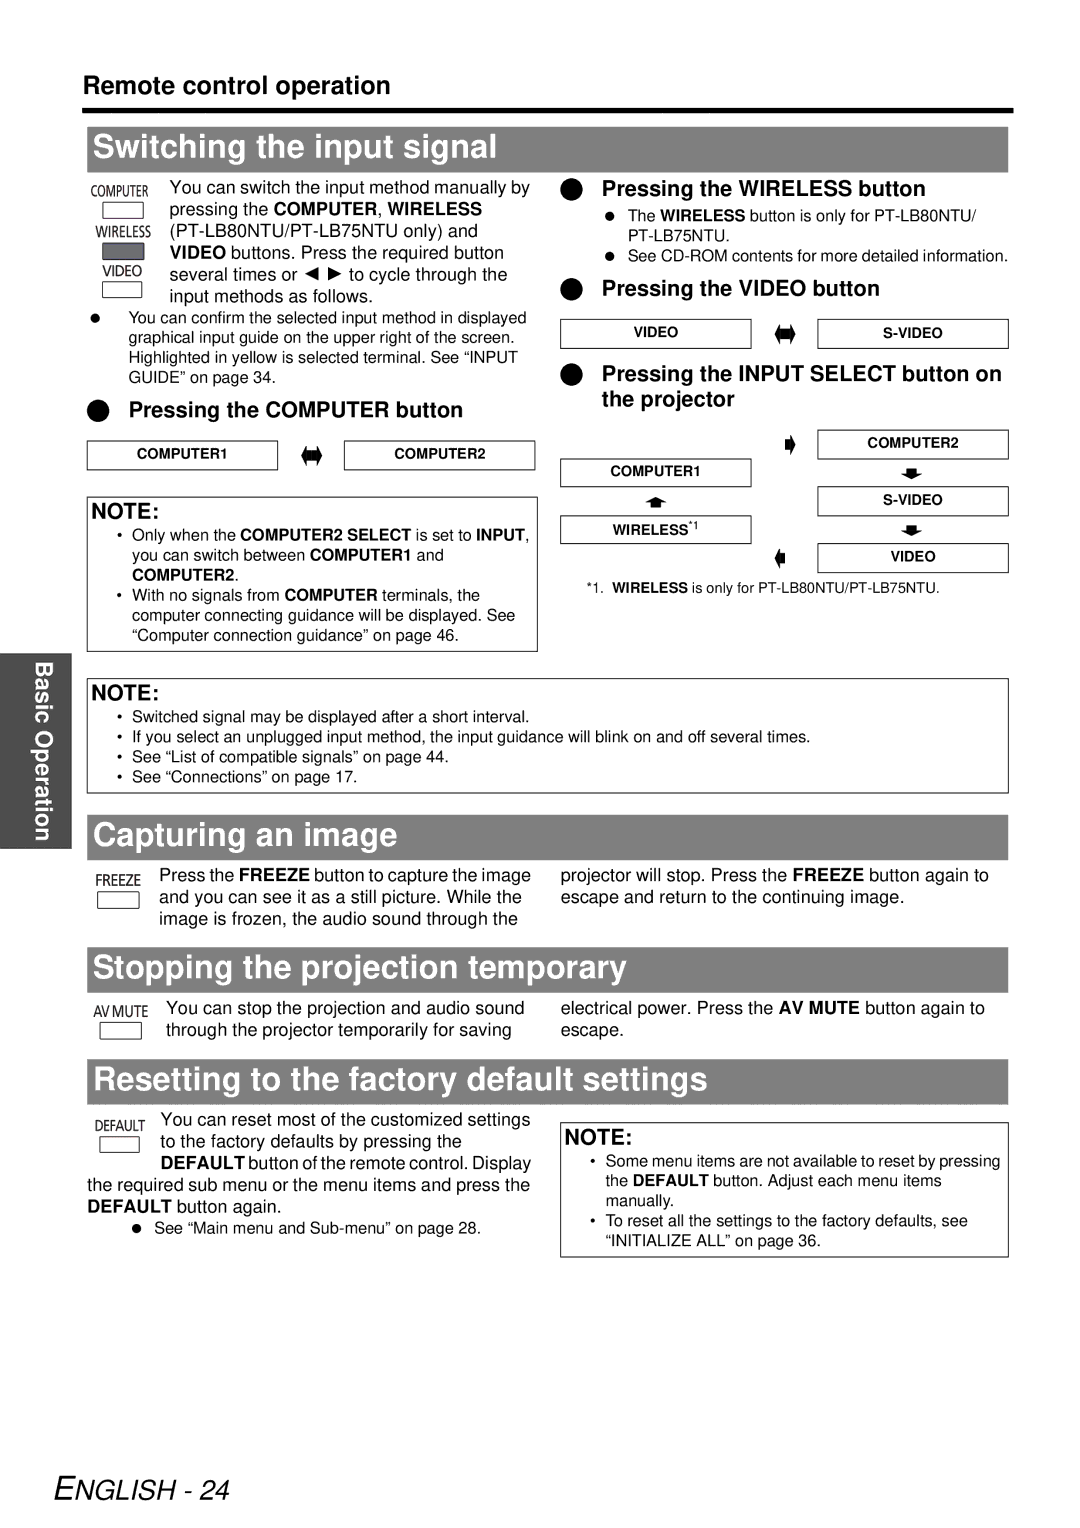
Switching the input signal
You can switch the input method manually by pressing the COMPUTER, WIRELESS
You can confirm the selected input method in displayed graphical input guide on the upper right of the screen. Highlighted in yellow is selected terminal. See “INPUT GUIDE” on page 34.
Pressing the COMPUTER button
COMPUTER1 |
|
|
| COMPUTER2 |
|
|
| ||
|
|
|
|
|
Pressing the WIRELESS button
The WIRELESS button is only for
See
Pressing the VIDEO button
VIDEO |
|
|
| |
|
|
| ||
|
|
|
|
|
Pressing the INPUT SELECT button on the projector
COMPUTER2
COMPUTER1
NOTE:
•Only when the COMPUTER2 SELECT is set to INPUT, you can switch between COMPUTER1 and COMPUTER2.
•With no signals from COMPUTER terminals, the computer connecting guidance will be displayed. See “Computer connection guidance” on page 46.
WIRELESS*1
VIDEO
*1. WIRELESS is only for
Basic Operation
NOTE:
•Switched signal may be displayed after a short interval.
•If you select an unplugged input method, the input guidance will blink on and off several times.
•See “List of compatible signals” on page 44.
•See “Connections” on page 17.
Capturing an image
Press the FREEZE button to capture the image | projector will stop. Press the FREEZE button again to |
and you can see it as a still picture. While the | escape and return to the continuing image. |
image is frozen, the audio sound through the |
|
Stopping the projection temporary
You can stop the projection and audio sound | electrical power. Press the AV MUTE button again to |
through the projector temporarily for saving | escape. |
Resetting to the factory default settings
You can reset most of the customized settings |
| |
to the factory defaults by pressing the | NOTE: | |
DEFAULT button of the remote control. Display | • Some menu items are not available to reset by pressing | |
the required sub menu or the menu items and press the | the DEFAULT button. Adjust each menu items | |
DEFAULT button again. | manually. | |
See “Main menu and | • To reset all the settings to the factory defaults, see | |
“INITIALIZE ALL” on page 36. | ||
| ||
|
|
