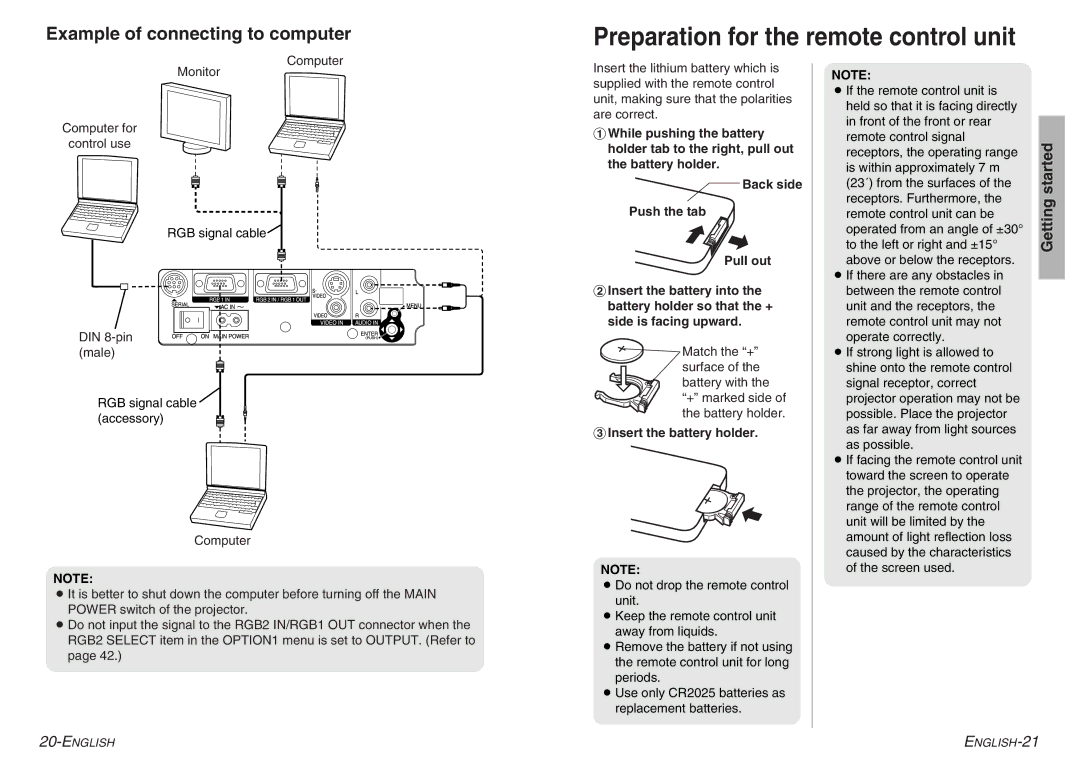
Example of connecting to computer
Preparation for the remote control unit
Computer
Monitor
Computer for
control use
RGB signal cable
DIN
RGB signal cable (accessory)
Computer
NOTE:
BIt is better to shut down the computer before turning off the MAIN POWER switch of the projector.
BDo not input the signal to the RGB2 IN/RGB1 OUT connector when the RGB2 SELECT item in the OPTION1 menu is set to OUTPUT. (Refer to page 42.)
Insert the lithium battery which is supplied with the remote control unit, making sure that the polarities are correct.
#While pushing the battery holder tab to the right, pull out the battery holder.
Back side
Push the tab
Pull out
$Insert the battery into the battery holder so that the + side is facing upward.
Match the “+” surface of the battery with the “+” marked side of the battery holder.
%Insert the battery holder.
NOTE:
BDo not drop the remote control unit.
BKeep the remote control unit away from liquids.
BRemove the battery if not using the remote control unit for long periods.
BUse only CR2025 batteries as replacement batteries.
NOTE:
BIf the remote control unit is held so that it is facing directly in front of the front or rear remote control signal receptors, the operating range is within approximately 7 m (23´) from the surfaces of the receptors. Furthermore, the remote control unit can be operated from an angle of ±30° to the left or right and ±15° above or below the receptors.
BIf there are any obstacles in between the remote control unit and the receptors, the remote control unit may not operate correctly.
BIf strong light is allowed to shine onto the remote control signal receptor, correct projector operation may not be possible. Place the projector as far away from light sources as possible.
BIf facing the remote control unit toward the screen to operate the projector, the operating range of the remote control unit will be limited by the amount of light reflection loss caused by the characteristics of the screen used.
Getting started