Connector panel |
|
|
|
|
# | $ | % | & | ' |
Setting-up
Projection methods
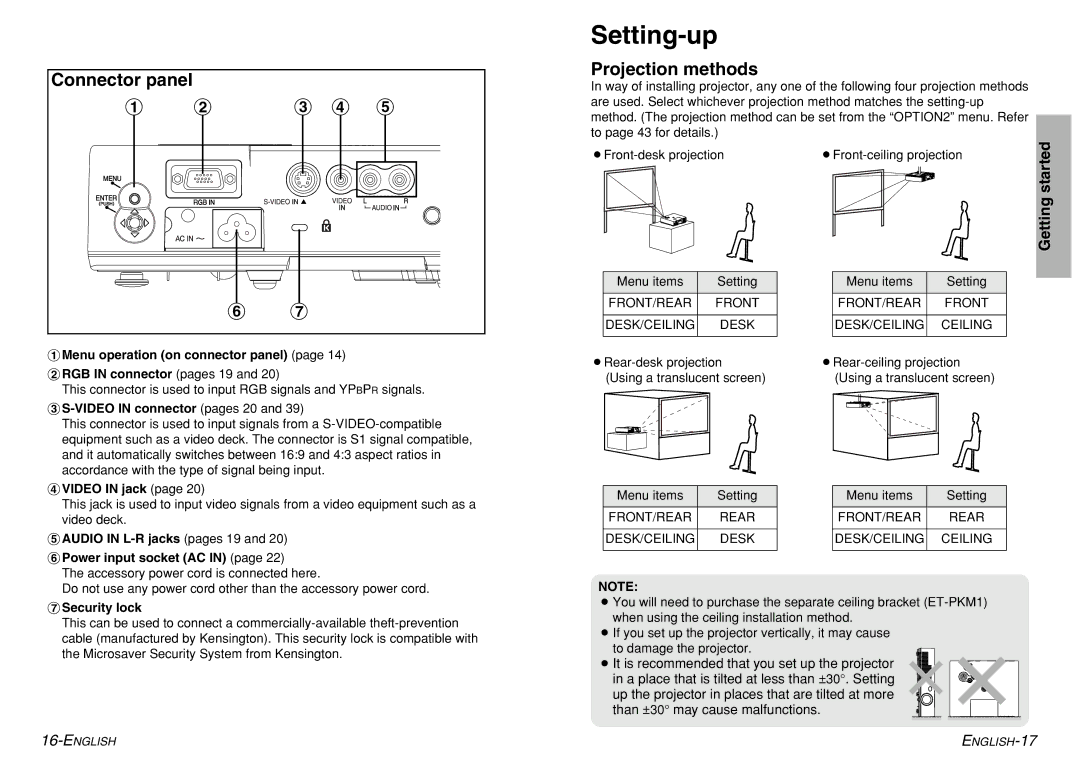
In way of installing projector, any one of the following four projection methods are used. Select whichever projection method matches the
Gettingstarted | |
( ) |
#Menu operation (on connector panel) (page 14)
$RGB IN connector (pages 19 and 20)
This connector is used to input RGB signals and YPBPR signals.
%S-VIDEO IN connector (pages 20 and 39)
This connector is used to input signals from a
Menu items | Setting |
|
|
FRONT/REAR | FRONT |
|
|
DESK/CEILING | DESK |
|
|
Menu items | Setting |
|
|
FRONT/REAR | FRONT |
|
|
DESK/CEILING | CEILING |
|
|
&VIDEO IN jack (page 20)
This jack is used to input video signals from a video equipment such as a video deck.
'AUDIO IN L-R jacks (pages 19 and 20)
(Power input socket (AC IN) (page 22)
The accessory power cord is connected here.
Do not use any power cord other than the accessory power cord.
)Security lock
This can be used to connect a
Menu items | Setting |
| Menu items | Setting |
|
|
|
|
|
FRONT/REAR | REAR |
| FRONT/REAR | REAR |
|
|
|
|
|
DESK/CEILING | DESK |
| DESK/CEILING | CEILING |
|
|
|
|
|
NOTE:
BYou will need to purchase the separate ceiling bracket
BIf you set up the projector vertically, it may cause to damage the projector.
BIt is recommended that you set up the projector in a place that is tilted at less than ±30°. Setting up the projector in places that are tilted at more than ±30° may cause malfunctions.
