11
12
13
14
15
M-CARD Mode Menu Screen
[ Photo Rec Mode Menu Screen ]
![]() 1
1
[ Photo Play Mode Menu Screen ]
![]() 2
2
![]() 3
3
![]() 4
4
![]() 5
5
![]() 6
6
![]() 7
7
MENU OSD
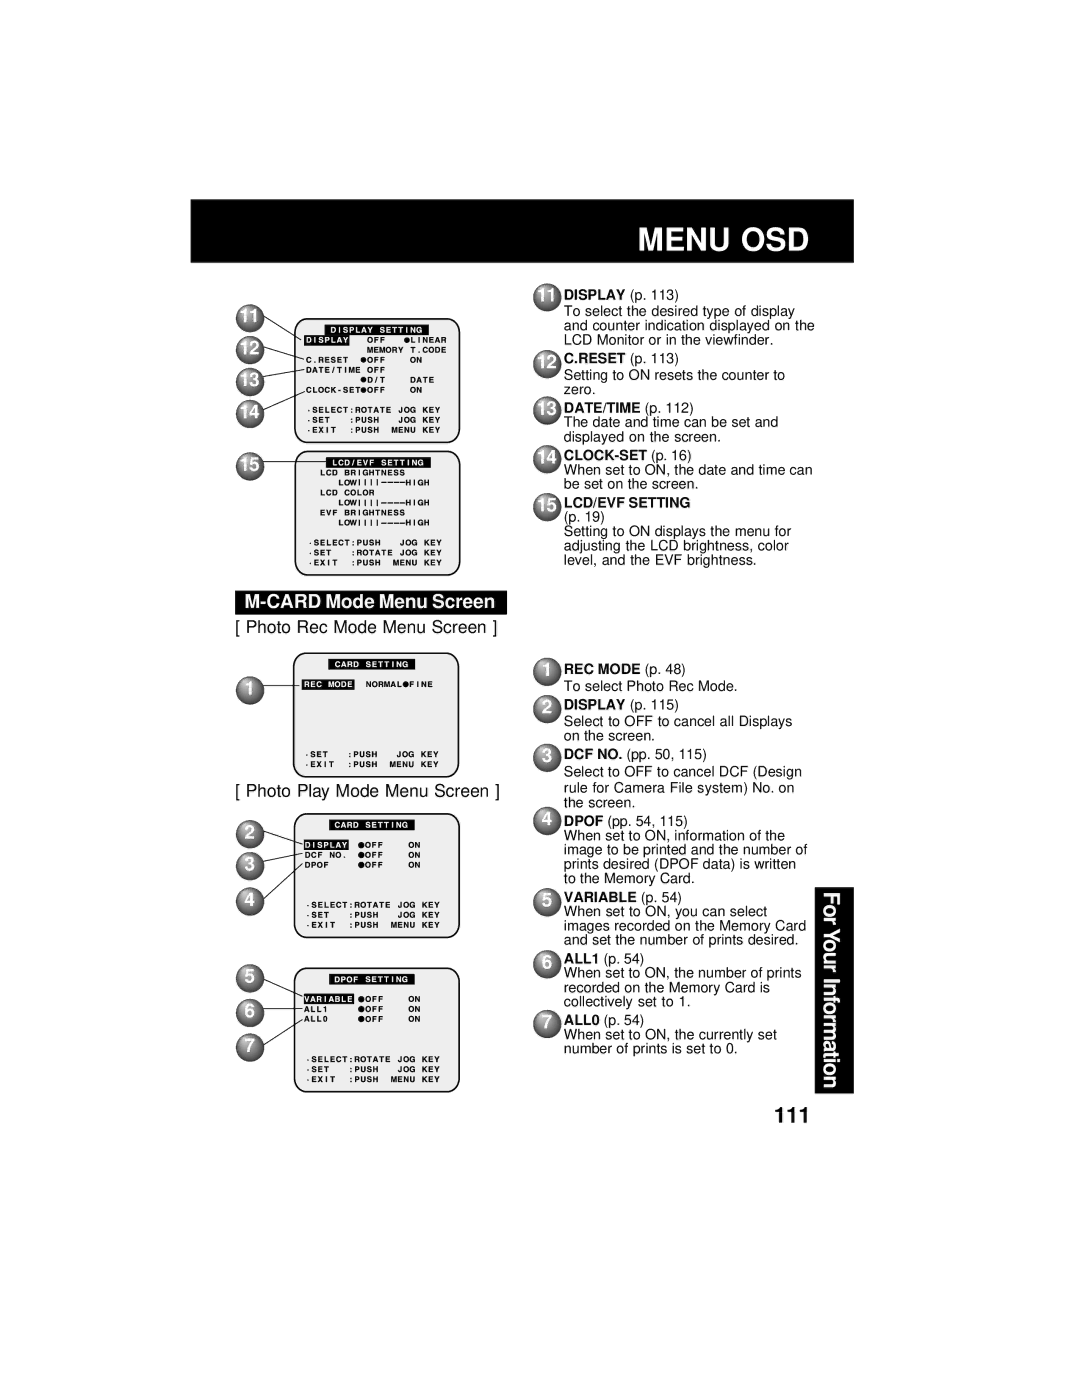
11DISPLAY (p. 113)
To select the desired type of display and counter indication displayed on the LCD Monitor or in the viewfinder.
12C.RESET (p. 113)
Setting to ON resets the counter to zero.
13DATE/TIME (p. 112)
The date and time can be set and displayed on the screen.
14
When set to ON, the date and time can be set on the screen.
15LCD/EVF SETTING (p. 19)
Setting to ON displays the menu for adjusting the LCD brightness, color level, and the EVF brightness.
1REC MODE (p. 48)
To select Photo Rec Mode.
 2 DISPLAY (p. 115)
Select to OFF to cancel all Displays on the screen.
![]() 3 DCF NO. (pp. 50, 115)
3 DCF NO. (pp. 50, 115)
Select to OFF to cancel DCF (Design rule for Camera File system) No. on the screen.
4DPOF (pp. 54, 115)
When set to ON, information of the image to be printed and the number of prints desired (DPOF data) is written to the Memory Card.
5 | VARIABLE (p. 54) | For |
| When set to ON, you can select |
|
6 | images recorded on the Memory Card | Your |
ALL1 (p. 54) | ||
| and set the number of prints desired. |
|
| When set to ON, the number of prints | Information |
| recorded on the Memory Card is | |
| collectively set to 1. |
|
7 | ALL0 (p. 54) |
|
| When set to ON, the currently set |
|
number of prints is set to 0.
111
