Before Use
Using the Remote Control (Optional)
Remote Control is not supplied, If you would like to order, the parts number is LSSQ0411 as a replacement parts. Please refer to page 68.
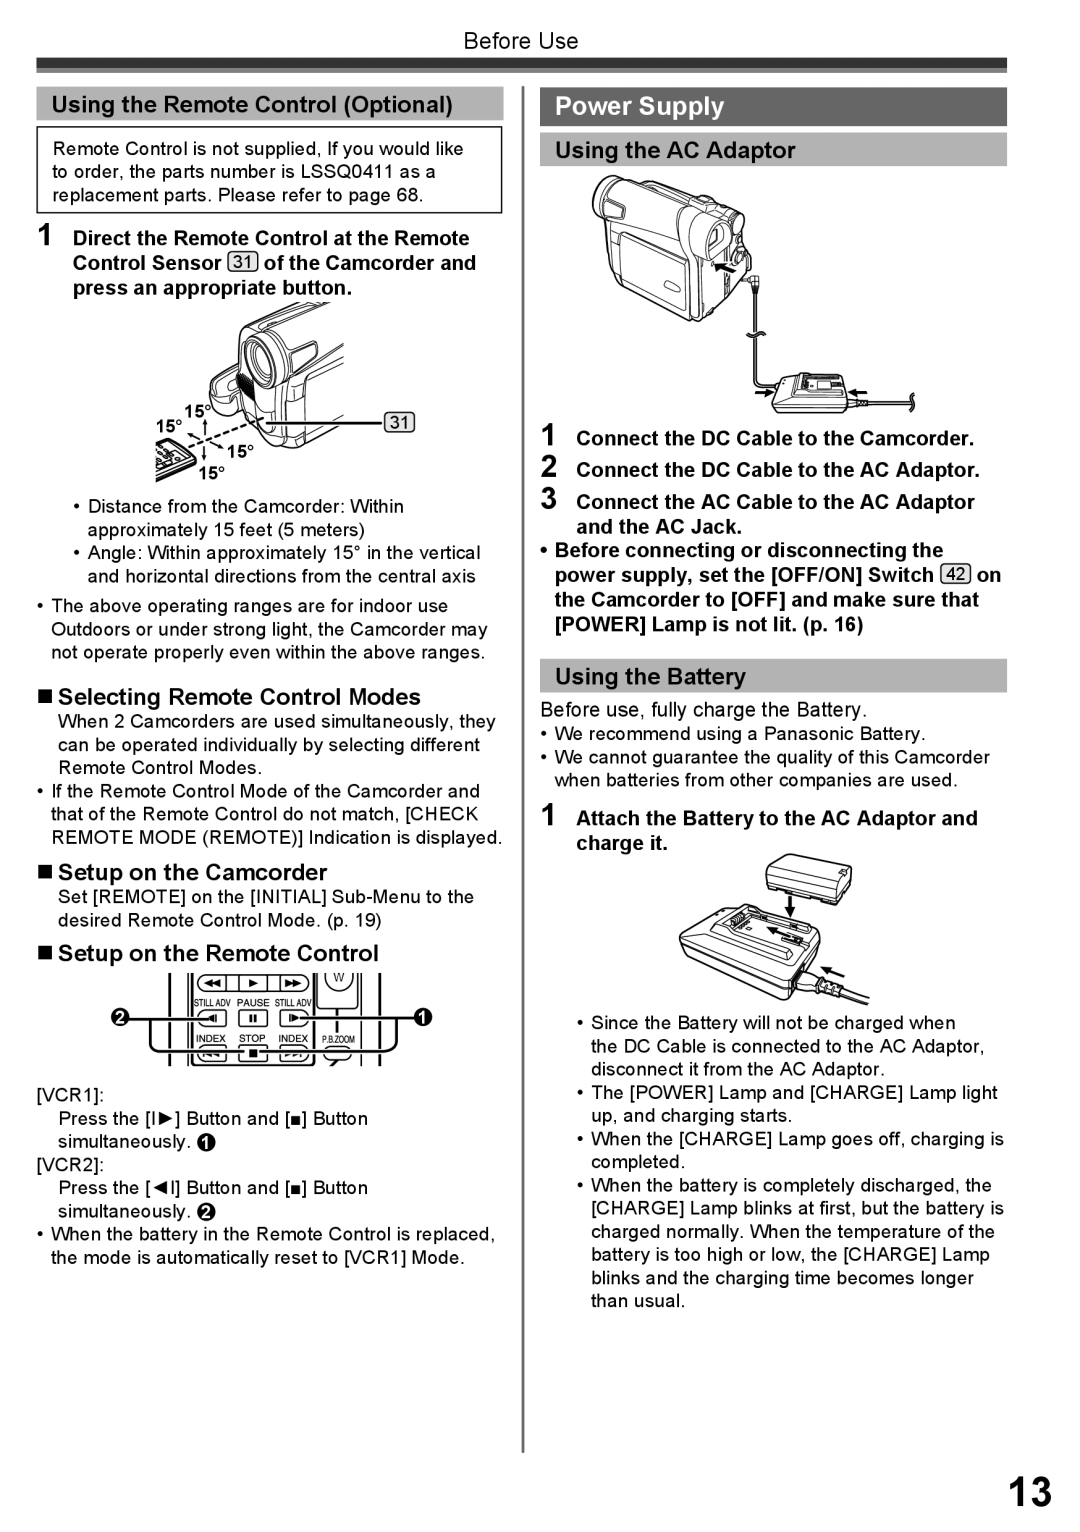
1 Direct the Remote Control at the Remote Control Sensor 31 of the Camcorder and press an appropriate button.
15°15°31
![]() 15° 15°
15° 15°
•Distance from the Camcorder: Within approximately 15 feet (5 meters)
•Angle: Within approximately 15° in the vertical and horizontal directions from the central axis
•The above operating ranges are for indoor use Outdoors or under strong light, the Camcorder may not operate properly even within the above ranges.
Selecting Remote Control Modes
When 2 Camcorders are used simultaneously, they can be operated individually by selecting different Remote Control Modes.
•If the Remote Control Mode of the Camcorder and that of the Remote Control do not match, [CHECK REMOTE MODE (REMOTE)] Indication is displayed.
Setup on the Camcorder
Set [REMOTE] on the [INITIAL]
Setup on the Remote Control
2 | 1 |
[VCR1]:
Press the [Ι►] Button and [■] Button simultaneously. 1
[VCR2]:
Press the [◄Ι] Button and [■] Button simultaneously. 2
•When the battery in the Remote Control is replaced, the mode is automatically reset to [VCR1] Mode.
Power Supply
Using the AC Adaptor
1 Connect the DC Cable to the Camcorder.
2 Connect the DC Cable to the AC Adaptor.
3 Connect the AC Cable to the AC Adaptor and the AC Jack.
•Before connecting or disconnecting the power supply, set the [OFF/ON] Switch 42 on the Camcorder to [OFF] and make sure that [POWER] Lamp is not lit. (p. 16)
Using the Battery
Before use, fully charge the Battery.
•We recommend using a Panasonic Battery.
•We cannot guarantee the quality of this Camcorder when batteries from other companies are used.
1 Attach the Battery to the AC Adaptor and charge it.
•Since the Battery will not be charged when the DC Cable is connected to the AC Adaptor, disconnect it from the AC Adaptor.
•The [POWER] Lamp and [CHARGE] Lamp light up, and charging starts.
•When the [CHARGE] Lamp goes off, charging is completed.
•When the battery is completely discharged, the [CHARGE] Lamp blinks at first, but the battery is charged normally. When the temperature of the battery is too high or low, the [CHARGE] Lamp blinks and the charging time becomes longer than usual.
13