Recording operations
16 |
A | Side A |
Tab for side B | Tab for side A |
To
Normal tape
B
1
3
C
STOP
3
3 ![]() REC
REC![]()
![]()
![]()
REC
D
STOP ![]()
VOL |
|
| VOL |
|
FM MODE TUNE MODE REW | FF |
| ||
SOUND | PRESET | BASS | TREBLE | FM MODE |
VIRTUALIZER | EQ | |||
MUTING |
| DISPLAY | DIMMER |
|
REC
MHz
TUNED
ST
Before recording
Types of tapes which can be recorded correctly
Use normal position tapes.
High position and metal position tapes can be used, but the unit will not be able to record or erase them correctly.
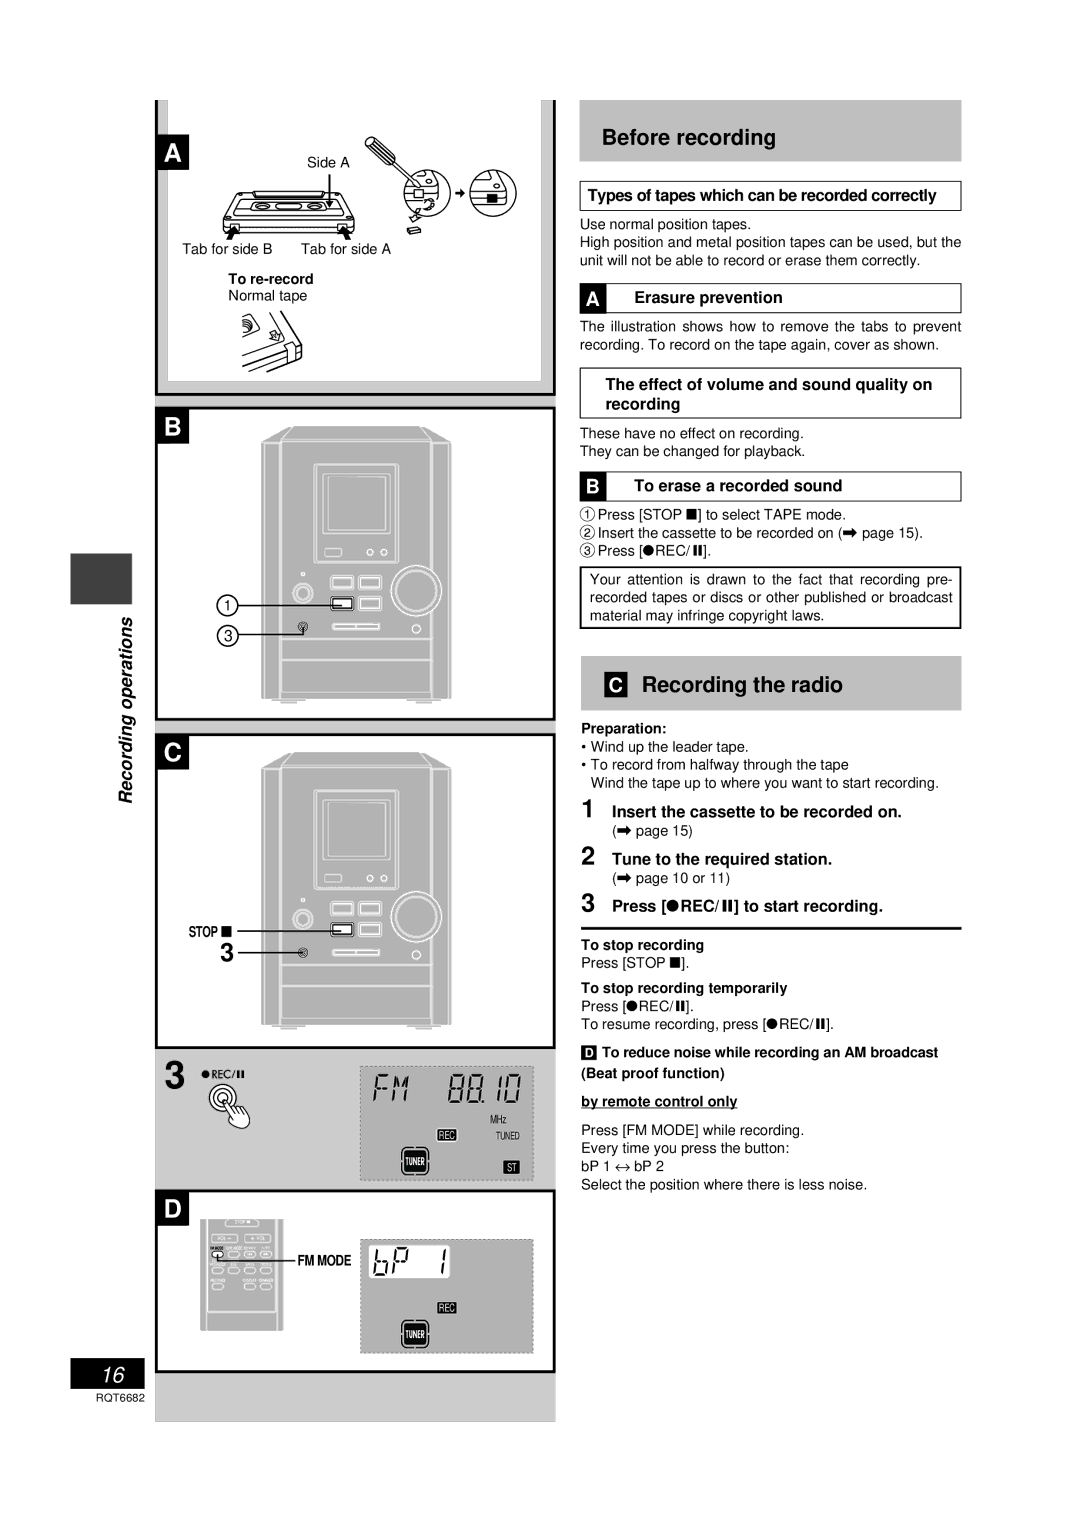
AErasure prevention
The illustration shows how to remove the tabs to prevent recording. To record on the tape again, cover as shown.
The effect of volume and sound quality on recording
These have no effect on recording.
They can be changed for playback.
BTo erase a recorded sound
1Press [STOP L] to select TAPE mode.
2Insert the cassette to be recorded on (\ page 15).
3Press [[REC/ J].
Your attention is drawn to the fact that recording pre- recorded tapes or discs or other published or broadcast material may infringe copyright laws.
CRecording the radio
Preparation:
•Wind up the leader tape.
•To record from halfway through the tape
Wind the tape up to where you want to start recording.
1 Insert the cassette to be recorded on.
(\ page 15)
2 Tune to the required station.
(\ page 10 or 11)
3 Press [[REC/ J] to start recording.
To stop recording
Press [STOP L].
To stop recording temporarily
Press [[REC/ J].
To resume recording, press [[REC/ J].
DTo reduce noise while recording an AM broadcast (Beat proof function)
by remote control only
Press [FM MODE] while recording.
Every time you press the button: bP 1 ↔ bP 2
Select the position where there is less noise.
RQT6682
