STEP 4
|
| • Turn off all components before making any connections. |
|
| • Peripheral equipment and cables sold separately |
Auto speaker setup | unless otherwise indicated. | |
• To connect equipment, refer to the appropriate | ||
|
| operating instructions. |
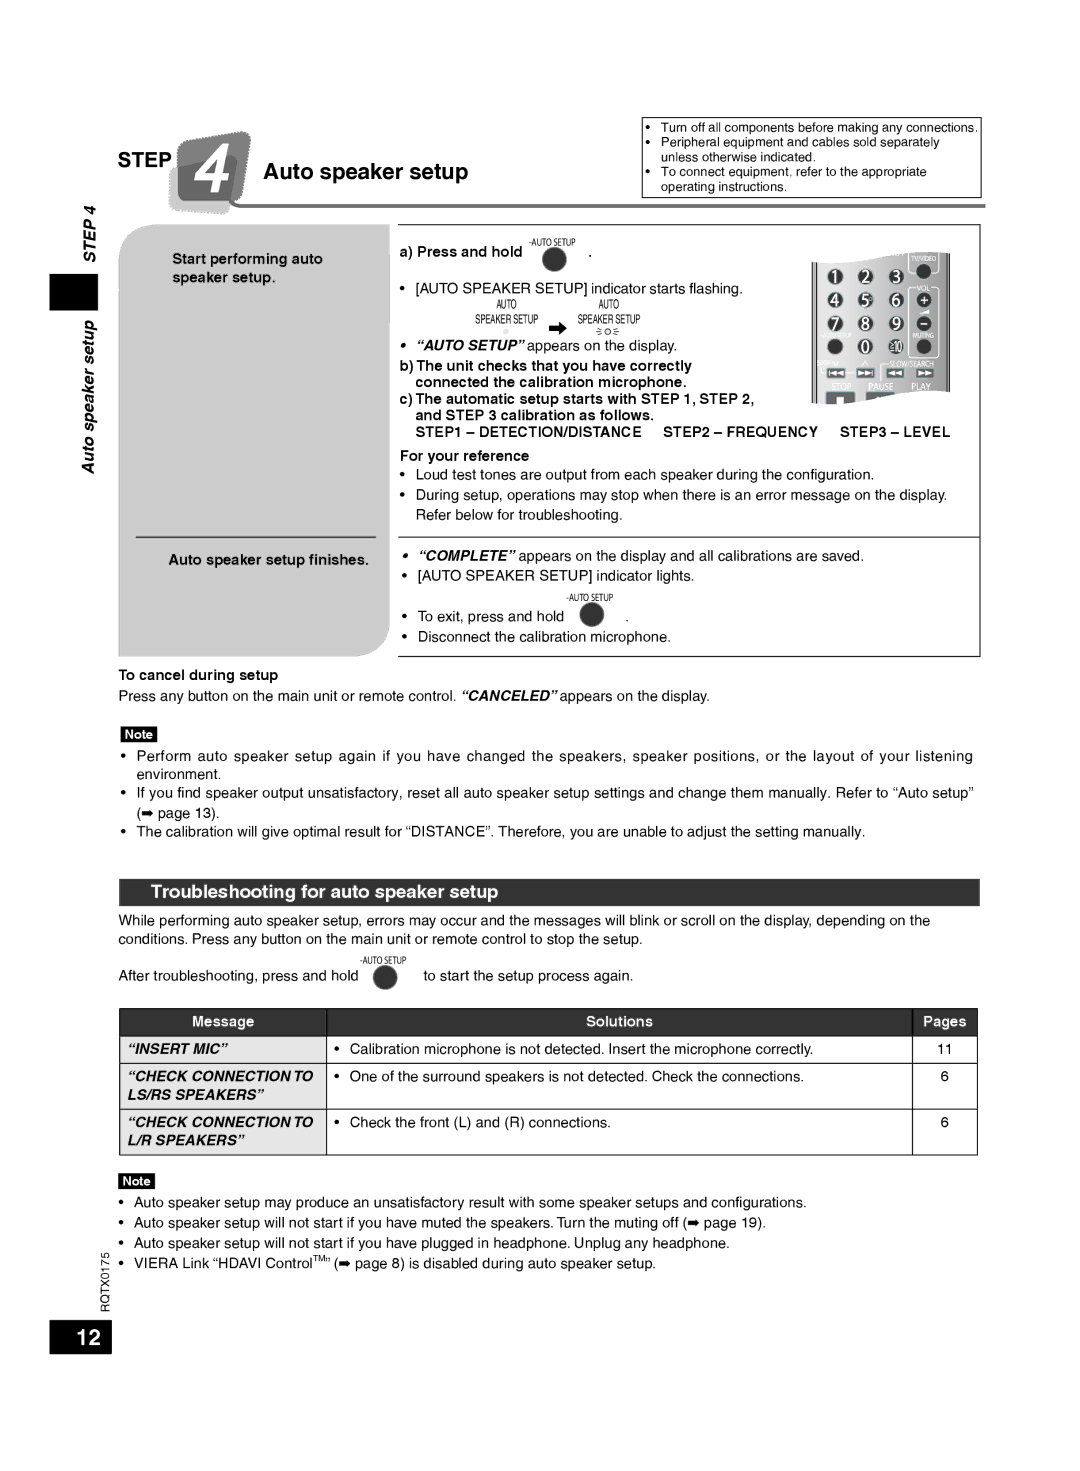
Start performing auto | a) Press and hold | |
|
| |
speaker setup. | • [AUTO SPEAKER SETUP] indicator starts flashing. | |
| ||
| AUTO | AUTO |
| SPEAKER SETUP | SPEAKER SETUP |
Auto speaker setup
Auto speaker setup finishes.
To cancel during setup
• “AUTO SETUP” appears on the display.
b) The unit checks that you have correctly connected the calibration microphone.
c) The automatic setup starts with STEP 1, STEP 2, and STEP 3 calibration as follows.
STEP1 – DETECTION/DISTANCE STEP2 – FREQUENCY STEP3 – LEVEL
For your reference
•Loud test tones are output from each speaker during the configuration.
•During setup, operations may stop when there is an error message on the display. Refer below for troubleshooting.
•“COMPLETE” appears on the display and all calibrations are saved.
•[AUTO SPEAKER SETUP] indicator lights.
|
| |
• | To exit, press and hold | . |
• | Disconnect the calibration microphone. | |
Press any button on the main unit or remote control. “CANCELED” appears on the display.
Note
•Perform auto speaker setup again if you have changed the speakers, speaker positions, or the layout of your listening environment.
•If you find speaker output unsatisfactory, reset all auto speaker setup settings and change them manually. Refer to “Auto setup” (➡ page 13).
•The calibration will give optimal result for “DISTANCE”. Therefore, you are unable to adjust the setting manually.
Troubleshooting for auto speaker setup
While performing auto speaker setup, errors may occur and the messages will blink or scroll on the display, depending on the conditions. Press any button on the main unit or remote control to stop the setup.
|
|
| ||
| After troubleshooting, press and hold | to start the setup process again. | ||
| Message |
| Solutions | |
|
| |||
| “INSERT MIC” | • Calibration microphone is not detected. Insert the microphone correctly. | ||
| “CHECK CONNECTION TO | • One of the surround speakers is not detected. Check the connections. | ||
| LS/RS SPEAKERS” |
|
| |
| “CHECK CONNECTION TO | • Check the front (L) and (R) connections. | ||
| L/R SPEAKERS” |
|
| |
| Note |
|
| |
|
|
| ||
| • Auto speaker setup may produce an unsatisfactory result with some speaker setups and configurations. | |||
| • Auto speaker setup will not start if you have muted the speakers. Turn the muting off (➡ page 19). | |||
RQTX0175 | • Auto speaker setup will not start if you have plugged in headphone. Unplug any headphone. | |||
• VIERA Link “HDAVI ControlTM” (➡ page 8) is disabled during auto speaker setup. | ||||
| ||||
Pages
11
6
6
12